This post introduces three practical ways to add angel wings to photos on PC, using Fotor, AI Ease, and OpenArt. Easily transform your original images into more eye-catching visuals.
Adding angel wings to pictures is a fun way to make your images more eye-catching. Whether you are looking to create a high-quality social media post or promotional marketing visual to attract more viewers, several powerful photo editing platforms can help you add angel wings to photos in seconds. The following are three excellent options.
How to Add Angel Wings to Photos Using Fotor
Fotor is a versatile online photo editor that is suitable for both beginners and experienced users. With a suite of editing tools, Fotor not only supports basic adjustments such as brightness and contrast but also provides advanced editing features like portrait retouching.
For adding angel wings to photos, Fotor offers a wide selection of wing stickers to use. You can customize the sticker’s position and size to tailor it to your image. What’s more, to make your image with wing stickers look natural and harmonious, Fotor allows you to change the wings’ color to fit the image’s background or clothing.
How to add angel wings to photos with Fotor? Follow the guide below.
Step 1: Access Fotor’s Photo Editor
Navigate to the official website of Fotor’s adding wing stickers tool (https://www.fotor.com/photo-editor-app/editor/sticker) in your browser.
Step 2: Import Your Image
Click Upload Image to import your photo.
Step 3: Add Angel Wings to Photo
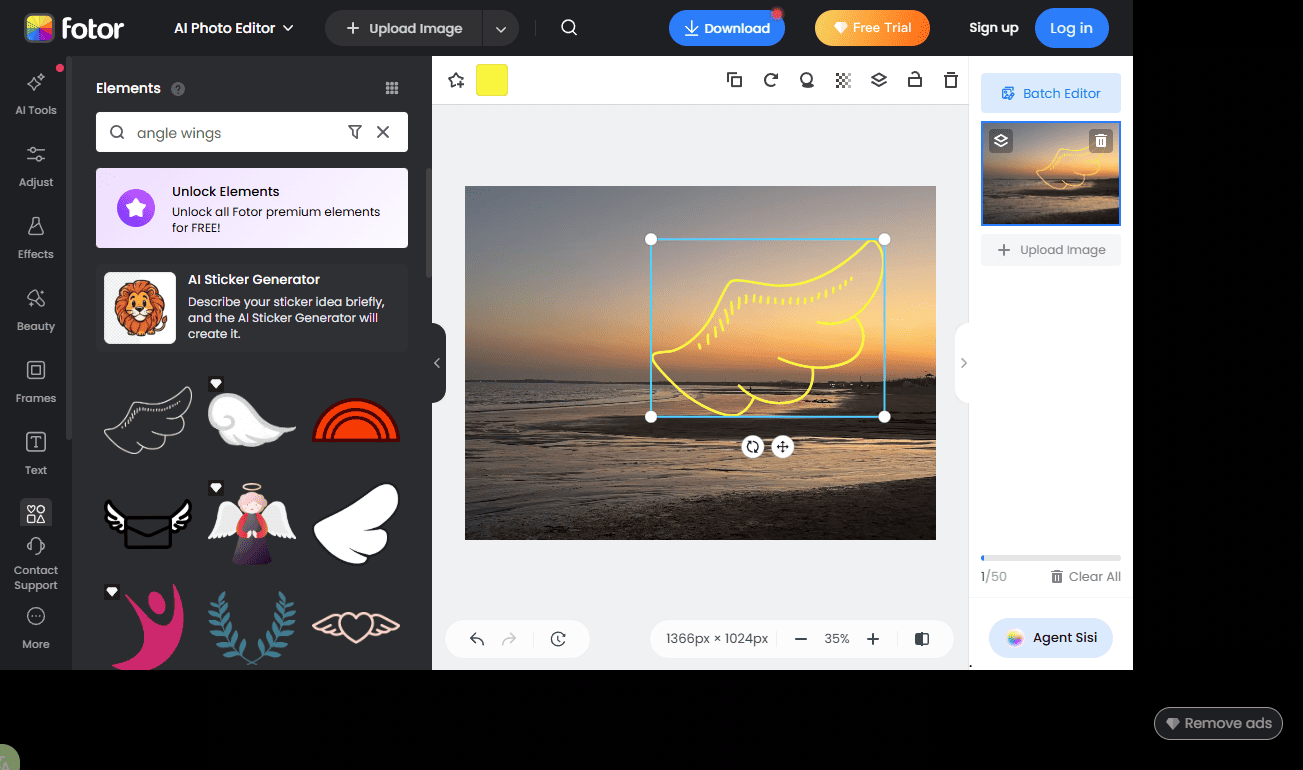
Click Elements on the sidebar and search for angel wings in the search bar. Click your desired angel wing sticker to add it to the canvas, or directly drag and drop it to the canvas. Then, you can drag the sticker on the canvas to adjust its position and customize its size by dragging the corners of the bounding box. Click the Color icon and change its color to match your photo.
Step 4: Save the Image with Angel Wings
Click the Download icon at the top of the menu and select the proper format to save the photo to your computer.
How to Add Angel Wings to Photos Using AI Ease
AI Ease is a fast and smart AI photo editor and image generator. It enables users to enhance photo quality, remove unwanted objects from photos, and generate images from text. With the help of artificial intelligence, AI Ease simplifies complex editing tasks while resulting in professional-level visuals, making it an ideal choice for beginners.
Here are the detailed steps for adding angel wings to photos using AI Ease.
Step 1: Open AI Ease’s AI Replace Tool
Visit the official website of AI Ease’s AI object replacer tool (https://www.aiease.ai/app/ai-object-replacer/) to add angel wings to photos in your browser.
Step 2: Import Your Image
Click Upload Image to import your image.
Step 3: Add Angel Wings to Photo
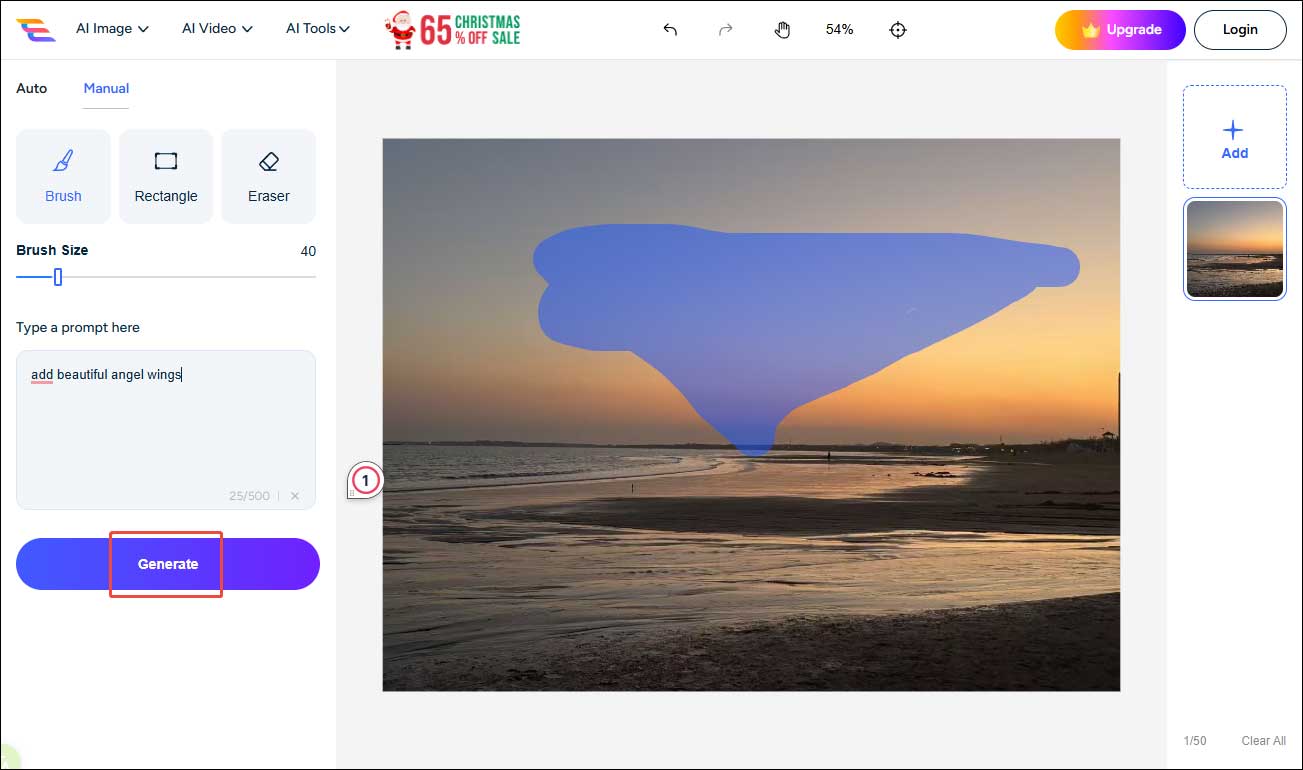
Draw on the area you want to replace in the canvas. You can click the Eraser icon to adjust the drawing area. Next, enter prompts like add beautiful angel wings and select Generate. It will take a few seconds to generate a new version.
Step 4: Save the Final Image
If you are satisfied with the results, click Download All to save the images to your computer. If you want a more polished image, click Generate more to find more options available.

How to Add Angel Wings to Photos Using OpenArt
OpenArt is another perfect choice for adding angel wings to photos. Using advanced algorithms, OpenArt allows users to create and edit images effortlessly. Thanks to its intelligence and flexibility, users can turn text prompts or transform original images into visually striking results in just a few clicks.
Follow the instructions below to add angel wings to photos with OpenArt.
Step 1: Go to OpenArt’s Image Editor
Access OpenArt’s AI replace tool (https://openart.ai/features/add-angel-wings-to-photo) in your browser.
Step 2: Import Your Image
Click Drop files here to upload your photo.
Step 3: Add Angel Wings to Image
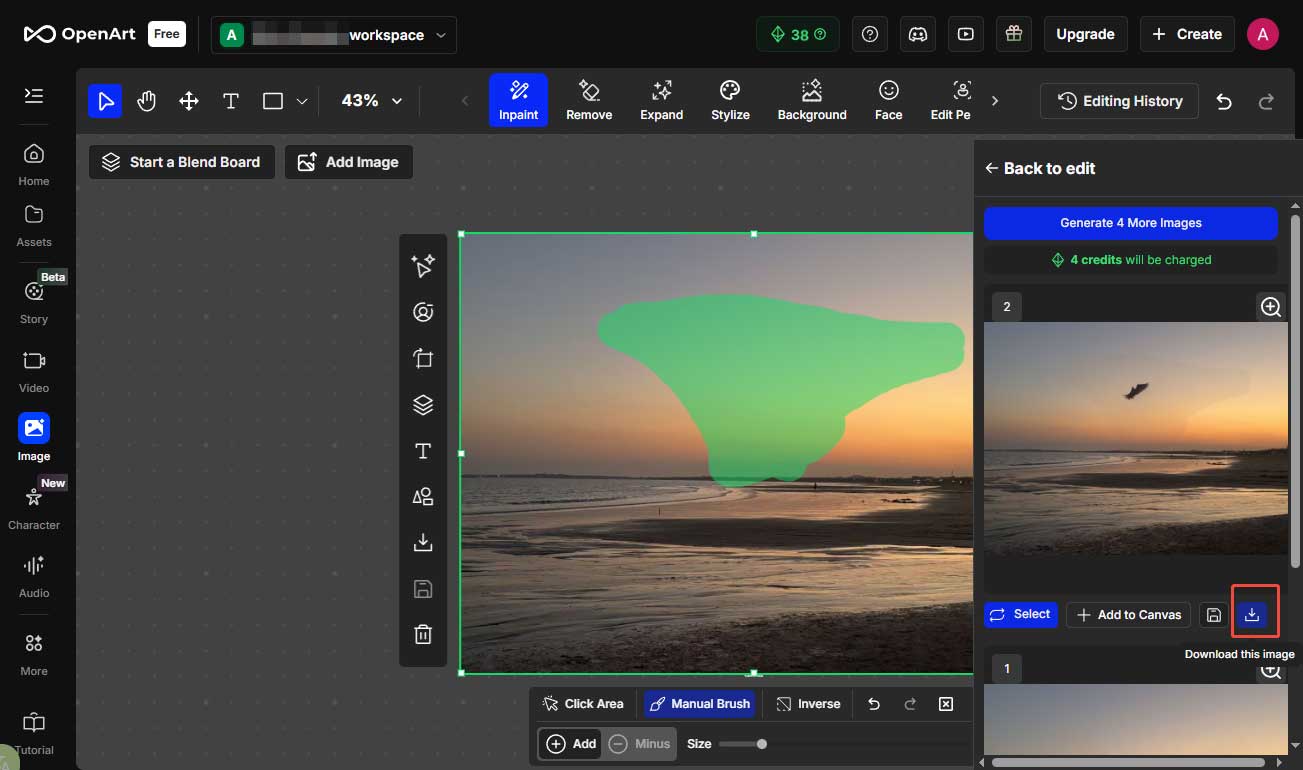
Select an area on your image by drawing. Next, enter the prompt in the right panel. Besides, you can choose a proper model and customize the number of generated images. Then, click Create. The platform will generate the image with angel wings in minutes..

Step 4: Save the Final Image
You can see the results in the right panel. If the image doesn’t meet your expectations, you can change the prompt in the editing panel and generate more images to select. Then, click the Download icon to save the image to your computer.
Conclusion
This post recommends three robust image editors to help you add angel wings to photos online with ease. Select the one that fits your preference and give it a try.
About The Author

Position: Columnist
Alice is a tech writer at MiniTool, specializing in tutorials and guides on video editing and screen recording. She stays up to date with the latest tools and techniques to ensure her content is accurate and easy to follow. By combining hands-on testing with continuous learning, Alice aims to help readers solve tech problems efficiently.
User Comments :