Perhaps you want to add a person to a group photo, or you want to add a person to a beautiful landscape photo. This seems like a difficult task, but with the right tools, it is much easier than you think. This guide will show you how to add a person to a photo both with and without Photoshop.
MiniTool MovieMakerClick to Download100%Clean & Safe
How to Add a Person to a Photo in Photoshop
Photoshop is one of the most powerful and widely used tools for photo editing. It offers a wide range of tools for retouching, color correction, and creative effects, making it an industry-standard in visual content creation. Here’s how to add a person to a photo in Photoshop:
Step 1: Open the Photo
Launch Photoshop and open the photo to which you want to add a person. Go to File > Open and select your image.
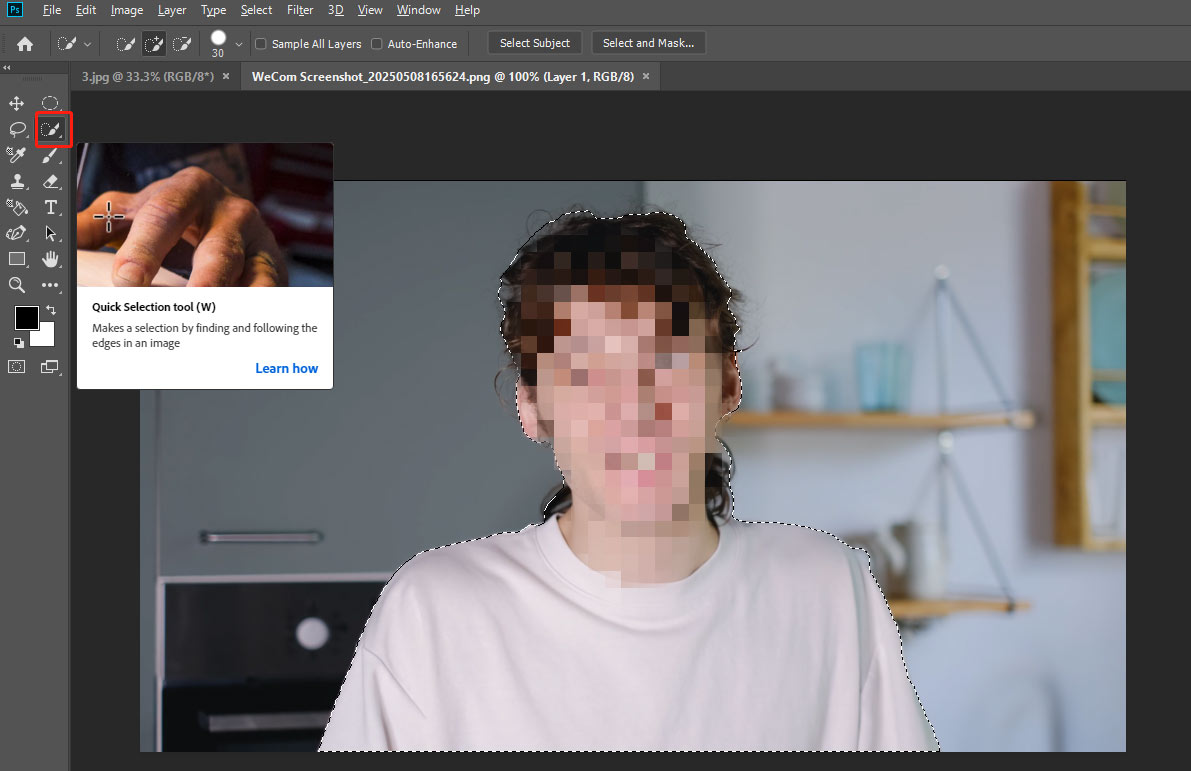
Step 2: Select the Person to Add
Next, open the photo that contains the person you want to add to the original image. Use the Quick Selection Tool or Lasso Tool to carefully select the person in the second photo. Zoom in to make sure you select the edges accurately. Once selected, hit Ctrl + C to copy the selection.
Step 3: Paste the Person into the New Photo
Return to the original photo and paste the copied person into it by pressing Ctrl + V. The person will appear as a new layer.
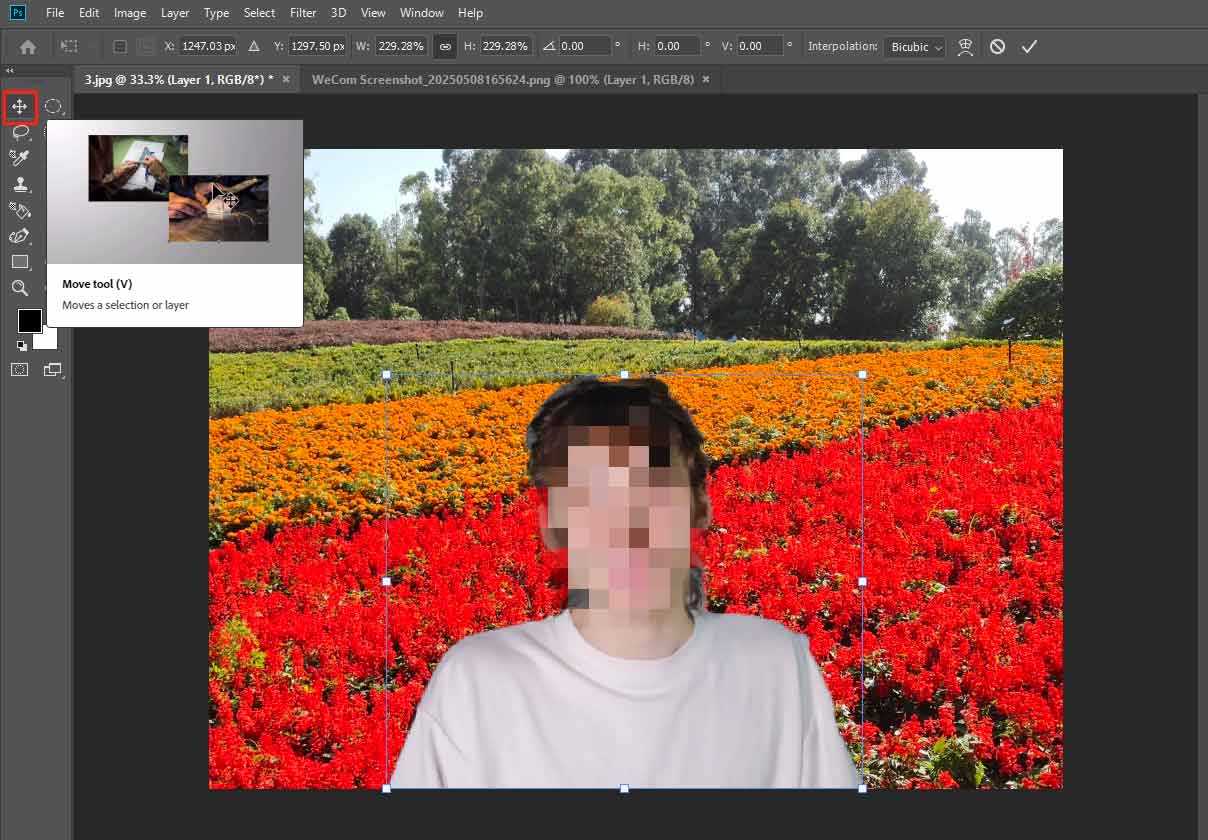
Step 4: Position and Resize
Use the Move Tool to position the person correctly in the new photo. You may need to resize the person to fit the scene. To do this, press Ctrl + T to bring up the transform handles and drag to resize.
Step 5: Final Touches
Once satisfied, save the image by going to File > Save As and choosing the desired file format.
How to Add a Person to a Photo without Photoshop
How to add a person to a photo without Photoshop? Or how to add a person to photo online free? Here I recommend Fotor. It is an online photo editor that is user-friendly and accessible to beginners. Here’s how to add a person to a photo using Fotor:
Step 1: Go to Fotor’s website and sign in (or use it as a guest).
Step 2: Click Upload Image to import the person’s photo to the workspace.
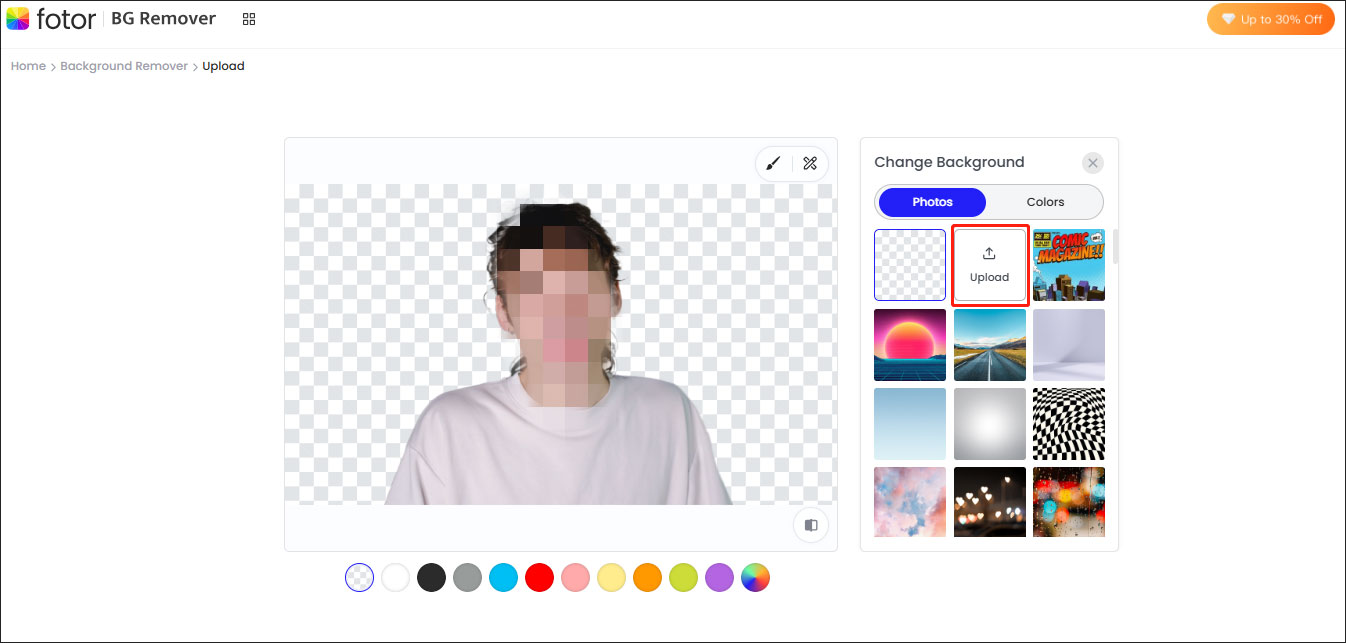
Step 3: After uploading your image with people, the background will be removed automatically.
Step 4: Click Change Background to add a new background for the people. You can use the preset background in this tool. Alternatively, you can also click on Upload to import your own image as background.
Step 5: After adding the background, click on the person, and then you can resize and position the person correctly in the photo.
Step 6: Once everything looks perfect, click the download icon to save your image.
Bottom Line
Adding a person to a photo doesn’t need to be complicated. Photoshop offers the most control and precision, and online tools like Fotor provide excellent alternatives that are easier to use and more accessible for beginners. Whether you’re creating a memory with friends, enhancing a photo for social media, or doing it for professional purposes, these tools can help you achieve great results. Try these methods today to add a person to a photo!
About The Author

Position: Columnist
Yulia has a great passion for life. She enjoys photography and travel, and is always eager to record cherished moment through her lens. This also led to her strong interest in video editing, and she kept learning multimedia-related knowledge, hoping to bring readers better advice on images, audio, video, and related topics.
User Comments :