Now, follow the methods to learn how to transfer Google Photos to iPhone or iCloud for saving Google Photos storage space.
Turning photos into a slideshow video is also a useful method to back up your files. For Mac users, iMovie is highly recommended. For Windows users, they can use the free slideshow maker – MiniTool MovieMaker.
MiniTool MovieMakerClick to Download100%Clean & Safe
How to Transfer Photos from Google Photos to iPhone Gallery
Download a Single Photo from Google Photos to iPhone
Step 1. Launch the Google Photos app.
Step 2. Open the picture you want to save and click the three dots located in the upper right corner.
Step 3. Then tap the Save to device option and this picture will be saved to the iPhone’s Photos app.
Download Multiple Photos from Google Photos to iPhone
Step 1. Open the Google Photos app.
Step 2. Browse photos and find the photos you’d like to download to your iPhone.
Step 3. Long press on a photo to select it and select the photos you want to save.
Step 4. Click the Share button at the top of your screen and choose Save to device.
Also read: Top 8 Photo Transfer Apps for iPhone and Android
How to Transfer All Google Photos to iCloud
If you want to transfer Google Photos to iCloud, you can download the Photos to your computer and upload the downloaded photos to iCloud.
Step 1. Download All Photos from Google Photos
To download all Google Photos at once, the best way is using Google’s Takeout service.
Here’s how:
1. Make sure that you log into your Google account. Then go to the Google Takeout page: https://takeout.google.com/.
2. Click Deselect all and scroll down until you find Google Photos.
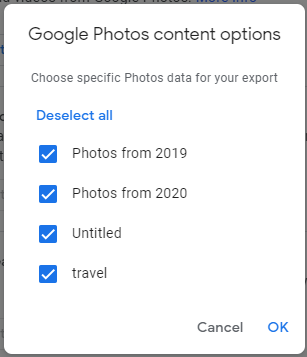
3. Check the Google Photos box. If you want to export specific photos data, click All photo albums included to select the photo album that you want to download. Click the Next step button.

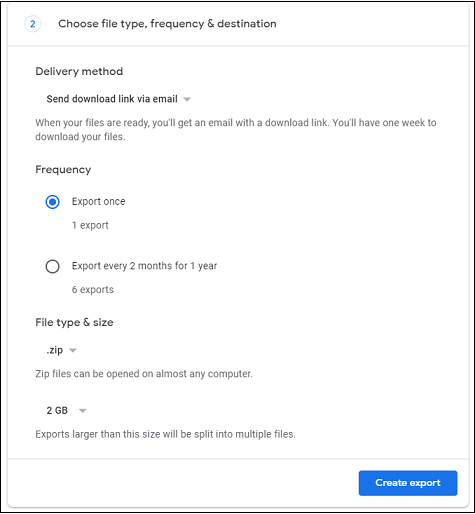
4. Then select the file type and size you like and click the Create export button.

5. When the progress is finished, Google will send the download link to you via email. After receiving the download link, click it to download your photos to the computer.
Step 2. Upload the Downloaded Photos to iCloud
After downloading all the photos from Google Photos, let’s see how to upload the downloaded photos to iCloud.
On Mac
- Open the Photos app.
- Drag the downloaded photos into the app.
- Click on Photos, go to the Preferences > iCloud.
- Then check the iCloud Photos
On Windows
- Download and install iCloud for Windows.
- Open File Explorer and click iCloud Photos in the left pane.
- Then select all the photos downloaded from Google Photos and drag them into the iCloud Photos folder.
Conclusion
If you are running out of your Google Photos storage space, transfer your Google photos to iPhone or iCloud.


User Comments :