One of the most basic tasks in video post-production is to stabilize your shaky footage. How to do that? Let’s get started to learn how to stabilize video in Premiere. If there is no enough space to install Premiere, you might need an online video stabilizer to help you out.
How to Stabilize Video in Premiere
Step 1. Launch Adobe Premiere Pro CC on your PC, and create a new sequence by placing the raw footage on the timeline.
Step 2. Select the clip that you want to stabilize.
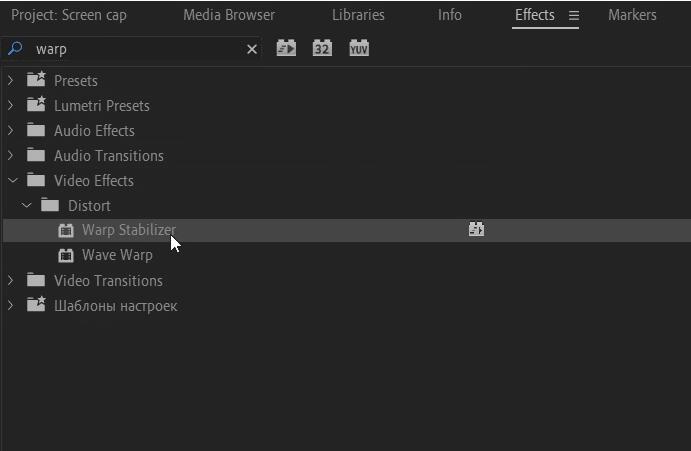
Step 3. In the Effects panel, navigate to Distort > Warp Stabilizer, or simply search for Warp Stabilizer in the search box.
Step 4. Double-click it or simply drag it onto the clip on the timeline and then you will see a blue Analyzing in background message on your footage. You can keep editing while this happens in the background.
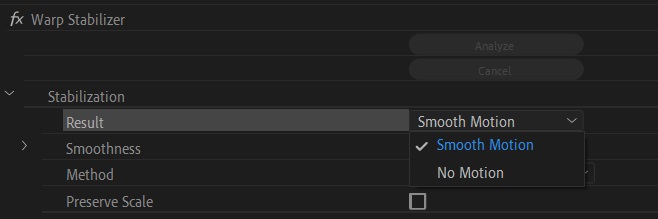
Step 5. Adjust the Smoothness parameter to tweak the overall amount of stabilization under the Warp Stabilizer option.
Step 6. If you want to create a still camera effect, select Stabilization > Result > No Motion. If you just want to eliminate the shakiness but keep the camera movement, select Smooth Motion.
Step 7. Click the Analyze button to see the results.
Step 8. Your video clip has now gone from shaky to stabilize.
Related article: How to Crop a Video in Premiere
How to Stabilize Video Online
Now, let’s have a look at how to stabilize video with free online video stabilizers.
1. Video Stabilize
In addition to video stabilization, if you need other video-editing functions, then Video Stabilize should be your best choice. It is an online platform that supports all common file formats, so you don’t need to change the video file format before starting the video stabilization process.
- Visit the Video Stabilize site on your web browser.
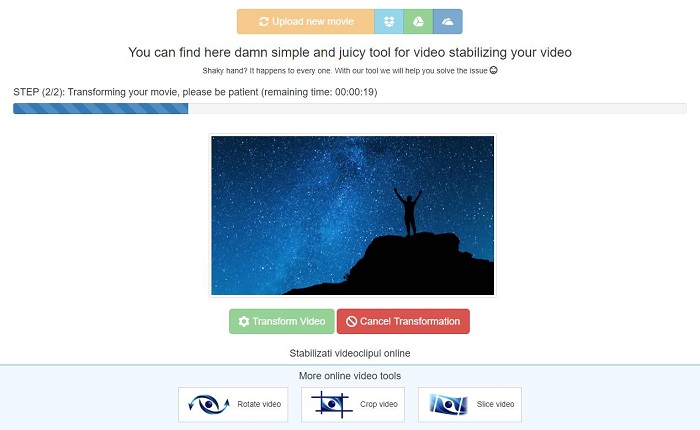
- Drag and drop the video file to the designated box. Alternatively, you can click the Upload your movie button to select the certain video clip from your local computer or upload the video clip using Dropbox, OneDrive or Google Drive.
- Once your video is uploaded, simply click the Transform Video button to start the process of stabilizing your video.
- Click the Download Result button after the platform finishes stabilizing your video.
Recommend post: 6 Must-Try Online Video Quality Enhancers
2. EZGIF Online Video Stabilizer
EZGIF is a simple online toolset for basic image/video/GIF editing. Its Video Stabilizer tool is one of the fastest ways to stabilize video clips. Let’s check the steps of using EZGIF’s online video stabilizer to stabilize video.
- Go to ezgif.com on your device and select its Video Stabilizer option.
- Upload the video you’d like to stabilize from the hard drive on your computer or paste the video’s URL if the clip you want to stabilize is stored online.
- Hit the Upload Video button to start uploading.
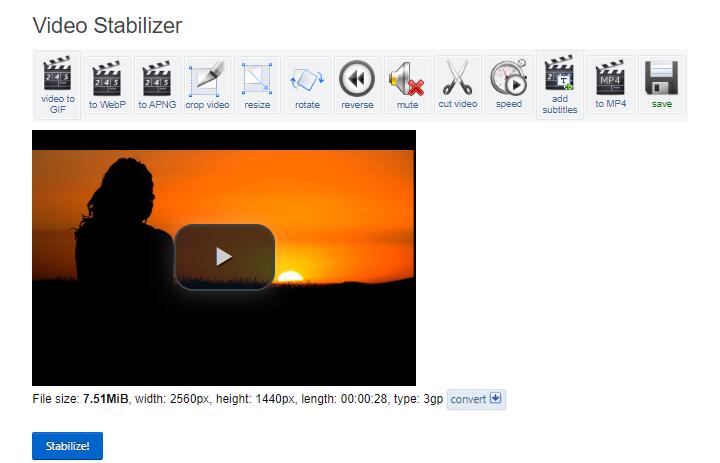
- To initiate the video stabilization process, click the Stabilize button.
- Once the task is finished, you can crop, rotate, and reverse the video clip, or simply click the Save icon below the video to download the video.

Bottom Line
Have you mastered how to stabilize video in Premiere or using the online video stabilizers after reading this post? If you have any questions or suggestions about it, please let us know via [email protected] or share them in the comments section below.
User Comments :