The split-screen function lets you work on multiple screens simultaneously which greatly your productivity. To improve the multitasking experience, Microsoft added a new feature called Snap Layouts to Windows 11. It provides six different layouts to help you arrange applications on your screen.
Before splitting screen in Windows 11, let’s see how to enable the Snap window feature (With the split-screen function, you can watch movies while editing videos or making GIFs using MiniTool MovieMaker).

How to Enable Snap windows
Here’s how to enable the Snap windows feature on Windows 11.
Step 1. Press Windows + I to open the Settings app on your computer.
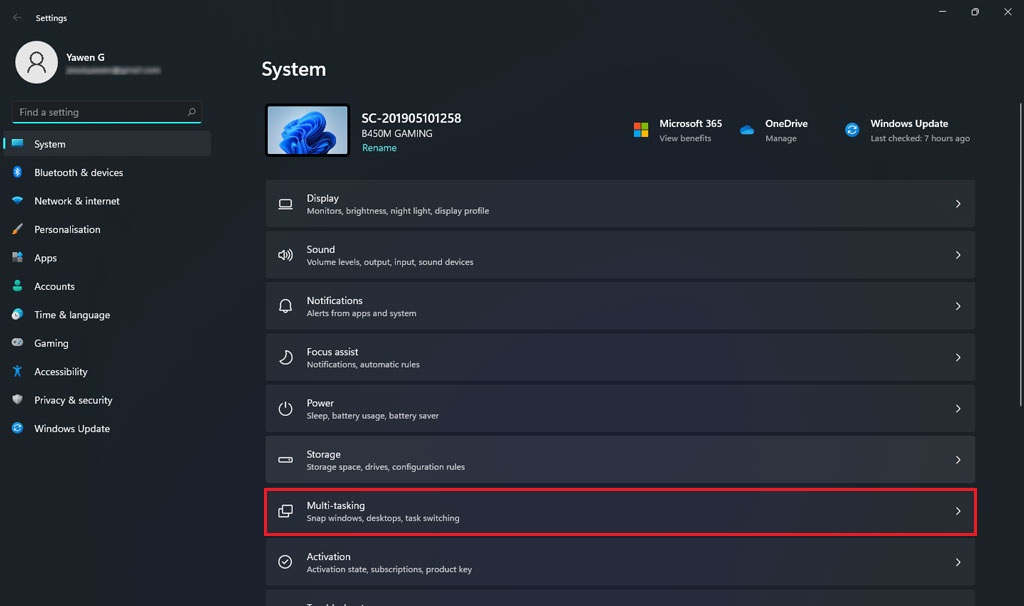
Step 2. Click on System to open the System settings. In the System settings, find and tap the Multi-tasking option.
Step 3. Now, click on the toggle to enable the Snap windows. Click the down arrow icon next to the toggle and you can change the default settings as required.
Related article: How to Move Windows 11 Start Menu to the Left Side? (2 Ways)
How to Use Snap windows to Split Screen in Windows 11
Windows 11 allows you to split your screen into 2, 3, 4 sections. All you need to is move the cursor over the maximize button in the top-right corner of the window or use keyboard shortcuts to split the screen.
Let’s take a look at how to split screen into multiple sections on Windows 11.
Split screen into two sections
- Open the app windows that you want to split.
- Hover the cursor over the maximize button and choose one of the parts of the first layout option.
- The current app window will take up half of your screen. On the other half of the screen, you can see other app windows appear as thumbnails. Select the one you want to take up the other half of the screen.
- Now, you have two app windows on the screen.
Split screen into three sections
- Hover the cursor over the maximum button and choose either of the three parts of the desired snap layout.
- Select the second and third app windows to fill the remaining screen space.
- You now have three windows open on the screen.
Split screen into four sections
- Hover the cursor over the maximum button and select the desired position in the target snap layout.
- Select the other apps to fill the remaining screen space accordingly.
- Now, you can work on four apps simultaneously.

How to Manually Split Screen in Windows 11
Another way to split screen Windows 11 is using keyboard shortcuts.
Here’s how to split screen in Windows 11 manually:
- Open the desired app window and press the Windows + Left/Right key.
- The current window occupies half of the screen. Then select the one you want to add to the other half of the screen.
Conclusion
That’s all about how to split screen in Windows 11. Now, split your screen in Windows 11 for multitasking!
User Comments :