Many creators believe their work is done as soon as the livestream ends, and editing the live stream video is a great opportunity to extend its reach. So, how to edit YouTube live stream videos?
This guide walks you through everything you need to know about editing YouTube live stream videos, from simple trims in YouTube Studio to professional-level enhancements using external software.
How to Edit Live Stream Video on YouTube
Fast Track:
- Find the video in YouTube Studio.
- Open the Editor.
- Trim and cut the video.
- Blur the face or other parts of the video.
- Save the edits.
Once a YouTube live stream ends, the platform automatically saves it as a Video on Demand (VOD) in the Live section of your channel. From there, I have full control to keep it public, switch it to private, or delete it permanently. Also, I can edit it using the YouTube Studio Editor.
1. Find Your Live Stream Video
Go to YouTube Studio and select Content on the left sidebar. Then, go to the Live tab at the top and find the target live stream.
2. Open the Editor
Click the Details icon (the pencil icon) next to the desired live stream video to open the video’s page. Next, click Editor on the left to open YouTube’s built-in video editor.
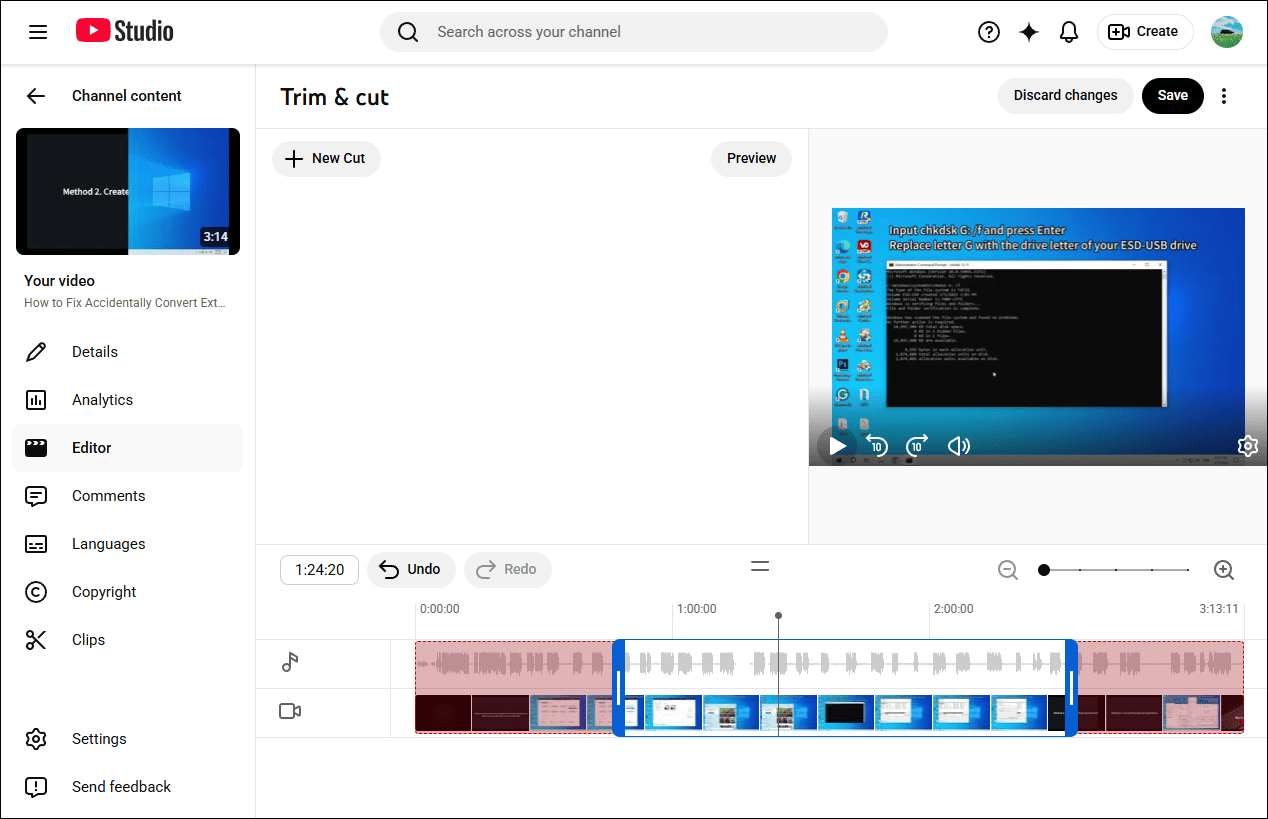
3. Trim and Cut the Live Stream Video
Select Trim & cut from the top menu. A blue framework will appear on the editor’s timeline. Drag the edges of the framework to define the segment you wish to keep, and everything outside it will be cut away. Once you’re satisfied, click Save to apply the changes.
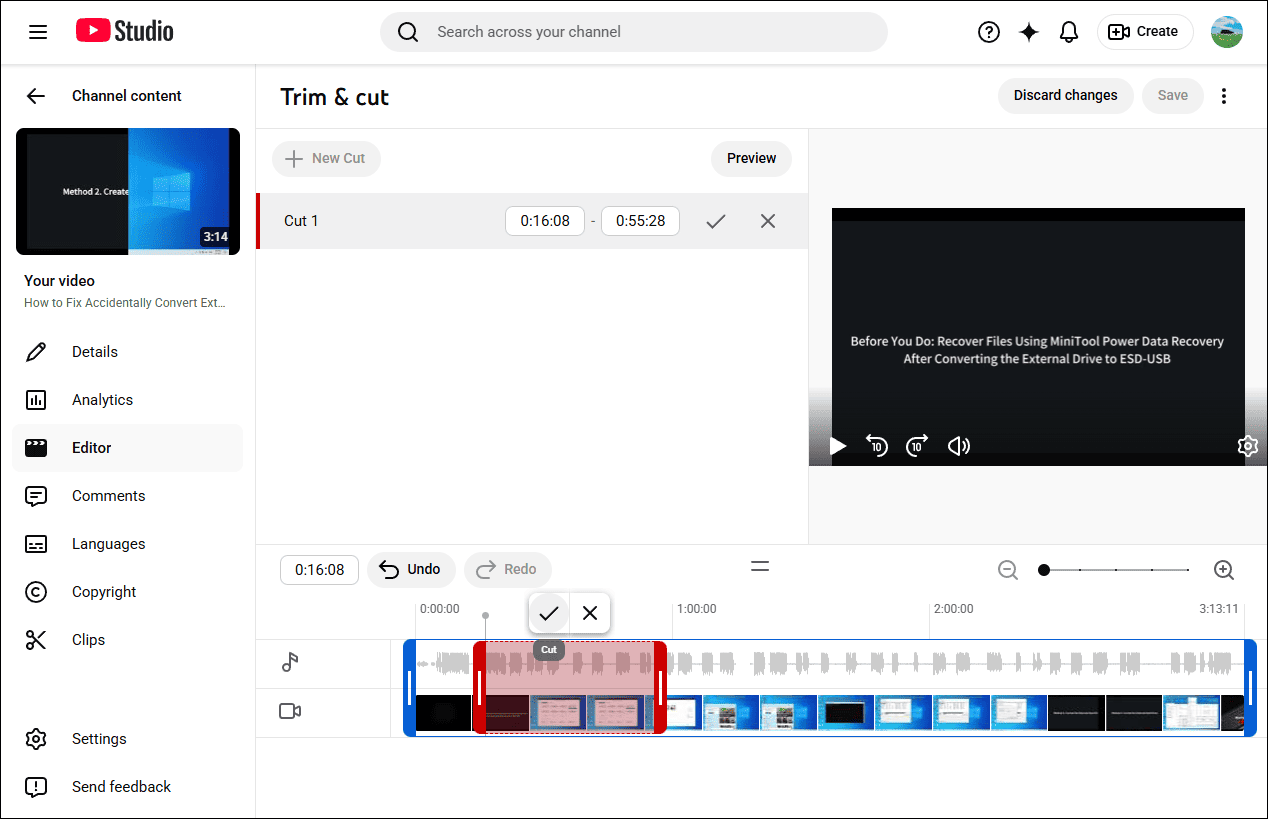
To remove a middle portion of the video, click Trim & cut, and select + New cut. A red framework will appear on the timeline. Adjust its edges to highlight the exact segment you wish to delete, and everything outside this red framework will be kept. After confirming the selection, click the Cut icon (the checkmark) to confirm, and click Save and Confirm changes.
4. Blur the Video
Click Blur and choose Face blur or Custom blur. Select the former to blur the face in the video, and click the latter to blur something else.
5. Save the Video
Click Save in the upper-right corner and select Confirm changes to save the edits.
How to Edit YouTube Live Stream Videos Using MiniTool MovieMaker
Fast Track:
- Save the live stream video to the computer.
- Download and install the video editor.
- Import the video and add it to the timeline.
- Trim, split, and crop the video.
- Export the video.
YouTube Studio’s native editor only offers basic editing tools. If I want to crop, add text, or merge several clips, I’ll select MiniTool MovieMaker, an easy-to-use video editor without watermark.
1. Download the Live Stream Video from YouTube to My PC
Locate the target live stream video in YouTube Studio, click the options icon (three vertical dots), and select Download.
2. Install the Video Editor
Ensure the application is already installed on the PC. If not, click the button below to download and install the video editor.
MiniTool MovieMakerClick to Download100%Clean & Safe
3. Import the Live Stream Video
Launch the software and click New Project to enter the main interface. Then, click the Import Media Files area on the left side to import the video. Next, click the + icon on the clip or drag and drop it to the timeline to begin editing.
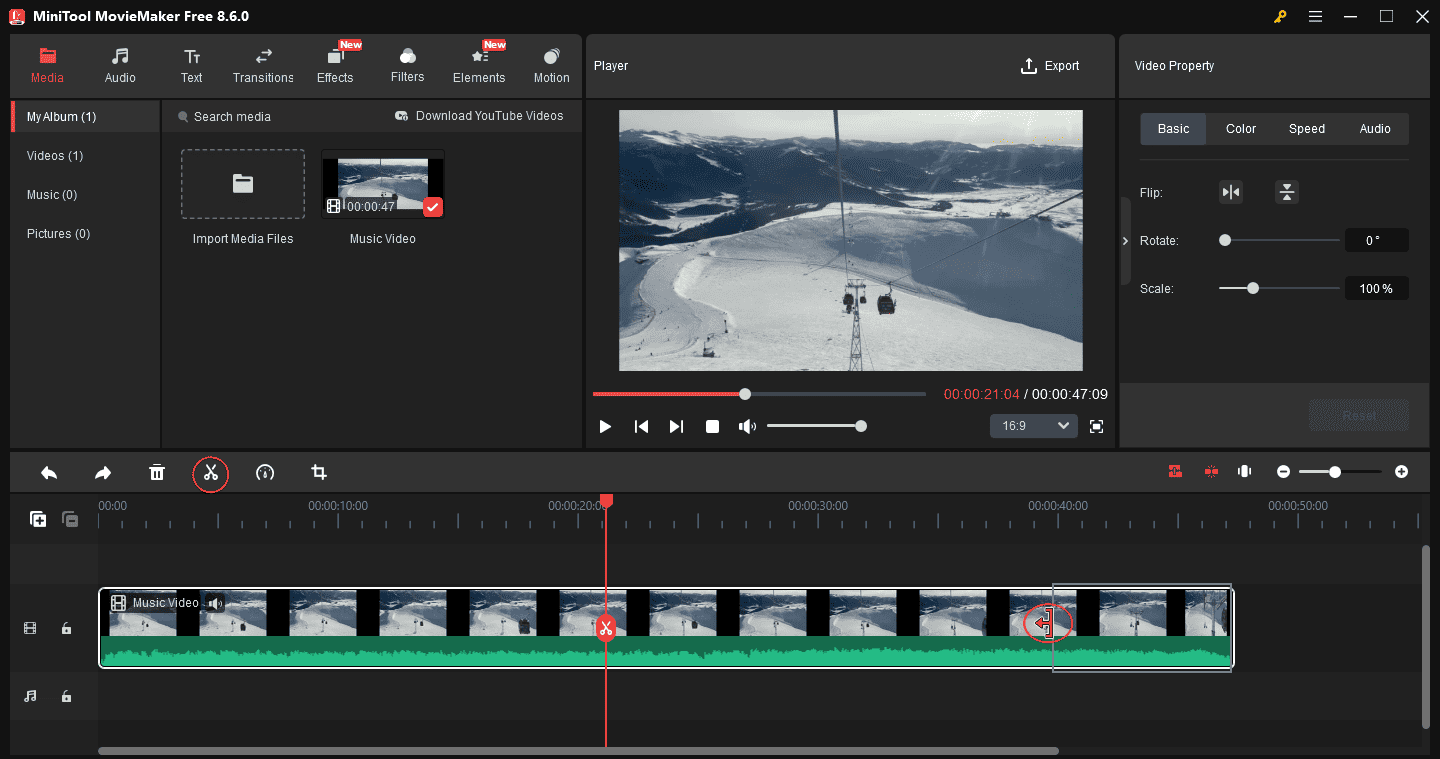
4. Trim YouTube Live Stream
On the timeline, hover over the beginning or end of the video until the Trim icon appears. Drag the Trim icon inward to remove unwanted parts at either end.
To remove the middle part of the video, use the Split tool to separate it from the entire clip and delete it.
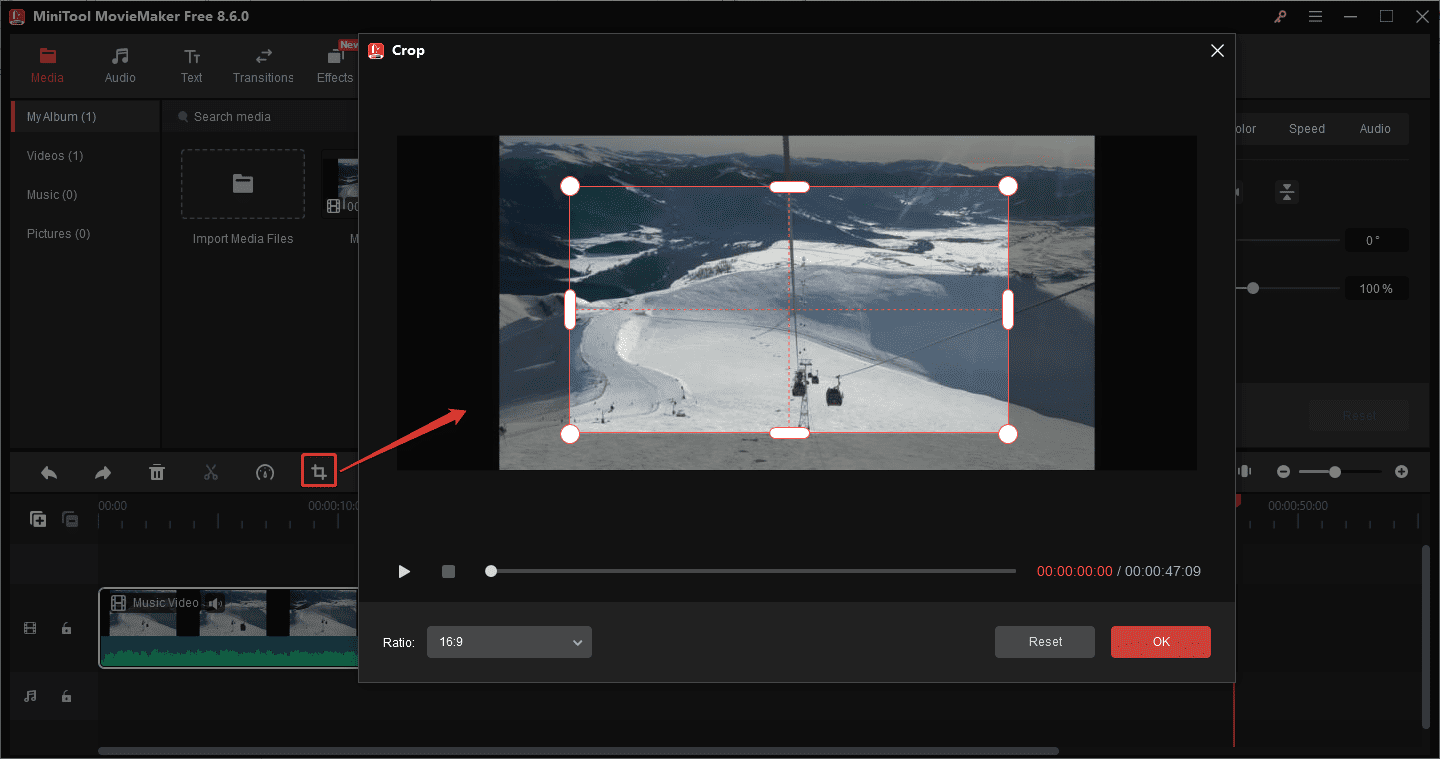
5. Crop YouTube Live Stream Video
Click the Crop icon on the timeline toolbar, adjust the position and size of the red rectangle to select the area I want to save, and click OK to apply changes.
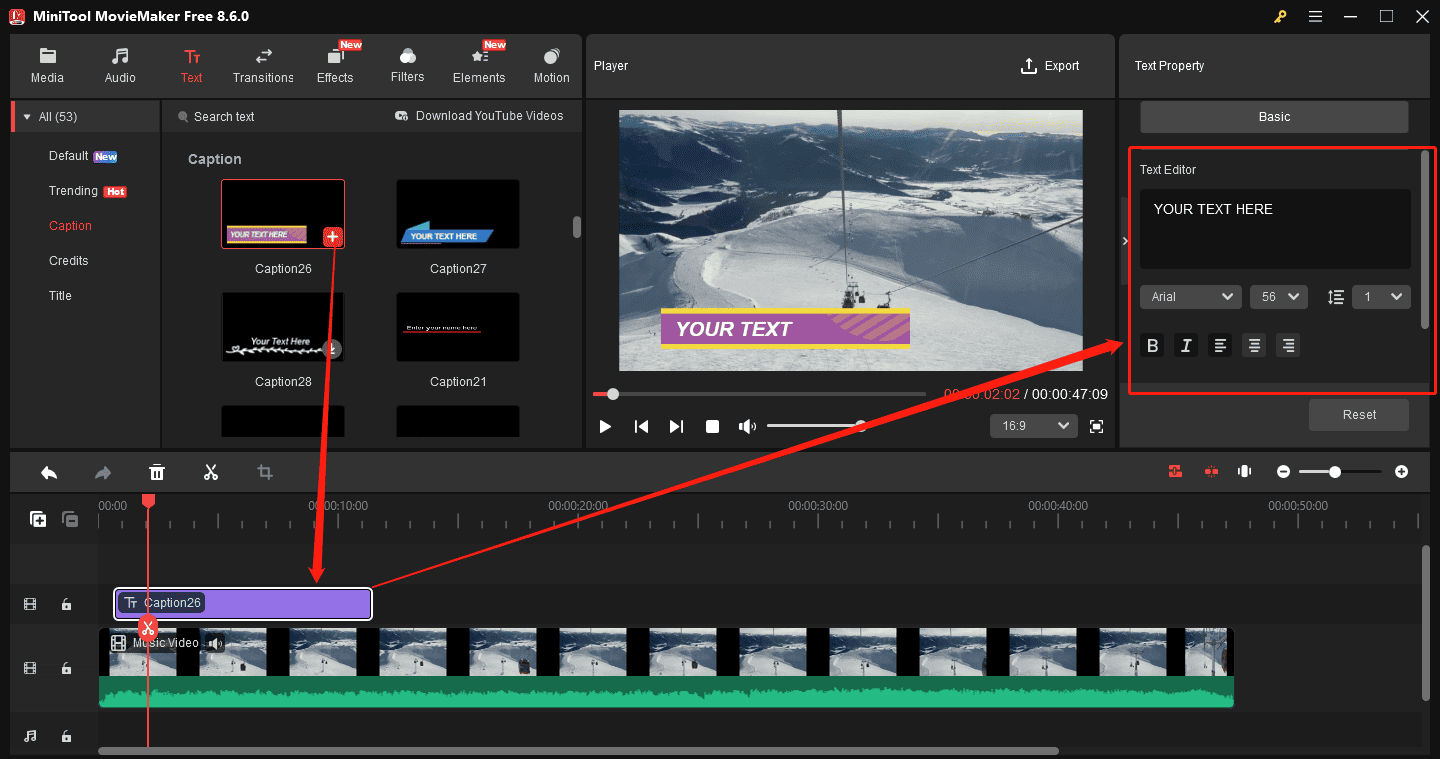
6. Add Captions
Go to Text at the top, add the Default Text template, or go to Caption and select a style, and add it to the timeline. Next, go to the Text Editor to type and edit the text.
7. Export the Video
Click Export in the upper-right corner. In the following window, select the output folder, format, resolution, and frame rate. Finally, click Export to start rendering the video.
MovieMaker by MiniTool is an inexpensive, easy-to-use video editing program. It includes a fair number of effects and gives you easy ways to join your clips, add transitions, and overlay objects and text.https://www.pcmag.com/reviews/minitool-moviemaker
Conclusion
After my YouTube live stream has finished broadcasting, I often edit the video using the Studio Editor to make highlights quickly or use MiniTool MovieMaker to create a compilation of highlights from multiple live stream videos.
Finally, if you encounter problems while using MiniTool MovieMaker, send an email to [email protected] for help.
People Also Ask
About The Author

Position: Columnist
Cora is a tech writer specializing in digital media workflows, with over six years of hands-on experience in video post-production, media transcoding, and screen capture. Her writing is always clear and practical. Cora also produces in-depth software reviews for users across skill levels to help them find the right tool and enjoy video editing.
User Comments :