This post explains how to edit surveillance videos using MiniTool MovieMaker, Microsoft Clipchamp, and CapCut. Select a video editor, import your footage, adjust the clip's color, add text, apply filters, and export the video.
Surveillance cameras are widely used for monitoring and recording purposes. They are not only essential for businesses to prevent emergencies or security incidents but also serve personal needs such as watching over pets or children and ensuring home safety.
Why You Should Edit Surveillance Videos
Editing surveillance footage helps extract key moments, and the main benefits include:
- Improve video quality: Enhance brightness and sharpness to fix hazy or blurry footage.
- Remove background chatter: Reduce noise while preserving important audio, or use AI narration for unclear audio.
- Preserve memorable moments: Trim unnecessary parts to save unexpected, meaningful events.
- Share on social media: Add text, subtitles, or transitions, and adjust aspect ratios for platforms like YouTube, Instagram, or TikTok.
No matter what the reason, the important thing is to find a reliable and easy-to-use surveillance video editor to meet your needs.
How to Edit Surveillance Videos
Although a wide variety of surveillance cameras exists on the market, there are no specialized editors designed exclusively for surveillance footage. However, many powerful video editors can serve as excellent alternatives. In the following part, we will display step-by-step guides on how to edit surveillance videos on PC using MiniTool MovieMaker, Microsoft Clipchamp, and CapCut.
| Tool | MiniTool MovieMaker | Microsoft Clipchamp | CapCut |
| Platform | Windows | Win/Web | Win/Mac/Mobile/Web |
| Price | Free + Ultimate | Free + Paid | Free + Pro |
| No Watermark | Yes | Yes | Yes |
| Brightness/Contrast | Yes | Yes | Yes |
| Trim/Cut/Crop/Speed/Merge | Yes | Yes | Yes |
| Video Stabilization | No | No | Yes |
| Voice Enhancement | No | No | Yes (Pro feature) |
| Ease of Use | Easy | Moderate | Moderate |
Method 1: Using MiniTool MovieMaker
Fast Track:
- Install MiniTool MovieMaker.
- Import your footage.
- Edit the video by color correction and trimming.
- Enhance the video with text, music, sound, and transitions.
- Export the final video.
MiniTool MovieMaker is a great free surveillance video editor for beginners. It offers a clean, easy-to-use interface with no ads, bundles, or watermarks. This all-in-one Windows editor features both basic tools (trimming, cropping, splitting) and advanced capabilities, including multi-track editing, text/image overlays, and picture-in-picture effects.
Here are the detailed steps on how to edit surveillance videos on PC using MiniTool MovieMaker.
Step 1: Download and Install
Click the button below to start downloading it. Then, follow the on-screen instructions to complete the installation.
MiniTool MovieMakerClick to Download100%Clean & Safe
Step 2: Import Your Video
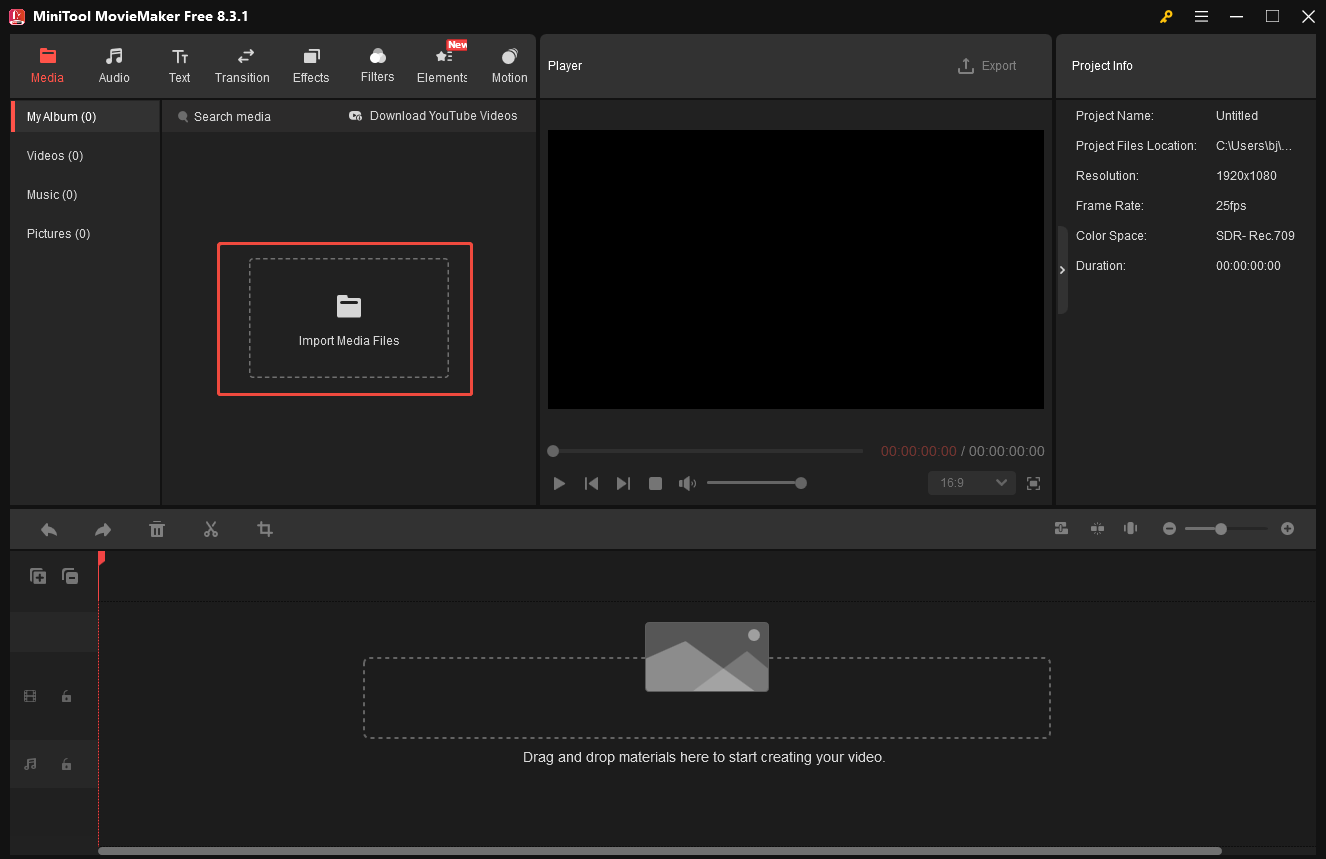
Launch MiniTool MovieMaker. Close the pop-up Project Library window to access the main editing interface. Then, click on Import Media Files to upload your video from your local computer.
Next, click the Plus icon at the lower-right corner of the video or directly drag it to the timeline.
Step 3: Edit the Video
There are various editing tools available for surveillance videos.
1. Adjust Video Properties
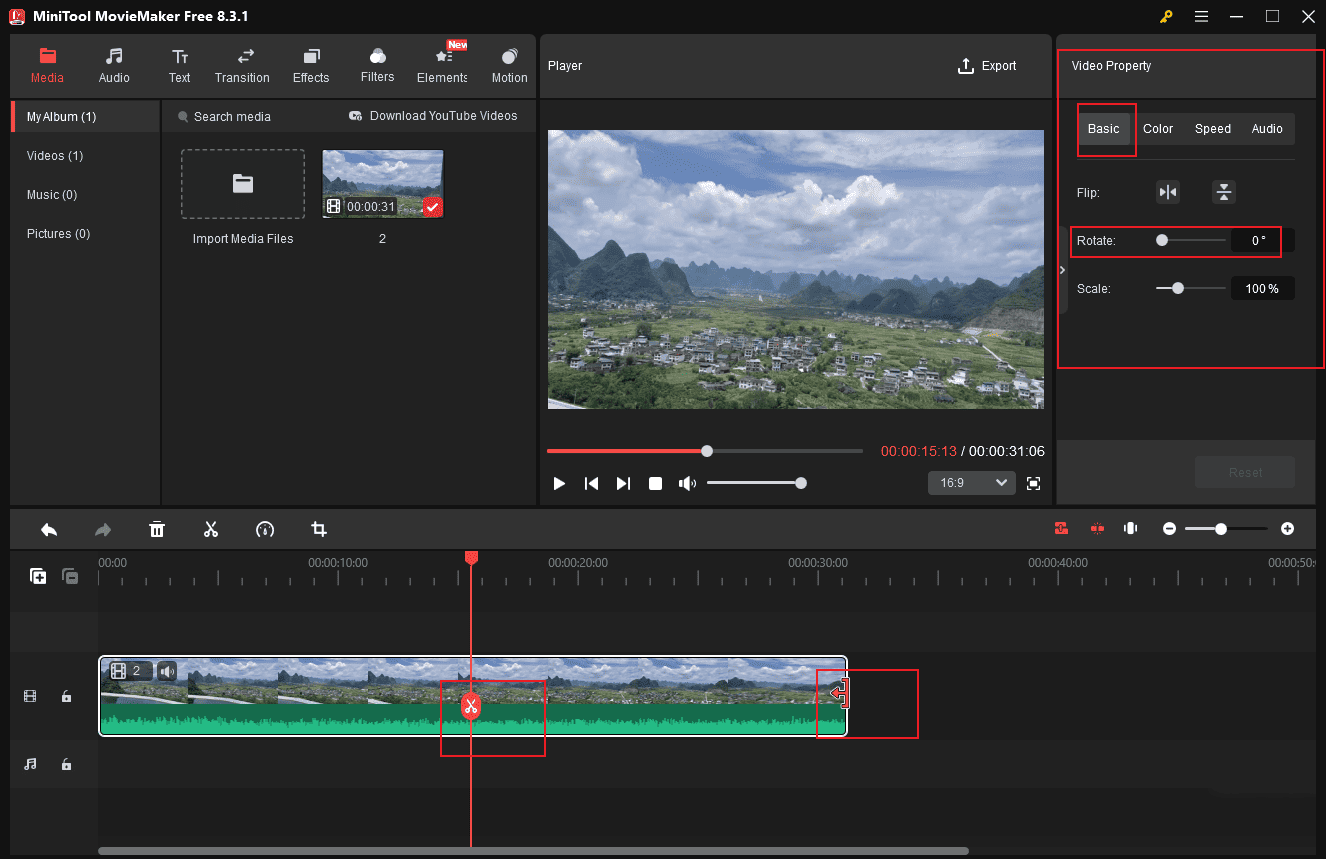
Click the video clip on the timeline, and you can select different specialized tabs to adjust the surveillance video in the right Video Property panel. For example, if the surveillance camera is crooked, you can move the Rotate slider to correct the direction. If the video is too dim to watch, click the Color tab and drag the Brightness slider to make it brighter. To avoid the background clutter, click on the Mute icon in the Audio section to remove the audio track from the video.
2. Trim & Split Video
To shorten your surveillance video, hover your mouse cursor over the edge of the video clip until the Trim icon appears. Then, drag the Trim icon inwards or outwards to remove the unwanted part from the clip.
Move the playhead to the desired points on the clip and click the Scissors icon to split it. Next, you can rearrange and organize the segments easily.
3. Add Text to Video
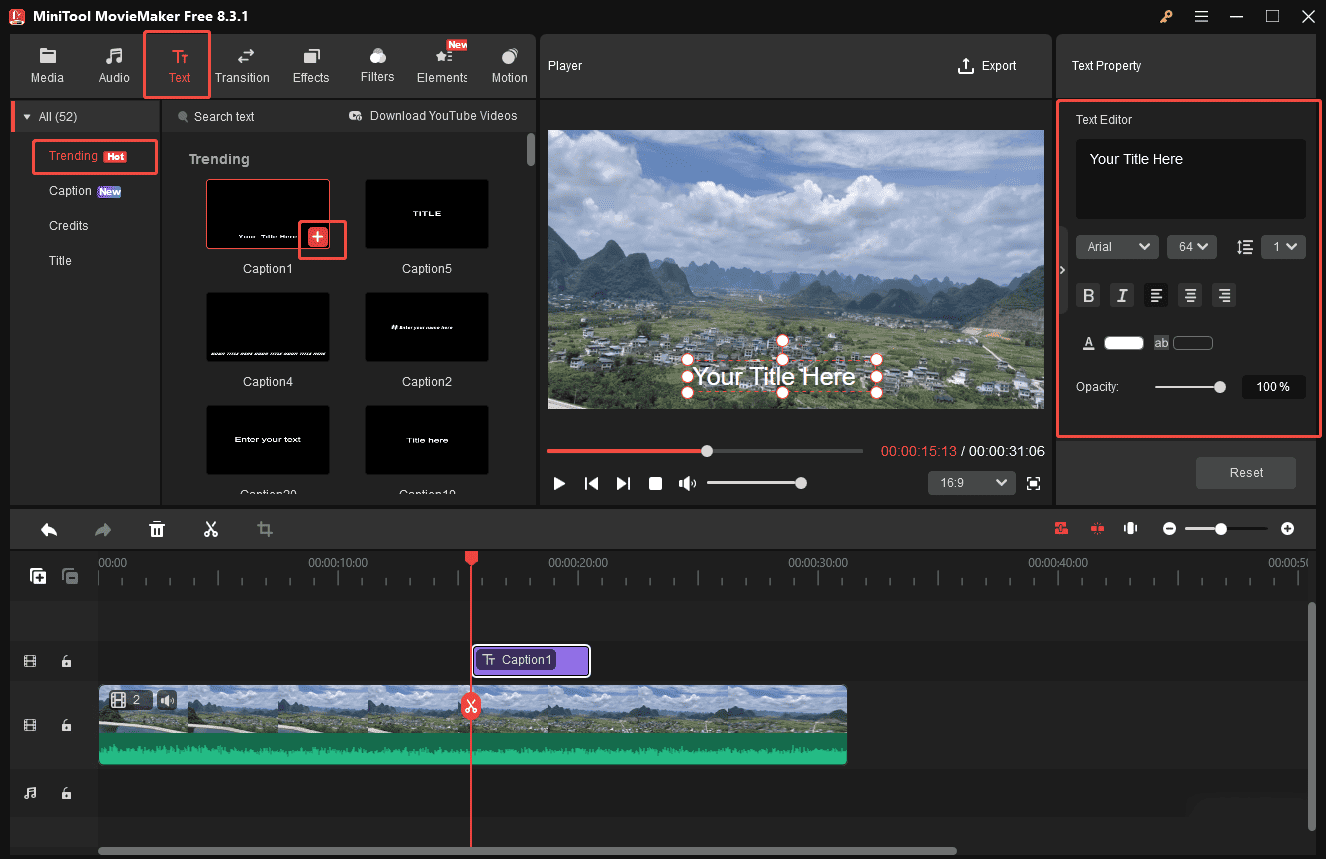
Click the Text tab on the menu, and you can browse down to see all kinds of text templates. Hover your mouse over the desired text to preview the text animation. If you are satisfied with it, click the Download icon. Then, click the Plus icon to add or drag it to the timeline.
On the right panel, you can input words and preview the effects on the Player window. Moreover, if you are not satisfied with the default font and size, select your preferred ones in the Text Property on the right.
4. Add Music to Video
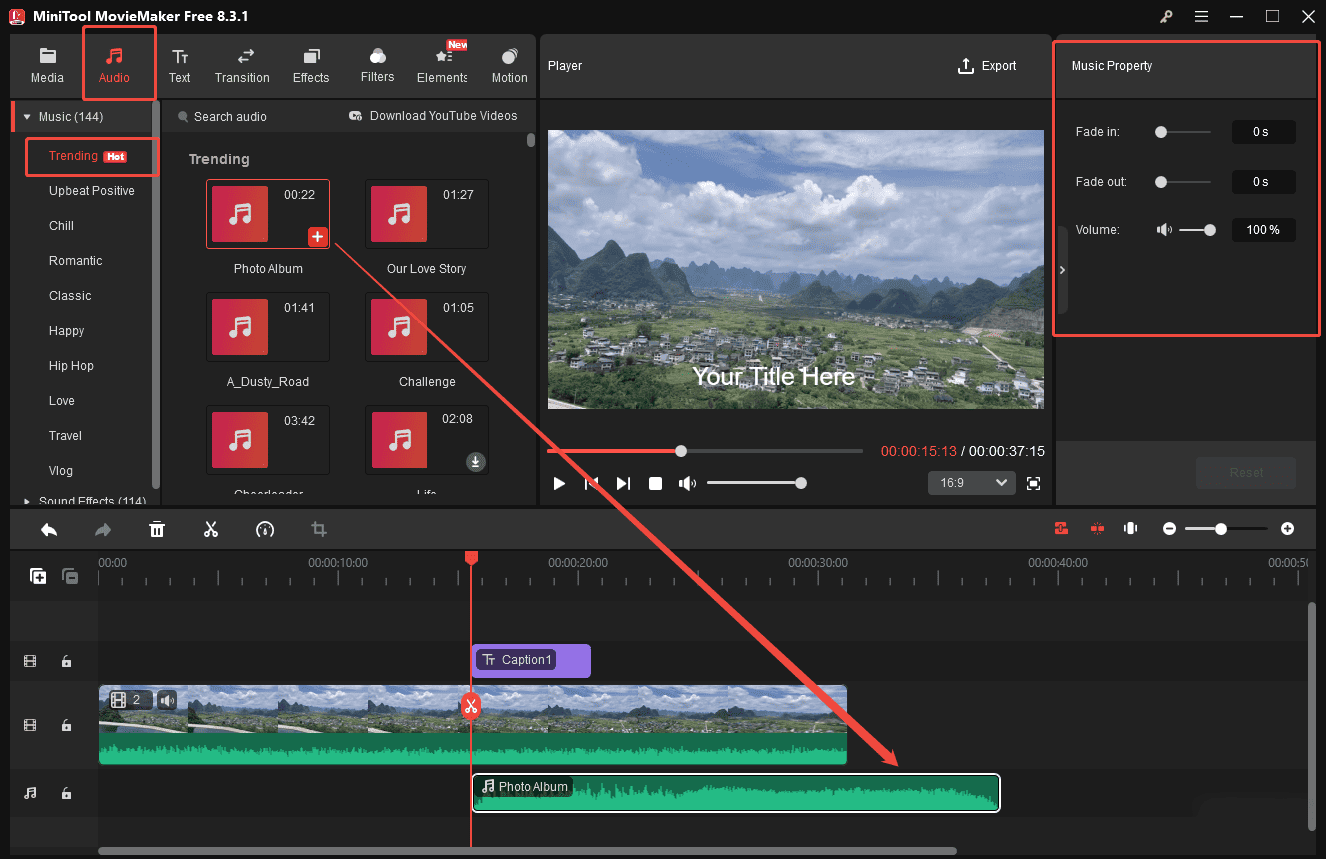
Actually, there are two methods available for adding music to a video. The one is clicking the Audio tab on the menu and scrolling down to find one suitable. Then, click the Plus icon to add it to the timeline. Using your own audio files is another way to add music to your video. Hit the Media tab on the menu and click Import Media Files again to upload your music files. Then, add it to the timeline.
Move the sliders on the music property to add the fade-in/out effect and decrease the music volume.
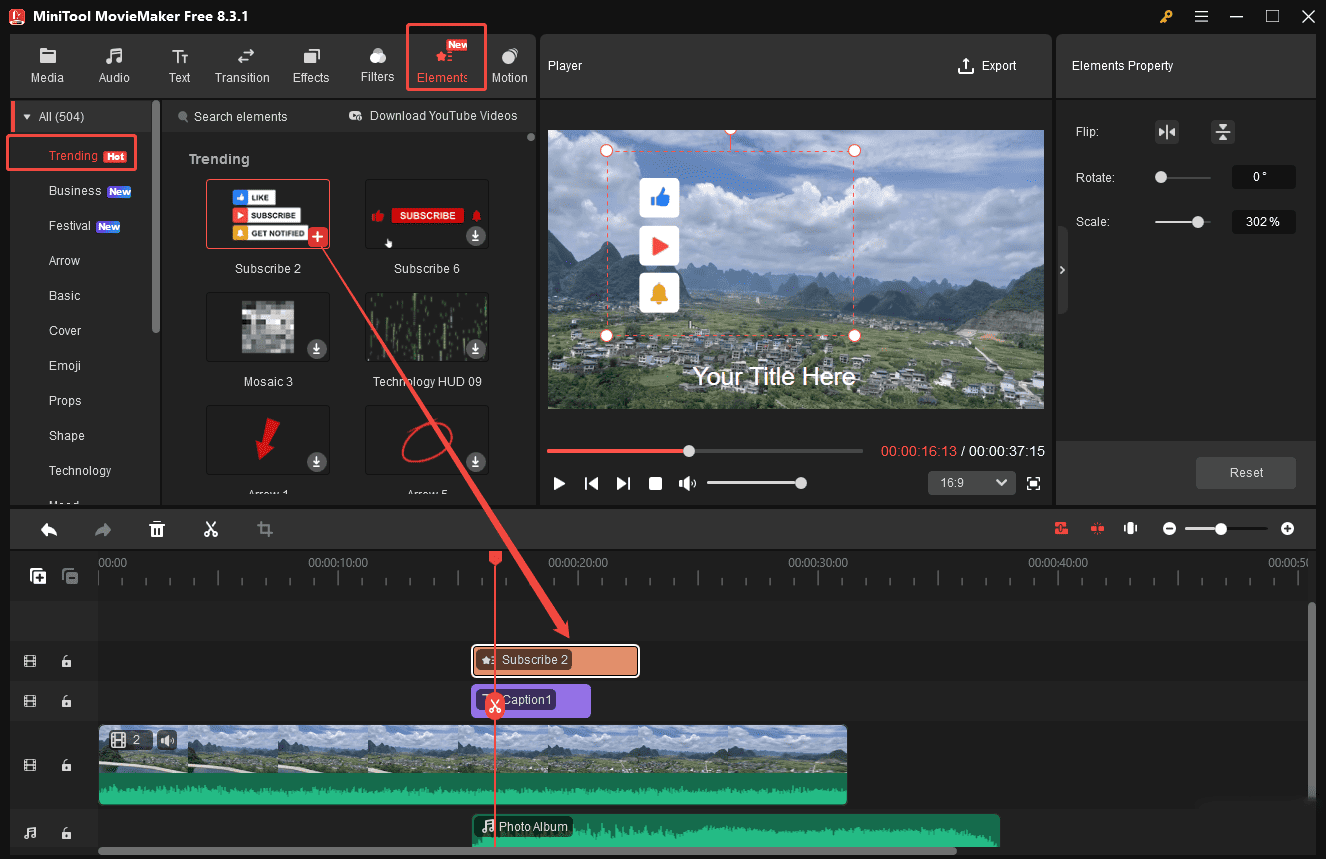
5. Add Elements to Video
To spice up your video or hide some important information in your surveillance video, adding elements is a great choice. Select the Elements tab on the menu and choose the desired one. Click the Plus icon to add it to the timeline. You can also preview the effects on the Player window.
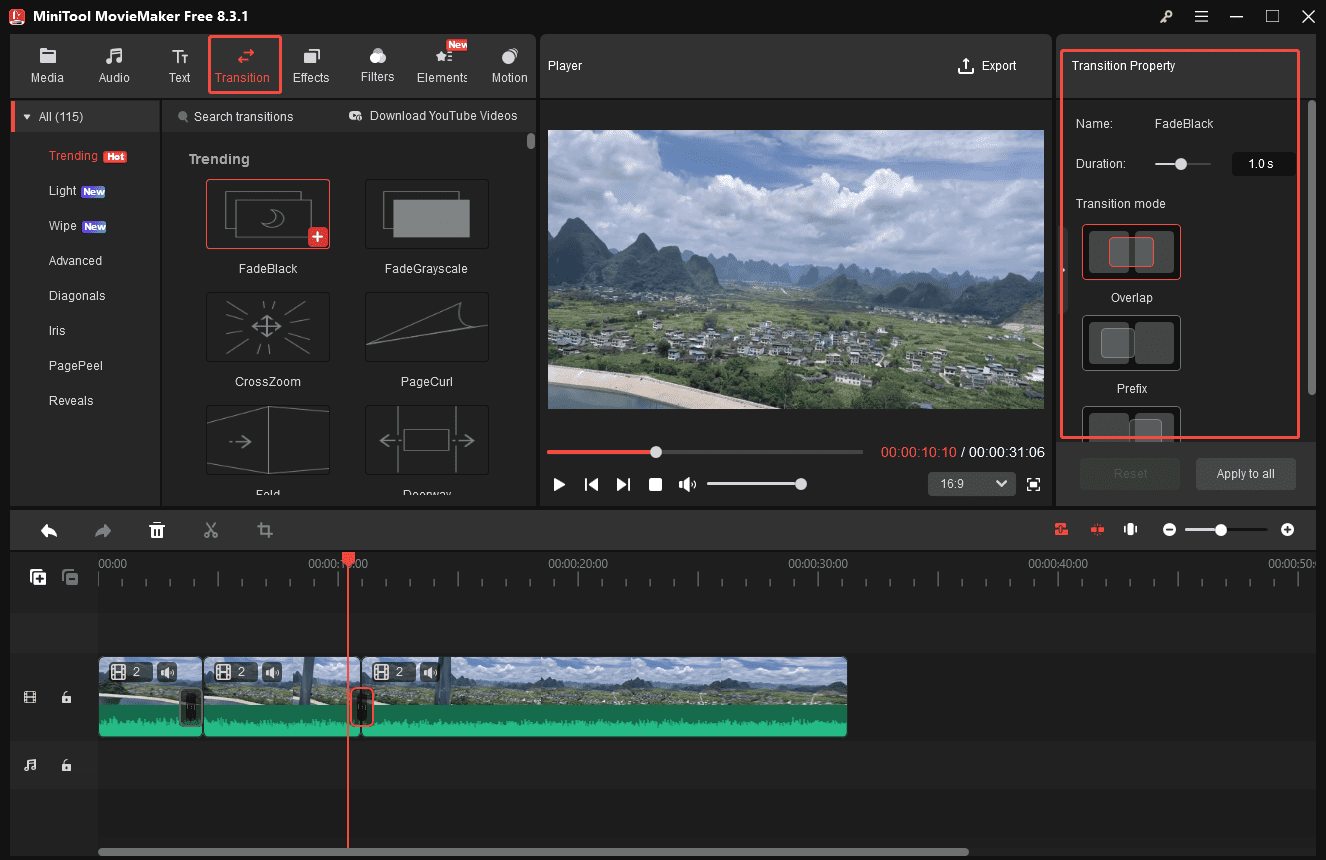
6. Add Transitions to Video
To connect different clips or highlight the excellent clips, it is necessary to add transitions. Click the Transition tab at the top of the menu, and you can see several kinds of transitions. Hit the clip on the timeline to add a transition. Click the Plus icon or directly drag the desired transition to the timeline.
Then, you can move the slider on the right Transition Property panel to adjust its duration and select the preferred mode. Also, you can preview the transition effect on the Player window.
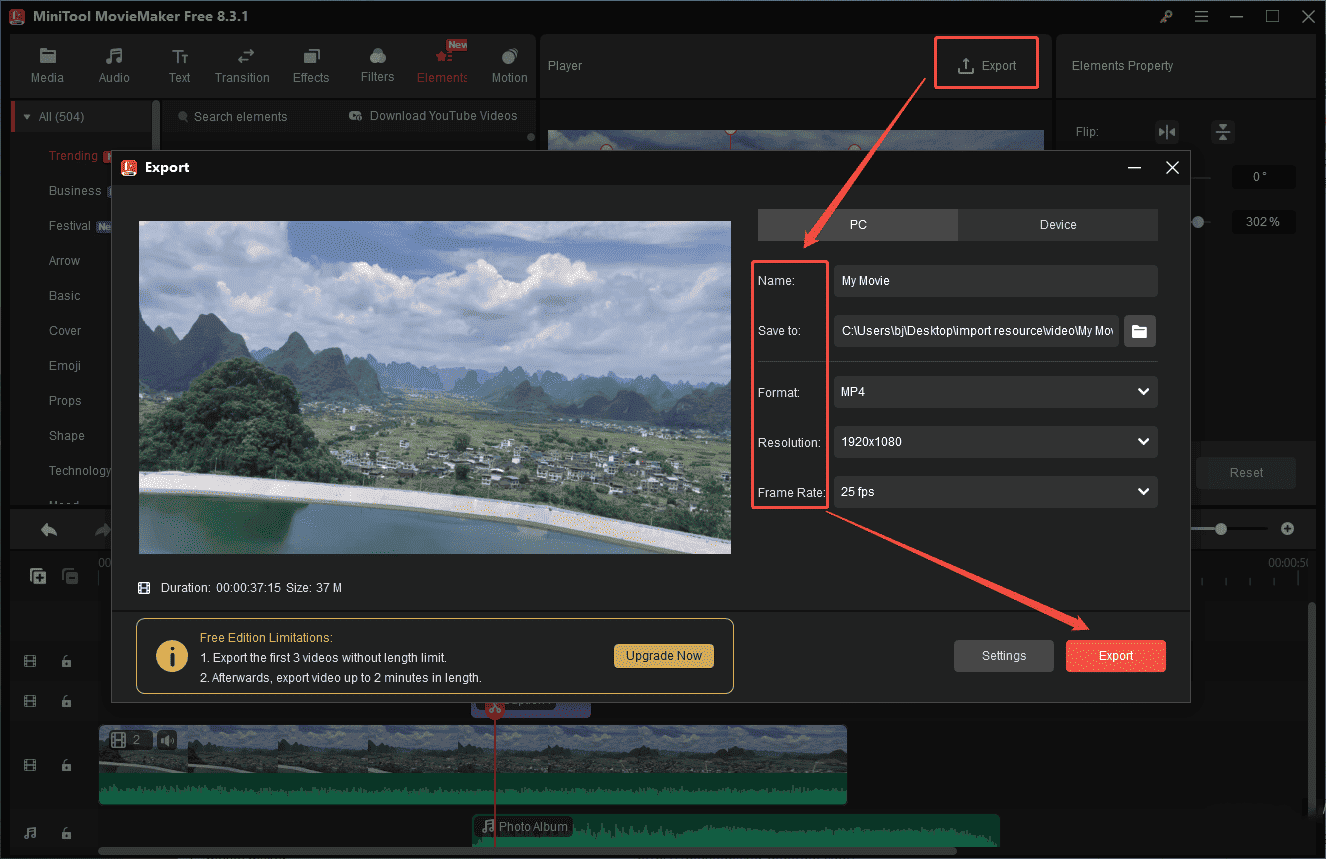
Step 4: Export the Final Video
After editing, click the Export icon at the top of the menu. Then, you can customize the video name, location, format, resolution, and frame rate. Next, click on the Export button at the bottom of the Export window to save the final video to your computer.
MovieMaker by MiniTool is an inexpensive, easy-to-use video editing program. It includes a fair number of effects and gives you easy ways to join your clips, add transitions, and overlay objects and text.https://www.pcmag.com/reviews/minitool-moviemaker
Method 2: Using Microsoft Clipchamp
Fast Track:
- Launch Microsoft Clipchamp.
- Add the target video clips.
- Edit the clip’s color and apply filters.
- Save and export the video.
Microsoft Clipchamp is also a great option to edit surveillance videos. It is easy to use and offers a wide variety of editing tools. It features a clean and simple interface that is suitable for users of all experience levels. With this video editor without watermark, you can easily cut out the unnecessary clips and add new content to make the video more engaging.
Here are the concrete steps on how to edit surveillance videos on PC using Microsoft Clipchamp.
Step 1: Download and Install
Check if your computer has Microsoft Clipchamp installed. If not, you can go to the Microsoft Store to download and install it.
Step 2: Import Your Video
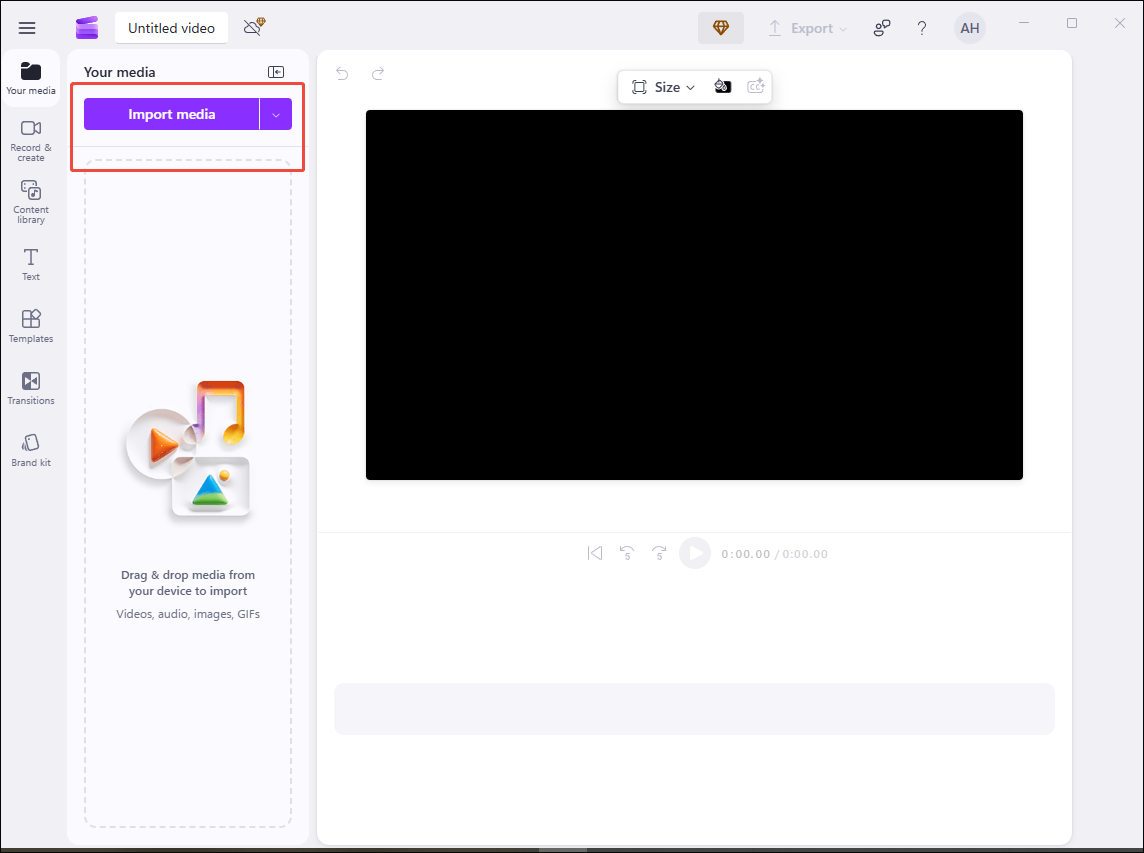
Open the software and click Create a new video to enter the editing interface. Then, click Import media to upload your video. Next, click the Plus icon of the video or drag it to the timeline.
Step 3: Edit the Video
There are several tools used for changing the tone of surveillance videos.
1. Adjust Video Color
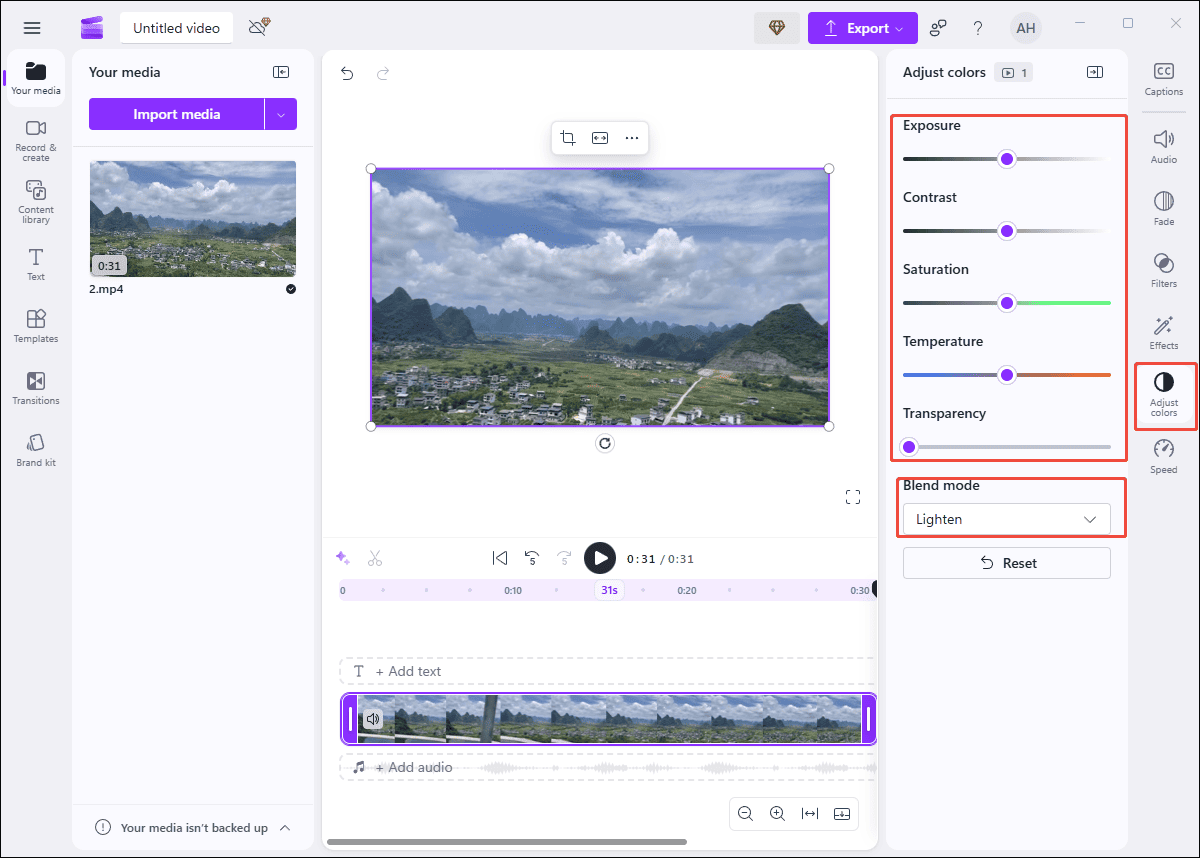
To make the fuzzy surveillance footage brighter and easier to watch, you can click Adjust colors to make adjustments. Set Blend mode to Lighten or move different kinds of sliders to adjust the color. The effect can be previewed from the Player Window.
2. Add Filters to Video
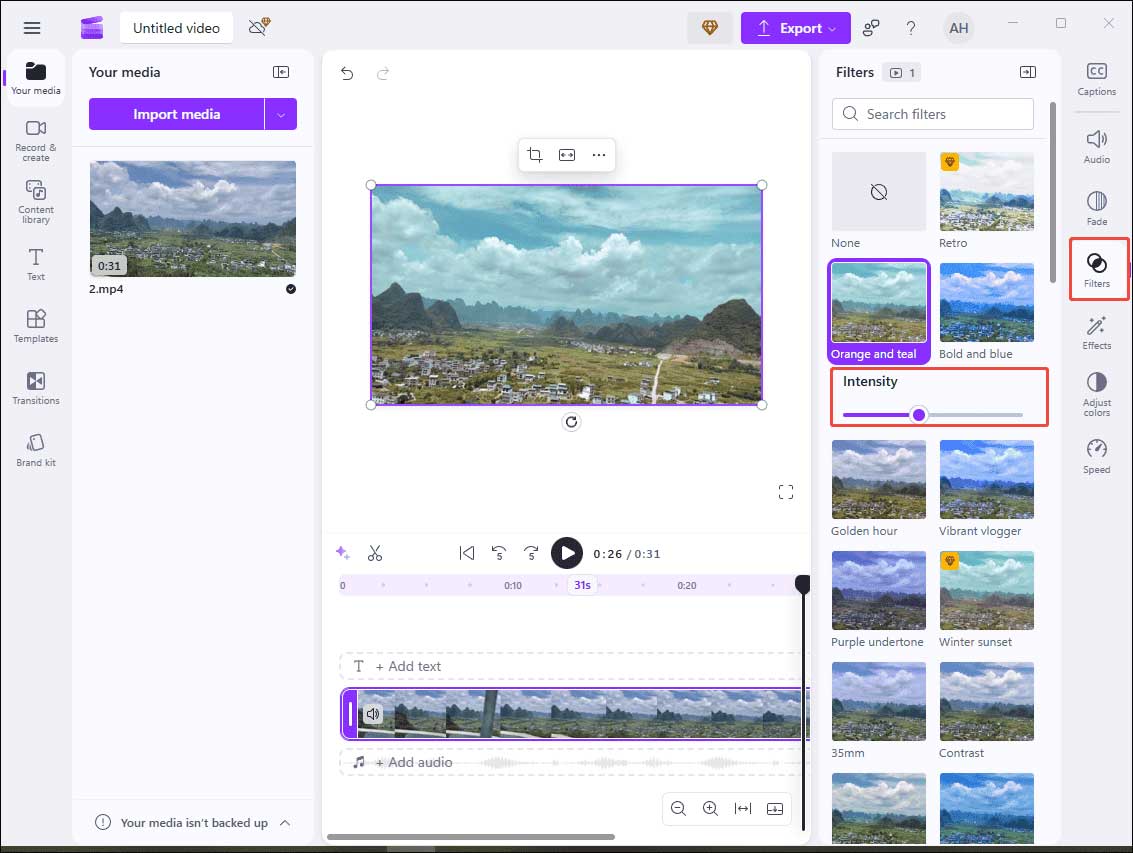
You can also add filters to change the video tone. Click Filters on the right toolbar and scroll down to select the desired one. Click it and you can see the effects on the Player window. Move the Intensity slider to make it fit the video better.
Step 4: Export the Final Video
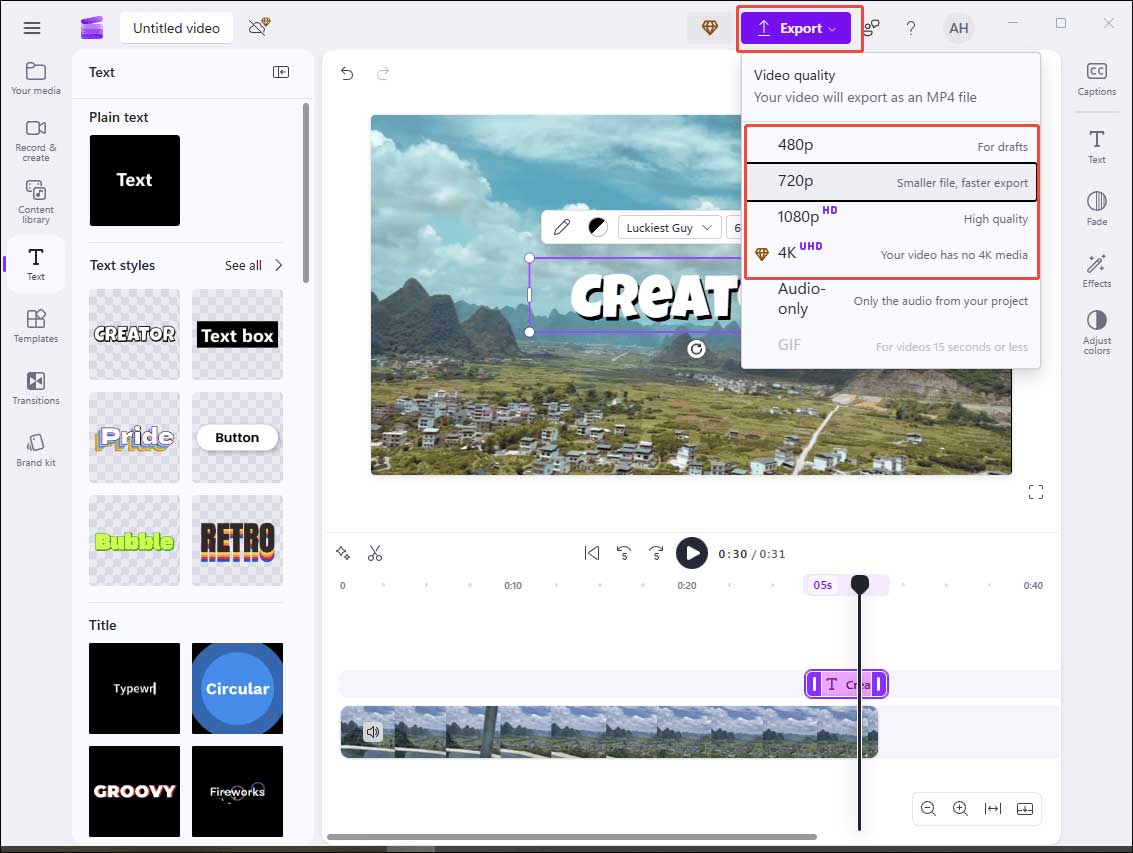
Once the editing is finished, click Export at the top of the menu. Then, select the preferred resolution for your video to save it to your computer.
Clipchamp, the default video editing software for Windows 10 and Windows 11, is surprisingly capable for both personal and professional use. It includes all the basic tools you need to produce video projects, some fun effects, and helpful templates for social media posts.https://www.pcmag.com/reviews/clipchamp
Method 3: Using CapCut
Fast Track:
- Install CapCut and open the software.
- Import the footage.
- Rotate, flip, and stabilize the video.
- Enhance the voice quality.
- Export the result.
CapCut is one of the best video editing software due to its ease of use and comprehensive editing tools. Therefore, if you are looking for a reliable tool for creating stunning surveillance videos, CapCut should be an ideal option.
Step 1: Download and Install
Visit CapCut’s official website to download this program and install it on your computer.
Step 2: Import Your Video
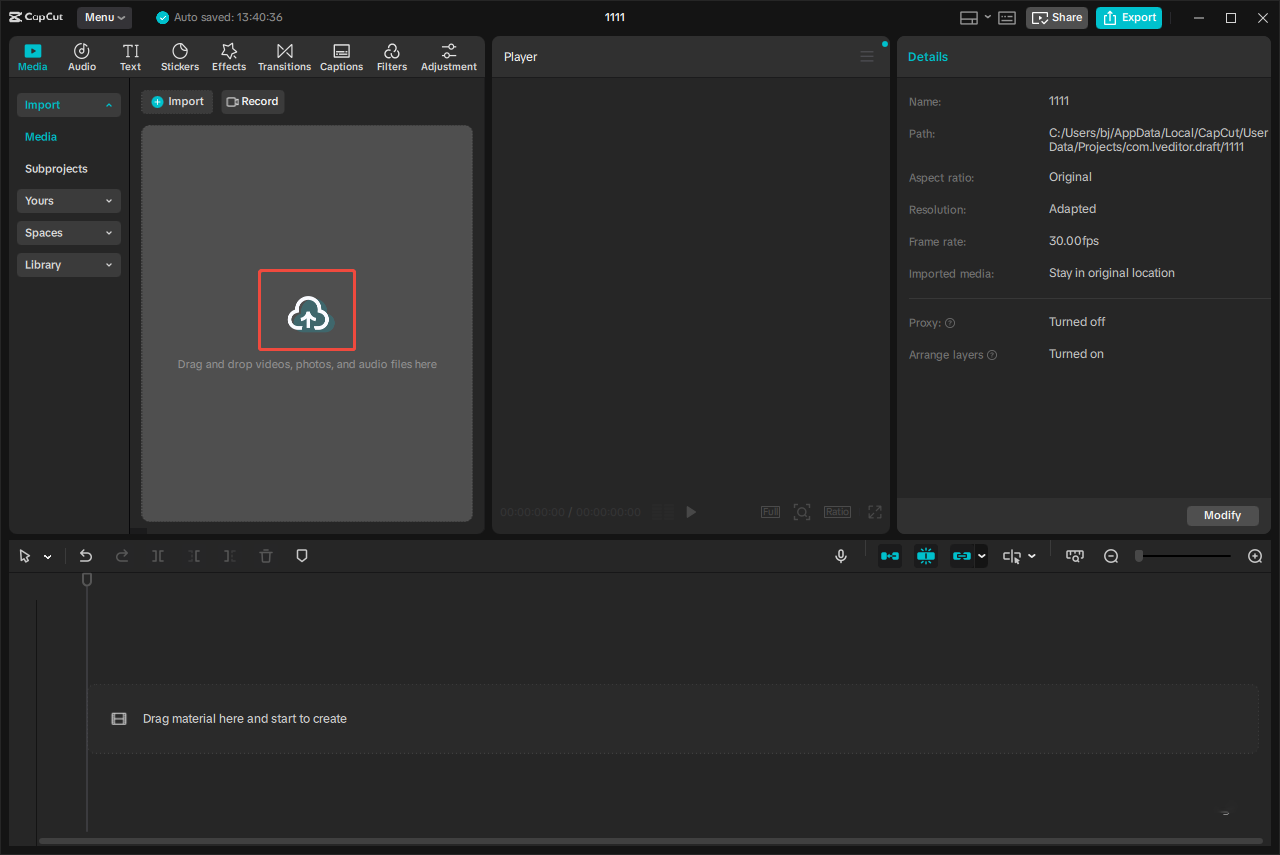
Open CapCut and click Create Project to enter the main interface. Then, click the Import icon to upload your video.
After importing, click the Plus icon at the corner of the video or simply drag it onto the timeline.
Step 3: Edit the Video
There are plenty of editing tools suitable for surveillance videos.
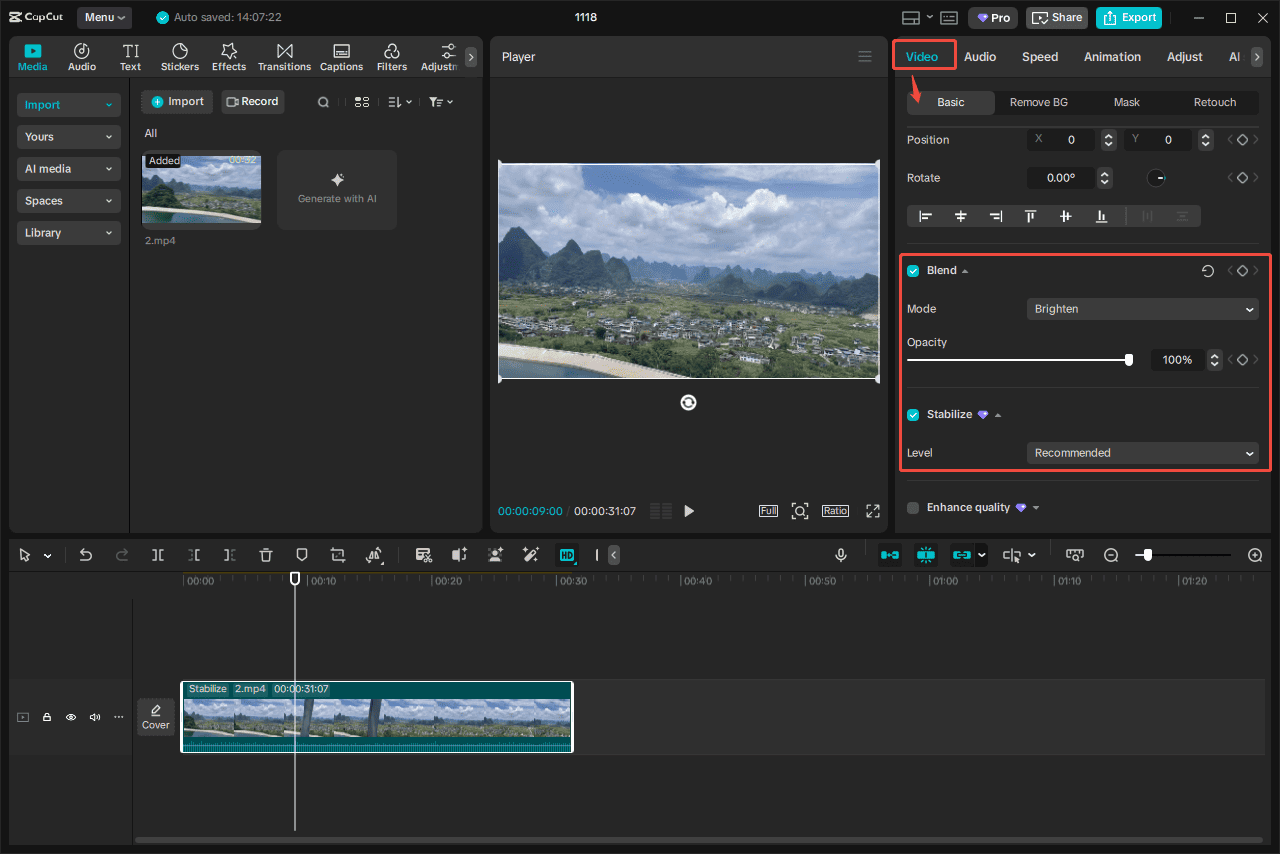
1. Adjust Video Property
Select the video and scroll down to see the basic default video settings. To improve the video tone, you can click the Blend icon to pick a desired mode and drag the slider to adjust the opacity. Then, click Stabilize to automatically apply it. You can select the preferred level to adjust the video stabilization.
2. Enhance Voice Quality
To eliminate the background clutter and enhance the voice quality in the surveillance video, you can right-click the video on the timeline. Then, select Enhance Audio and click Normalize loudness, Enhance voice, and Reduce noise to apply to the video automatically. Additionally, you can also click the Audio tab next to Video to find them.
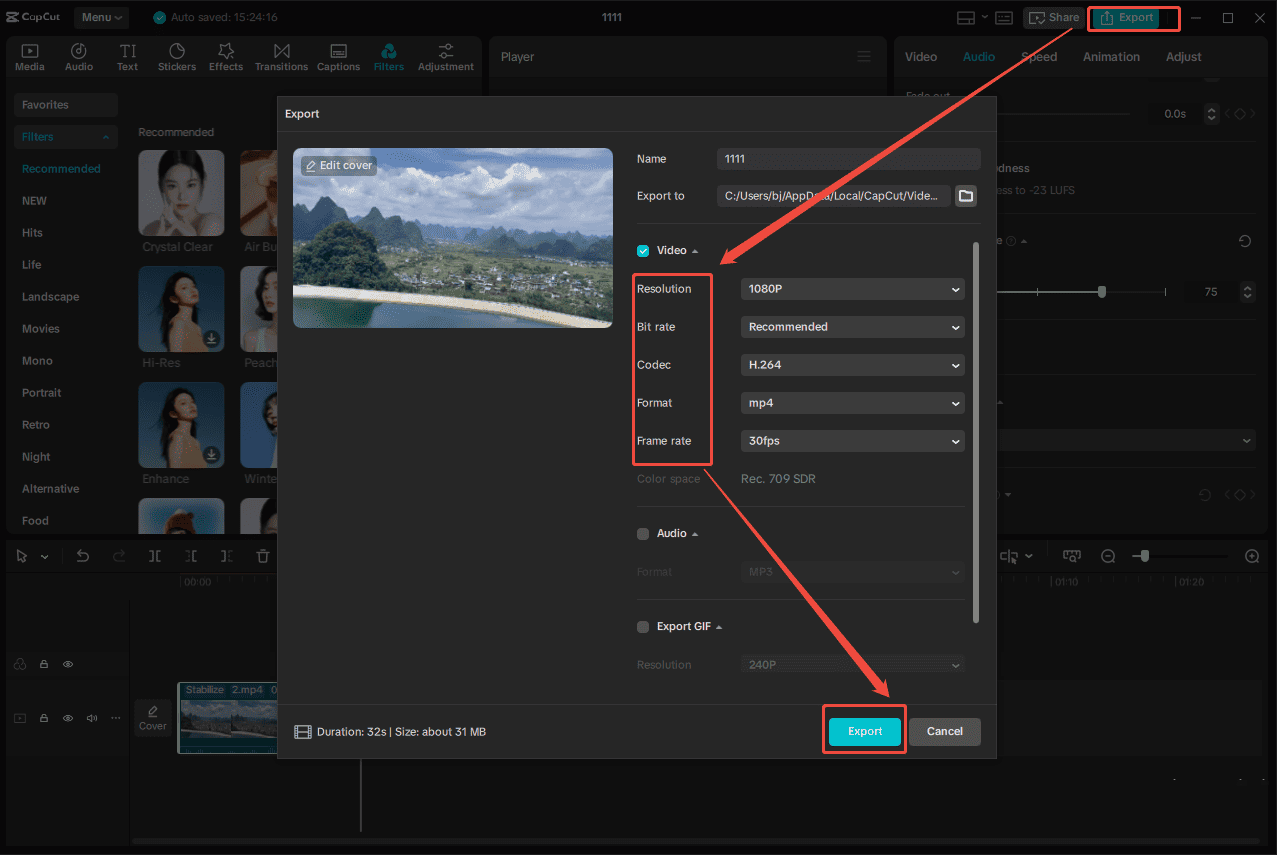
Step 4: Export the Final Video
Once the video is edited, click Export at the top of the menu to access the export settings window. Then, customize the video settings and click the Export icon at the bottom to save the final video to your computer.
CapCut is free for most tools, but some advanced features are locked behind a subscription.https://www.techradar.com/pro/software-services/capcut-review
Conclusion
This post provides detailed steps on how to edit surveillance videos on PC using MiniTool MovieMaker, Microsoft Clipchamp, and CapCut. In addition, it also explains why editing the surveillance footage is important. Give these applications a try and choose the one that best fits your needs to make your surveillance clearer and more effective.
If you have any problems or suggestions when using MiniTool MovieMaker, do not hesitate to contact us via [email protected].
How to Edit Surveillance Videos FAQ
About The Author

Position: Columnist
Cora is a tech writer specializing in digital media workflows, with over six years of hands-on experience in video post-production, media transcoding, and screen capture. Her writing is always clear and practical. Cora also produces in-depth software reviews for users across skill levels to help them find the right tool and enjoy video editing.
User Comments :