Editing faces in a video involves many aspects, such as blurring faces to protect privacy and face swapping for creative purposes. This post focuses on another aspect of face editing in videos – aesthetic enhancement. In other words, this post explains how to edit face in videos by smoothing skin, adding a blush filter, widening eyes, and applying other makeup effects.
How to Edit Face in Video
This section introduces two video face editors and shows you how to enhance faces in videos using the software.
Method 1: Use MiniTool MovieMaker
MiniTool MovieMaker is an easy-to-use and feature-rich video editor designed to help everyone, especially entry-level users, create videos with ease. With an intuitive interface and drag-and-drop functionality, the software is ideal for beginners to start their journey into video production.
MiniTool MovieMaker is equipped with all the basic editing tools, such as trimming, splitting, rotating, and speed adjustment. It’s also my favorite tool for cropping videos and changing the aspect ratio, because the application supports common aspect ratios, such as 16:9, 9:16, 4:3, and 1:1. Therefore, you can adjust the video aspect ratios to fit platforms like YouTube, TikTok, and Instagram.
MiniTool MovieMaker also provides a large library of filters, effects, transitions, motion effects, text templates, and stickers to enhance your footage. You can layer multiple resources on the timeline thanks to its multi-track timeline, which allows for handling complex projects, such as creating picture-in-picture effects.
Moreover, MiniTool MovieMaker can edit 4K videos smoothly and supports exporting videos up to 4K resolution without watermarks.
How to edit a face in a video using MiniTool MovieMaker? Here’s the guide.
Step 1: Download and Install
To get started, click the button below to download the video face editor and install the software on your computer.
MiniTool MovieMakerClick to Download100%Clean & Safe
Step 2: Add Your Video
After installing the software, open it and close the pop-up promotion to access the main user interface. Next, click on the Import Media Files area to launch File Explorer. Find your desired video file and upload it to MiniTool MovieMaker.

Step 3: Edit the Face in the Video
Drag and drop the video to the timeline to begin editing. Then, go to Effects at the top menu and choose AR Stickers from the left sidebar, and you’ll see the following options:
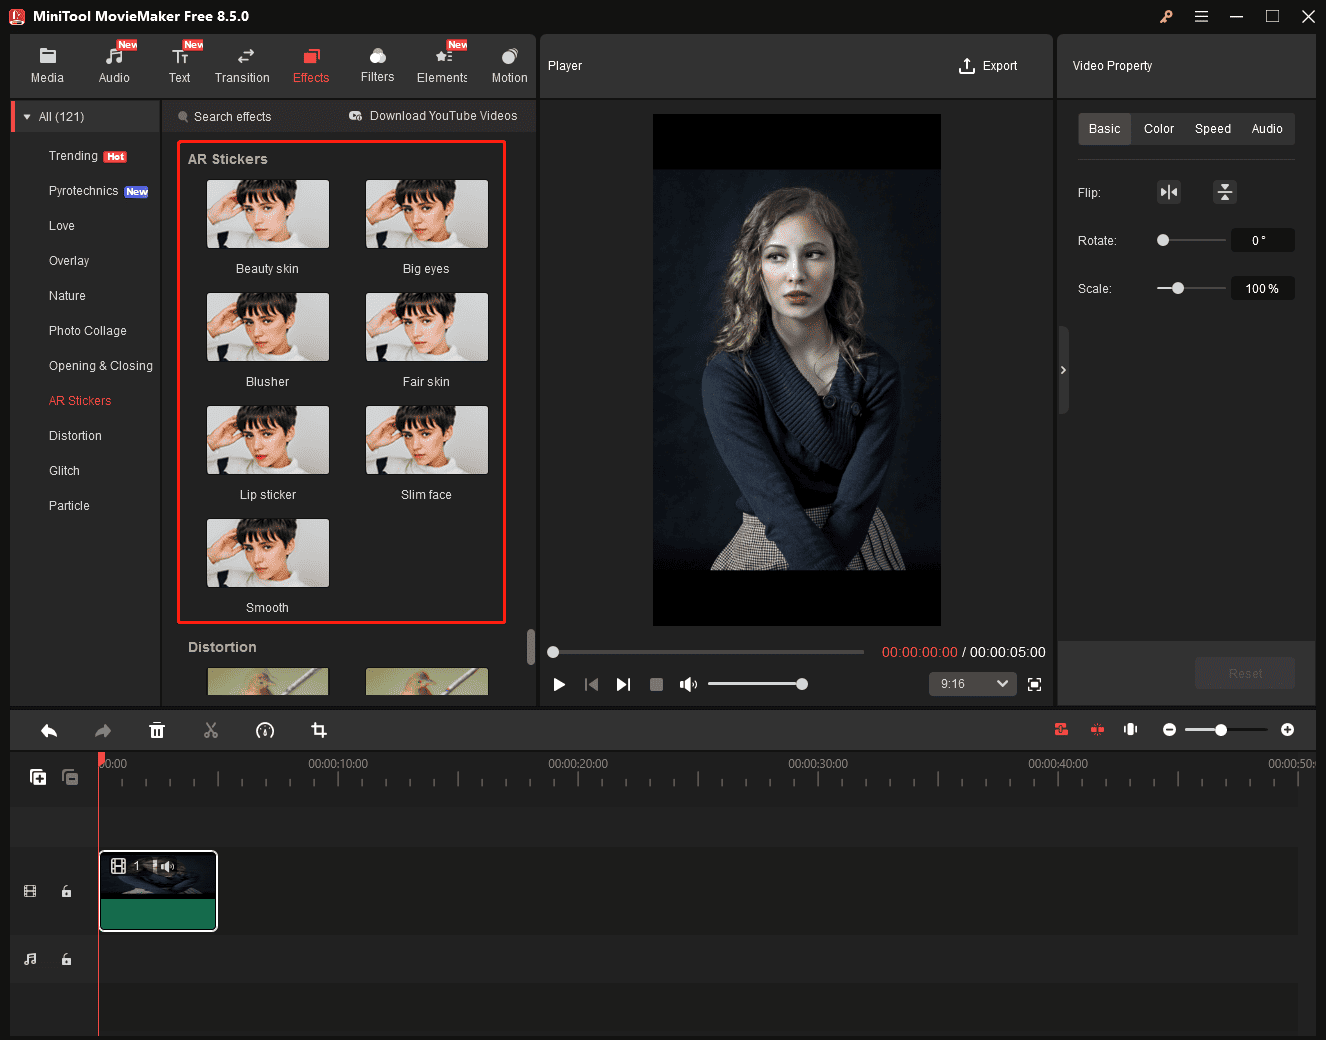
- Betufy skin: makes skin look brighter and more luminous.
- Big eyes: widens eyes and eyebrows to enhance visual appeal.
- Blusher: add a soft blush to the cheeks to create a healthy and youthful glow.
- Fair skin: makes the skin look fairer and more radiant.
- Lip sticker: render the lip makeup to brighten up your whole look
- Slim face: make the face look smaller.
- Smooth: makes the skin smoother and more even-toned.
To add an effect, click the Download icon to download it, and click the + icon to add the effect to your clip on the timeline. Then, the software will automatically detect a human face in the video and apply the selected beauty filter. You can add up to 8 AR stickers to the same video to enhance its appearance.
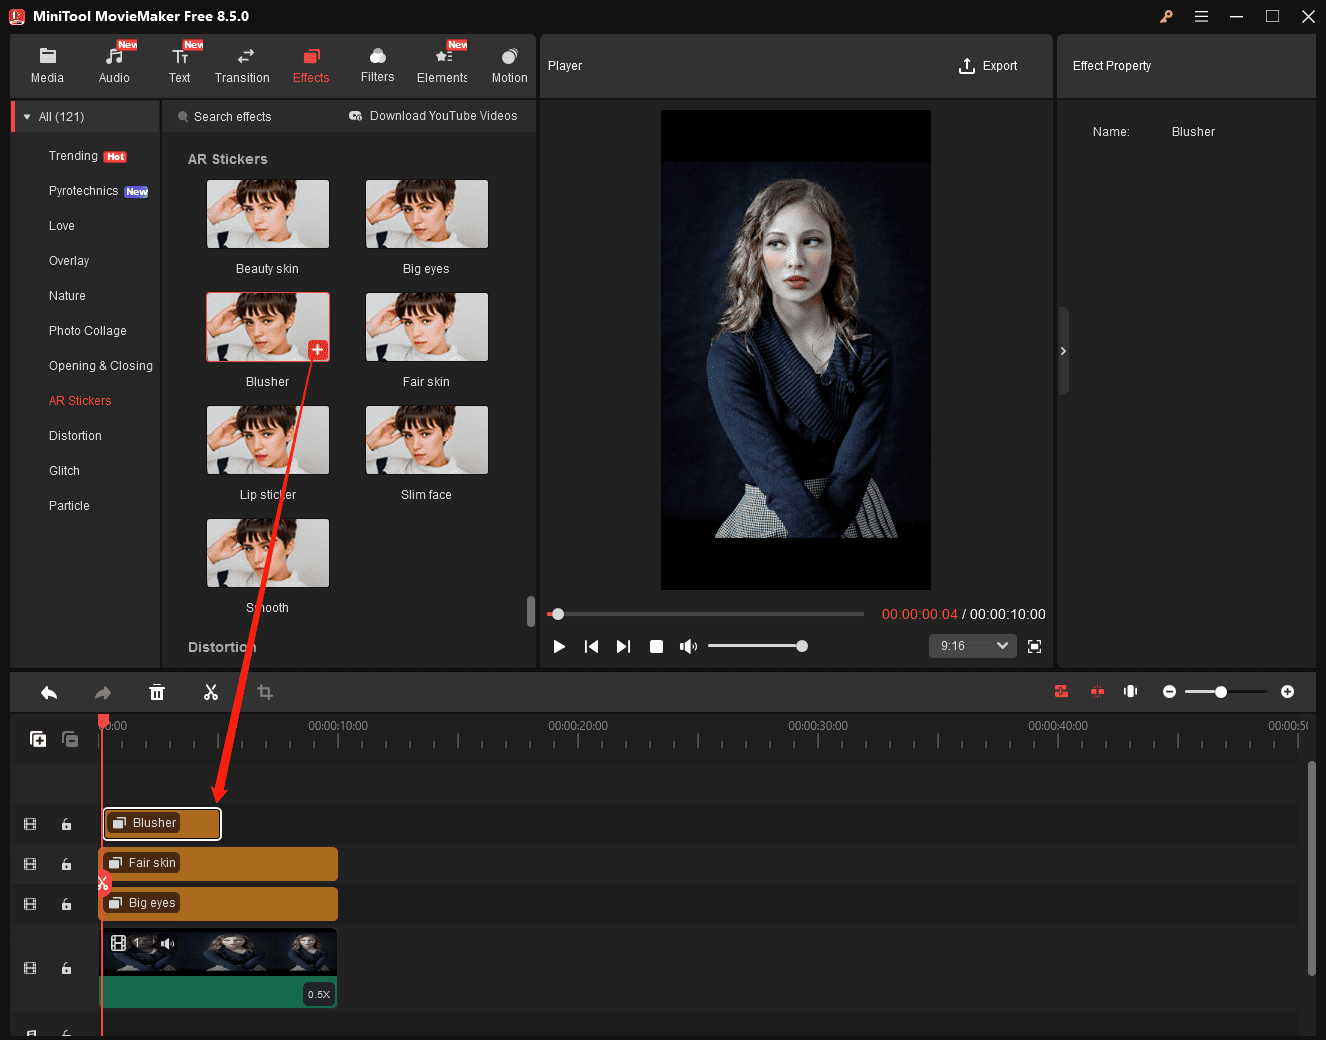
You can then drag either the edge of the effect on the timeline to adjust its duration. However, these effects can only be applied to still faces.
Step 4: Export Your Video
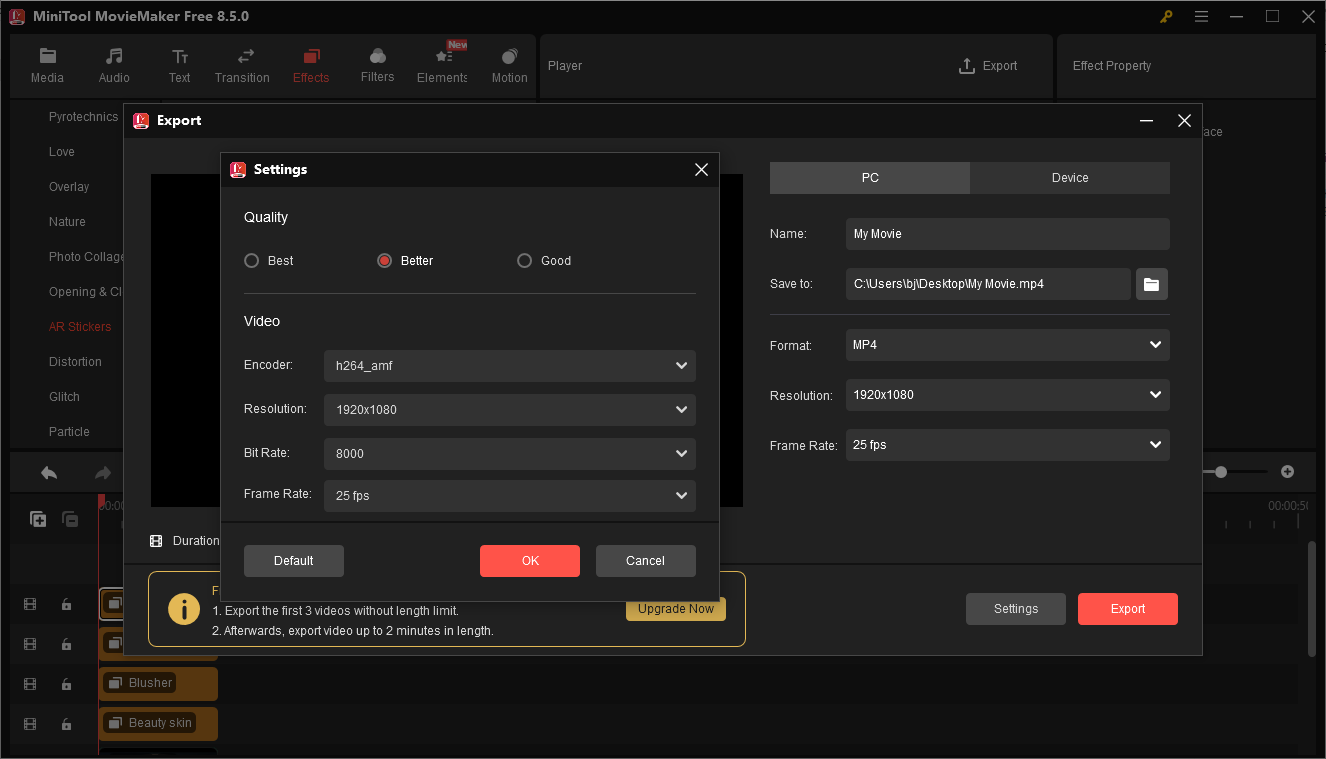
Open the Export window by clicking the Export option in the upper-right corner. Next, you can
Change the file name, output format, resolution, and frame rate. You can also click Settings to adjust the video quality and bitrate. Finally, click Export at the bottom to start exporting your video.
Method 2: Use CapCut
CapCut is a popular video editor for social media content creators because of its ease of use and powerful features. If you need a video editor for facial enhancements, CapCut is also a great option. It offers multiple retouching tools, supports face reshaping, provides virtual makeup options, and can even track facial movements.
However, not all face beauty tools are free to use, and some require a paid subscription.
Here’s how to edit face in video using CapCut.
Step 1: Get the Video Face Editor
Navigate to CapCut’s official website or the Microsoft Store to download and install the program on your computer.
Step 2: Import Your Video
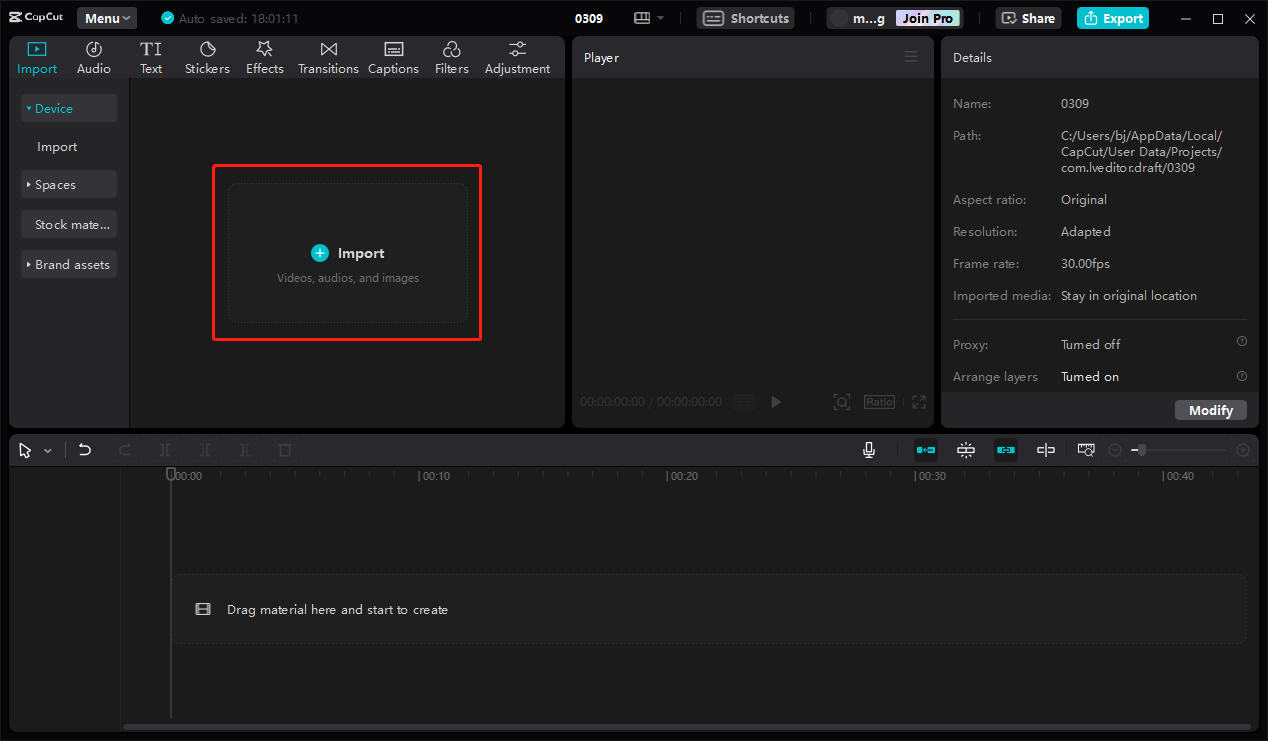
Run the software and click the + Create project option at the top to enter the main interface. Click Import to add your video and drag it to the timeline.
Step 3: Retouch the Face
Click the video on the timeline to open the editing panel on the right side. Then, go to the Retouch tab to access the face editing tools and check the Retouch box.
You can then drag the sliders to even out skin tone, make the skin smoother, minimize smile lines, enhance the eyes, reduce dark circles under the eyes, lighten overall skin tone, whiten teeth, and change the skin color tone.
However, the software lacks a reset option to let you cancel all changes simultaneously. If you’re not satisfied with the effect, you have to reset them to the default setting one by one.
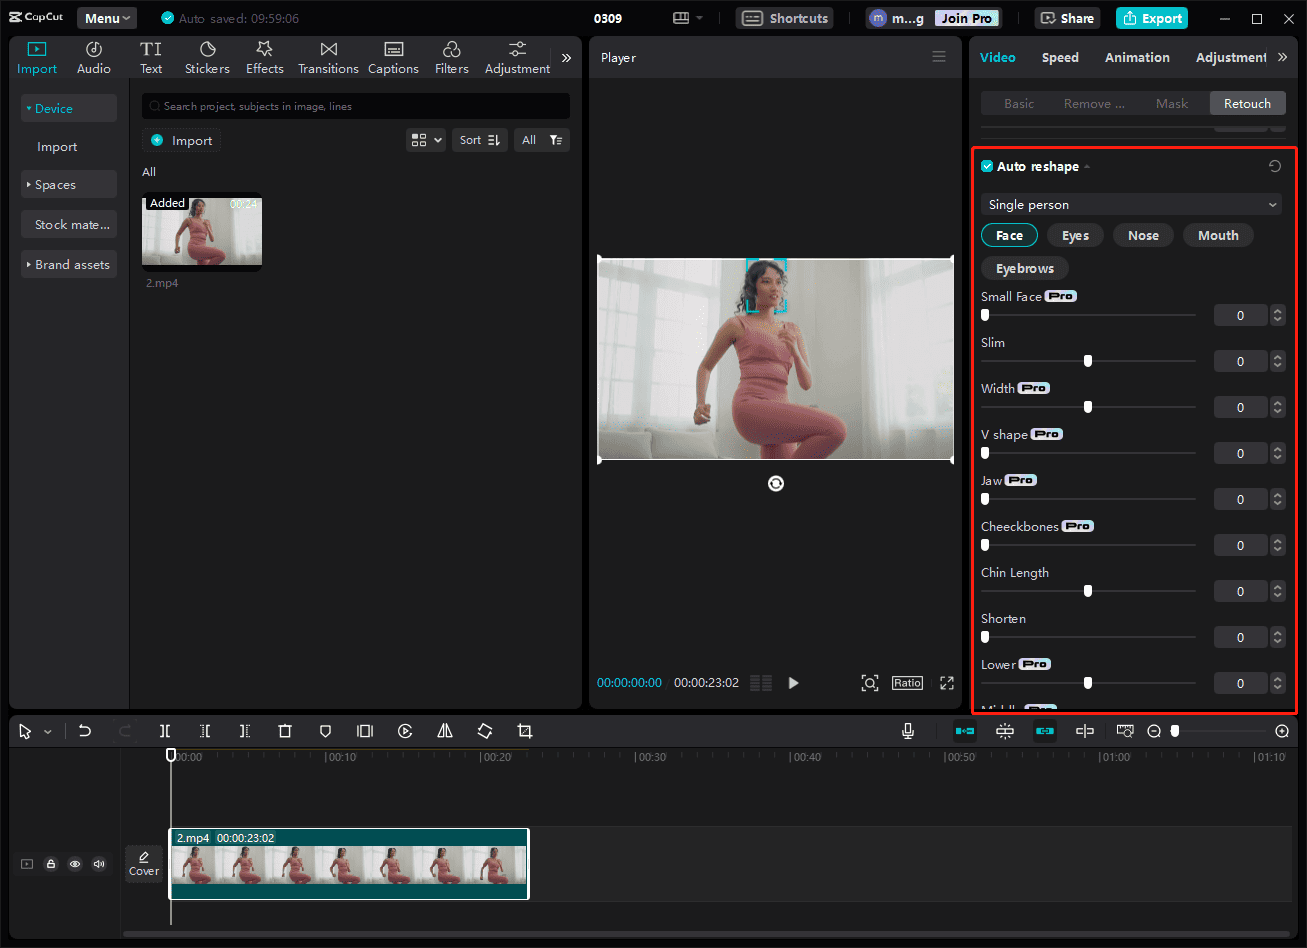
Moreover, CapCut can auto-reshape other facial features, including the face, eyes, nose, mouth, and eyebrows. Scroll down and select the Auto reshape option. You can then edit them individually with multiple options for fine features.
Besides, you can check the Makeup option to apply lipstick, eyeshadow, blush, and eyeliner, and other makeup effects to faces in videos, thus achieving a polished look.
Step 4: Save Your Video
Click Export in the upper-right corner, adjust the video settings, such as frame, resolution, codec, and bitrate, and click Export again to begin exporting the video.

Conclusion
How to edit your face in videos? This post offers two simple methods. Follow the steps above to edit and enhance your face in the video with ease.
Finally, if you encounter any difficulties while using MiniTool MovieMaker, please contact our support team at [email protected] for help.
About The Author

Position: Columnist
Cora is a tech writer specializing in digital media workflows, with over six years of hands-on experience in video post-production, media transcoding, and screen capture. Her writing is always clear and practical. Cora also produces in-depth software reviews for users across skill levels to help them find the right tool and enjoy video editing.
User Comments :