People enjoy sharing photos on Facebook. And creating an album on Facebook is a wonderful method to record and share the memories of your families, friends, and more. But how to create an album on Facebook? Luckily, this post will teach you how to how to create a photo album on Facebook on the computer and phone.
Except for photos, people love sharing videos and text stories on Facebook. Want to make an attractive video or photo slideshow for Facebook? Try the best free video editor – MiniTool MovieMaker.
How to Create an Album on Facebook on the Computer
Facebook is an American social media and social networking service available on PC, phones, and tablets. Firstly, let’s learn how to create an album on Facebook on the computer.
Step 1. On a web browser, enter facebook.com to visit the Facebook website and sign in.
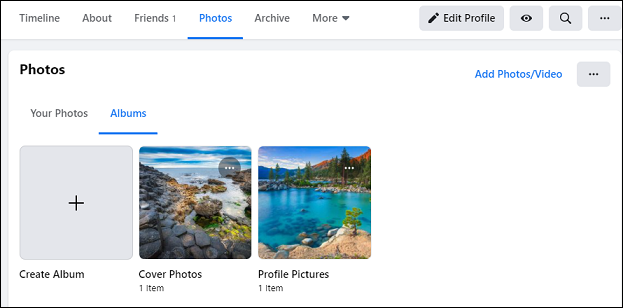
Step 2. Go to your profile page, click the Photos below the cover photo.
Step 3. Select the Albums > Create Album.
Step 4. Finish the Select Privacy dialog to change who can see your album. If you want to make photos private on Facebook, just click the Only Me.

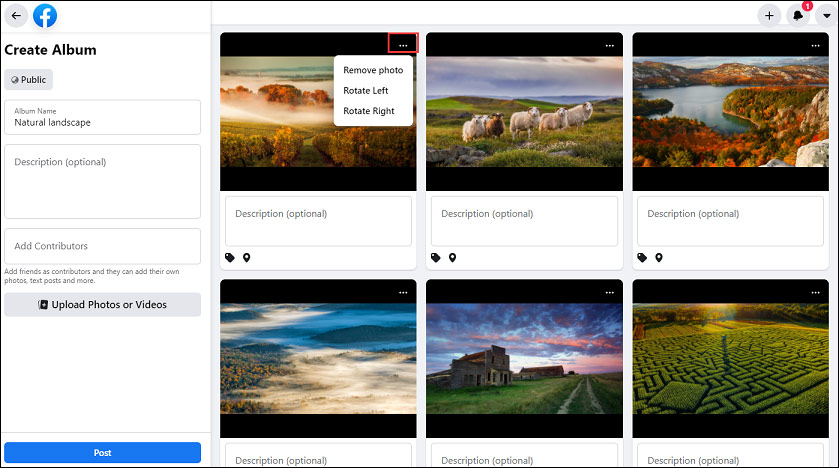
Step 5. Type the album name and description. If you want to your friends add their pictures, text posts and more, just enter friends’ mane in the Add Contributors box.
Step 6. After completing these settings, tap on the Upload Photos or Videos to make the computer’s file browser display.
Step 7. Navigate to the folder containing the target images, select the images, and click the Open to upload them to Facebook.
Step 8. Click the three-dot icon to remove the photo, or rotate the photo to the left or right.
Step 9. Click anywhere on the image to tag your friends. If necessary, add some description of this picture.
Step 10. Tap the Location button to tag a location for this whole album.
Step 11. Click the Post to create and share this album on Facebook.
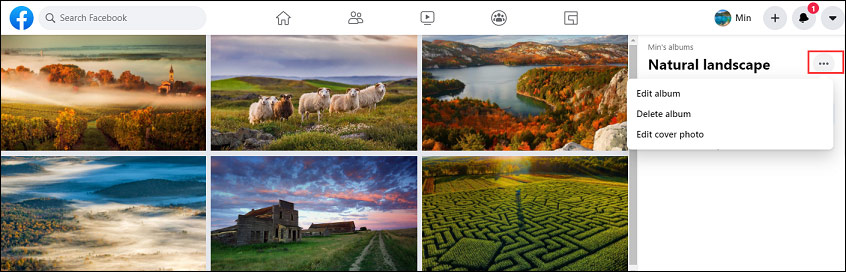
Step 12. Customize the album. Click the three-dot and choose from the Edit album, Delete album, and Edit cover photo. If necessary, click the Add Photos/videos to upload more.

How to Create an Album on Facebook on the Phone
The following part will show you how to make an album on Facebook on the phone.
Step 1. Launch Facebook and go to the profile page on your phone.
Step 2. Hit the Photos to choose pictures from the camera roll and other folders, and then click the Next.
Step 3. Click the +Album button and tap the Create New Album to make an album for your chosen photos.
Step 4. Name this album and add a description.
Step 5. Finish the privacy settings to control who can see your album. And then add contributors.
Step 6. Click the Create to make a new album.
Step 7. Tap the Post to share this album on Facebook.

Conclusion
This post offers 2 solutions on how to create an album on Facebook. Follow these steps and try to create a new album of your recent images, and then share this album with your friends.
About The Author

Position: Columnist
Cora is a tech writer specializing in digital media workflows, with over six years of hands-on experience in video post-production, media transcoding, and screen capture. Her writing is always clear and practical. Cora also produces in-depth software reviews for users across skill levels to help them find the right tool and enjoy video editing.
User Comments :