Overlaying image to GIF can add your own logo, watermark, and family photos to, which can make a GIF more complete. It’s also a solution to avoid redoing a new GIF when you forget to insert one important picture. If you want to make an interesting GIF using pictures or convert your video to GIF, MiniTool MovieMaker can help you.
Add Image to GIF Online
One solution to add image to GIF is to make full use of the online tools, because of their easy accessibility and no occupying storage in PC. Below are recommended animated GIF makers online.
Kawping
Kawping is an excellent web platform for video, picture and audio editing that also contains many tools to help realize various operations, including adding image to GIF. Being free, simplicity, no watermark, running on multiple platforms are all its great strength. It makes beginners accessible to edit video easily.
In general, it’s very easy-to-use. I will show you how to add image to GIF online.
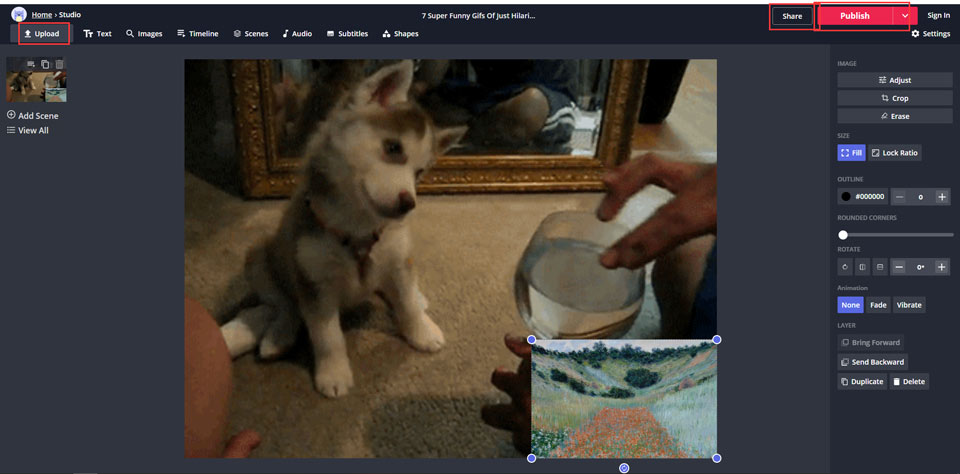
Step 1. Find the Watermark Video tool in Kawping’s website, choose a template and click Get Started.
Step 2. Click the Click to upload button to choose the target GIF file.
Step 3. Click the Upload button to choose the image you want to add, and then set the dimension of the image, and drag or drop the image to the appropriate location. You can also add text as an illustration or watermark.
Step 4. Click the Publishing button to finish it.
Imgflip
As an online tool to help add image to GIF, Imgflip also offers other useful features to edit GIF. It is a specialized animated GIF maker that aims at making GIF and editing GIF, whose clear function buttons make you overlay image to GIF easily.
Step 1. After entering the website, choose the Video to GIF option, and click the Upload Video button to select the GIF or video file.
Step 2. Then click the Add Image button to upload the overlay image or logo. Adjust the size and put it in the right place.
Step 3. Finally, click the Generate GIF to finish it.
Note: The free version of Imgflip has one chance of adding one image every day, and will make your GIF with Imgflip’s watermark. If you don’t like it, you should upgrade to the Pro version in charge.
Add Image to GIF on Desktop
Another solution is to add image to GIF on desktop, using powerful photo editing software – PS. The benefit of desktop software consists in the stability to edit high-quality images. So adding image to GIF on desktop’s Photoshop is the best choice.
Photoshop
As the most famous image editing and graphic design application, Photoshop offers many advanced functions for your image editing. However, it’s difficult to learn for freshmen. So let’s focus on how to add image to GIF with Photoshop.
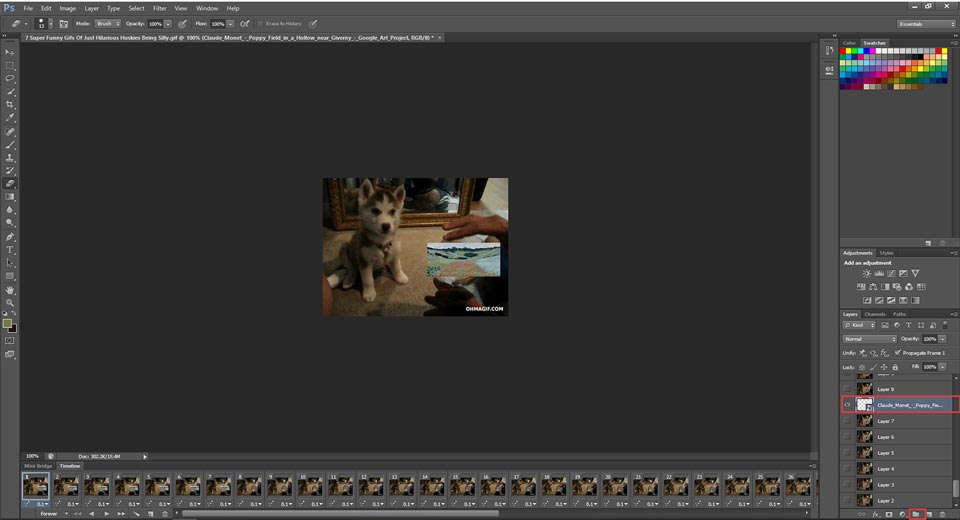
Step 1. Launch the Photoshop software on the desktop.
Step 2. Drag and drop the GIF file into the board. In the timeline that is located at the bottom of the window, a sequence of images would appear in it.
Step 3. On the right side of the window, click the Create New Layer icon and select this new layer using the arrow. Then drag the image you want to overlay into the board, and the image will overlay on the GIF.
Step 4. If you want to set the time at which the image appears, just drag the new layer to the layer X. For example, if you drag it to the layer 22, the previous part will be overlaid by this image.
Step 5. If you finish it, tap the File button and click Save as to save in your computer.
You may also like: 2 Simple Ways to Add GIF Overlay to Your Video and Image
Bottom Line
Have you gotten the hang of the technique of adding image to GIF? Hope you have solved it and explore further about the video/photo/audio editing. If you have any questions or suggestions about it, please let us know via [email protected] or share them in the comments section below.
User Comments :