How to crop a video in Premiere? Adobe Premiere Pro offers you a more complicated way to crop videos by its built-in Crop tool, which may confuse some people. However, in this article, we are going to show you how to crop a video in Premiere.
Want to use Adobe Premiere Pro to remove the black borders by cropping a video? The following are the details on how to crop a video in Premiere. If you think Adobe Premiere Pro is difficult for you to use, iMovie is a nice alternative. Need a professional yet free video editor? Try MiniTool MovieMaker.
Recommend post: How to Crop Video Online – Try These 4 Tools
How to Crop a Video in Premiere
Step 1. Run Adobe Premiere Pro
Double-click the Adobe Premiere Pro icon to launch it on your PC.
Step 2. Import a video project
Click File in the menu bar at the top of the screen, and then select New… to start a new project or choose Open… to open an existing project.
Step 3. Add the video to the timeline
Locate the video clip that you import in the Project panel under the Libraries tab and then drag-and-drop it onto the timeline.
Step 4. Locate the crop effect
Click the video clip on the timeline to highlight it and then navigate to Effects > Video Effects > Transform. After that, drag-and-drop the Crop tool onto the video clip. Alternatively, you can type in Crop in the search bar at the top of the Project panel and press the Enter key to locate it.
Step 5. Crop the video clip
Now, a Video Effects control interface will appear on the left side. Here you can also adjust the borders of the video by adjusting the number values next to Left, Right, Top, and Bottom.
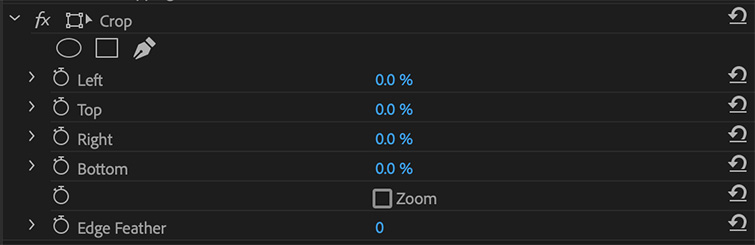
Note: The Left, Right, Top, and Bottom options mean the four directions of the video. Increasing these number values will add a black border around the edges of the video clip. In contrast, decreasing the values will remove the edges of the video clip.
Related article: SOLVED – How to Crop MP4 Quickly
How to Crop a Video in iMovie
Step 1. Launch iMovie on your PC at first.
Step 2. Click the File tab and then select New Movie. After that, click the Import Media button to browse your computer and upload the video you want to crop.
Step 3. Drag-and-drop the video file onto the iMovie timeline.
Step 4. Select the video clip on the timeline and a video-editing window will appear in the right corner.
Step 5. Click the Cropping icon from the toolbar and you will see two crop options.
- Crop to Fill: An adjustable frame will appear over the video clip in the viewer. You can move and resize the frame until you’re satisfied with the result.
- Ken Burns: Two frames, labeled Start and End will appear over the video clip in the viewer. You can make a crop that moves the image through the frame.
Step 6. Once the crop task is finished, click the Apply Crop Adjustment checkmark in the right upper corner to apply the crop.

Bottom Line
Have you mastered how to crop a video in Premiere and iMovie after reading this guide? If you have any questions or suggestions about it, please let us know via [email protected] or share them in the comments section below.