Cartoon elements are fun animated graphics or stickers to enhance your videos. MiniTool MovieMaker offers about 200 different types of animated stickers like arrow, emoji, festival, love & wedding, pets, travel, etc., to decorate your videos. You can click the Elements tab on the top menu to access its library.
MiniTool MovieMakerClick to Download100%Clean & Safe
Add Elements
First of all, let’s see how to put an element on a video.
- Go to the Elements.
- Click the download icon to download the online animated elements. Or right-click on an element and then select Download All to get all the elements.
- Locate the time point on the video or photo clip where you want to add an element on the timeline with the playhead, select the desired element, and click the + button or simply drag the desired element to the track above the target clip.
Edit Elements
After adding elements to videos, you can make some changes to the elements in the Elements Property window.
Change the Duration of the Element
If you want the target element to last longer or shorter, you can customize its duration.
- Click on the target element on the timeline to select it.
- Put your mouse on the start or end of the element.
- When the mouse cursor turns into a double-headed arrow, drag the mouse inwards to shorten the element or outwards to prolong the element. You can extend the target element to make it last the whole video.
This is also the way to trim the start and end of the element.
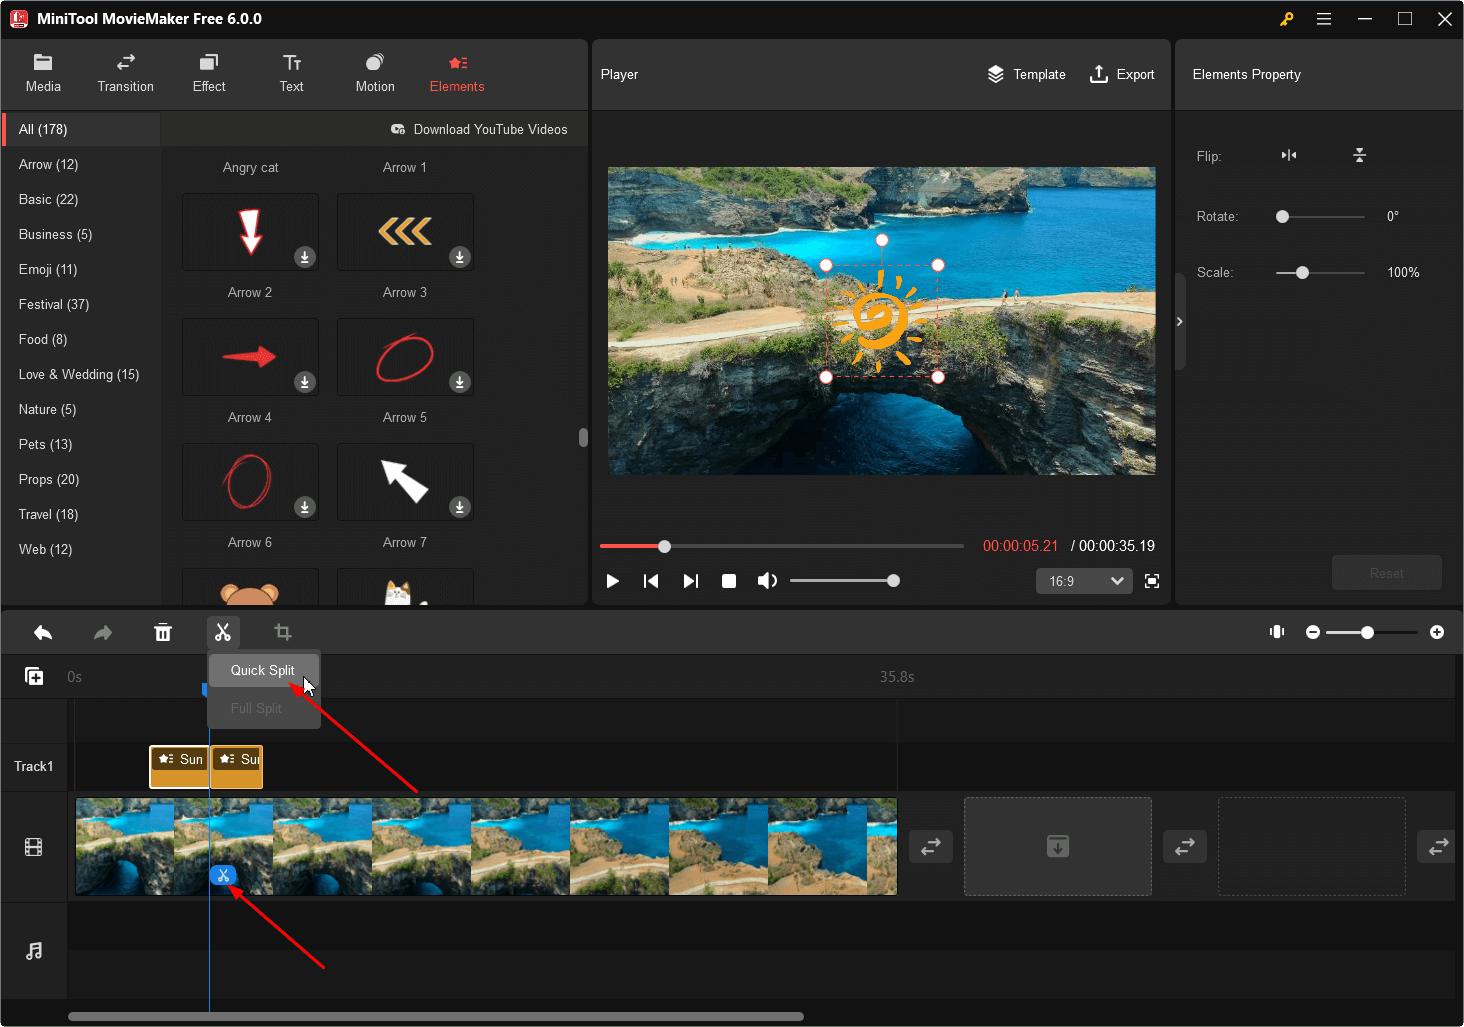
Split the Element
Another way to shorten an element is to split it into two pieces and delete one piece to shorten its duration.
- Click on the element on the timeline to select it.
- Move the playhead to where you’d like to cut the element into two parts.
- Click the scissors icon on the timeline toolbar and choose Quick Split or directly click the scissors icon on the playhead to cut the element into 2 parts.
- Right-click on the unwanted part and select Delete to remove it.
This way can help you make a copy of an element. Of course, you can add the same element twice to get two copies.
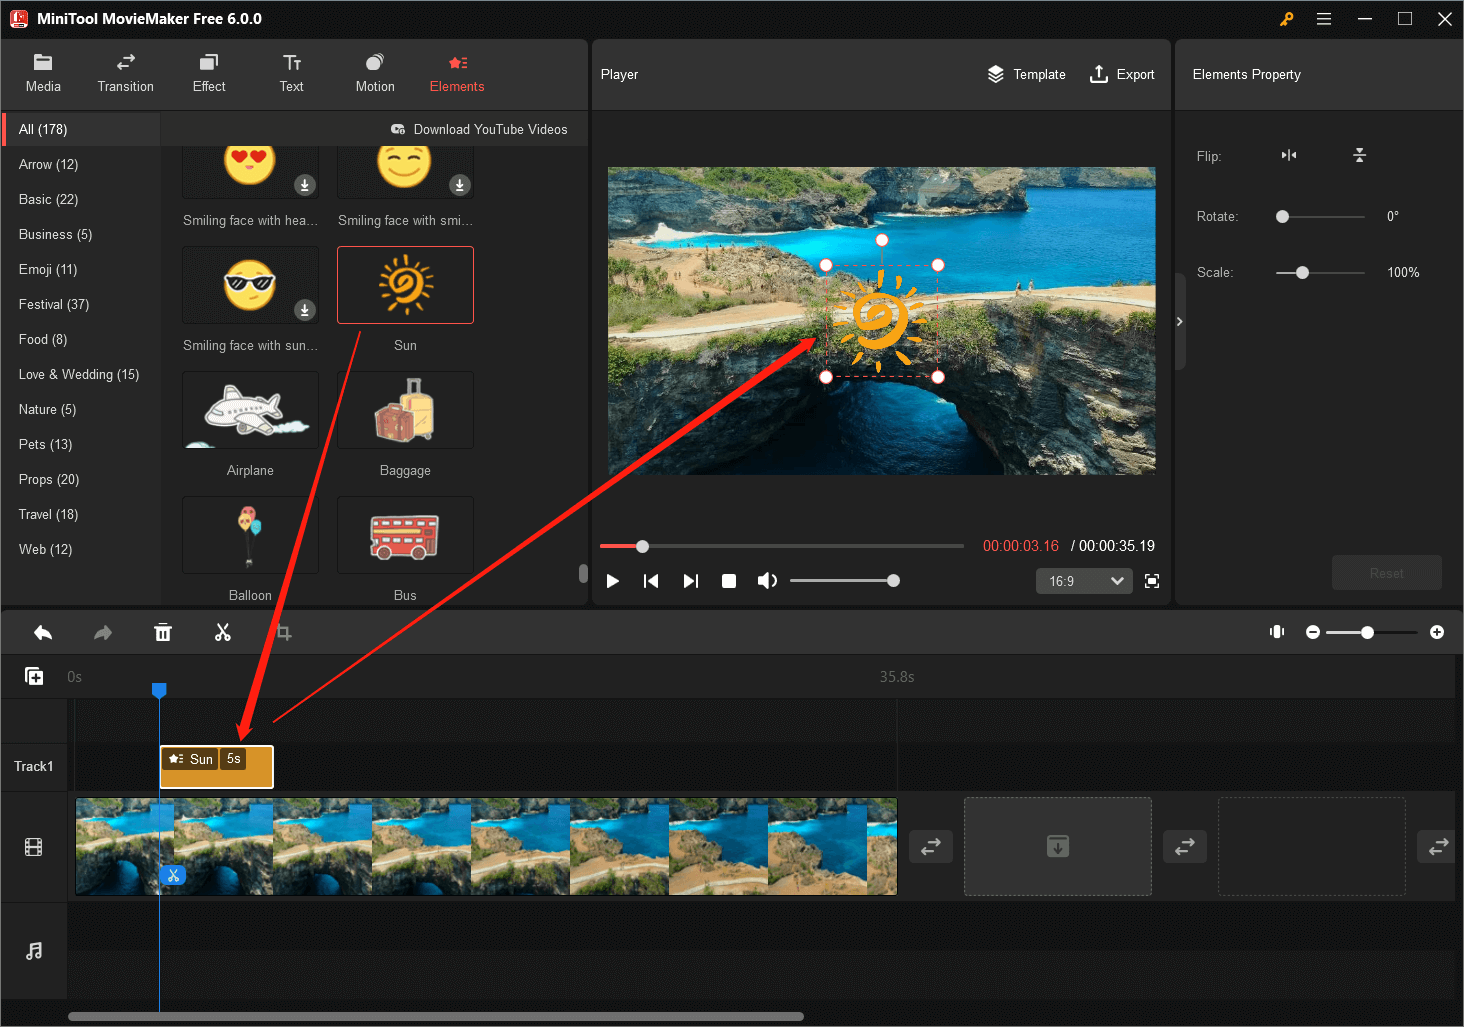
Adjust the Position of the Element
You can put the element in the proper place on the screen to make it match the video content.
- Select the target element on the timeline.
- Put your mouse on the element in the Player section.
- When your mouse turns into a four-headed arrow, drag the element to the place where you want it to appear on the screen.

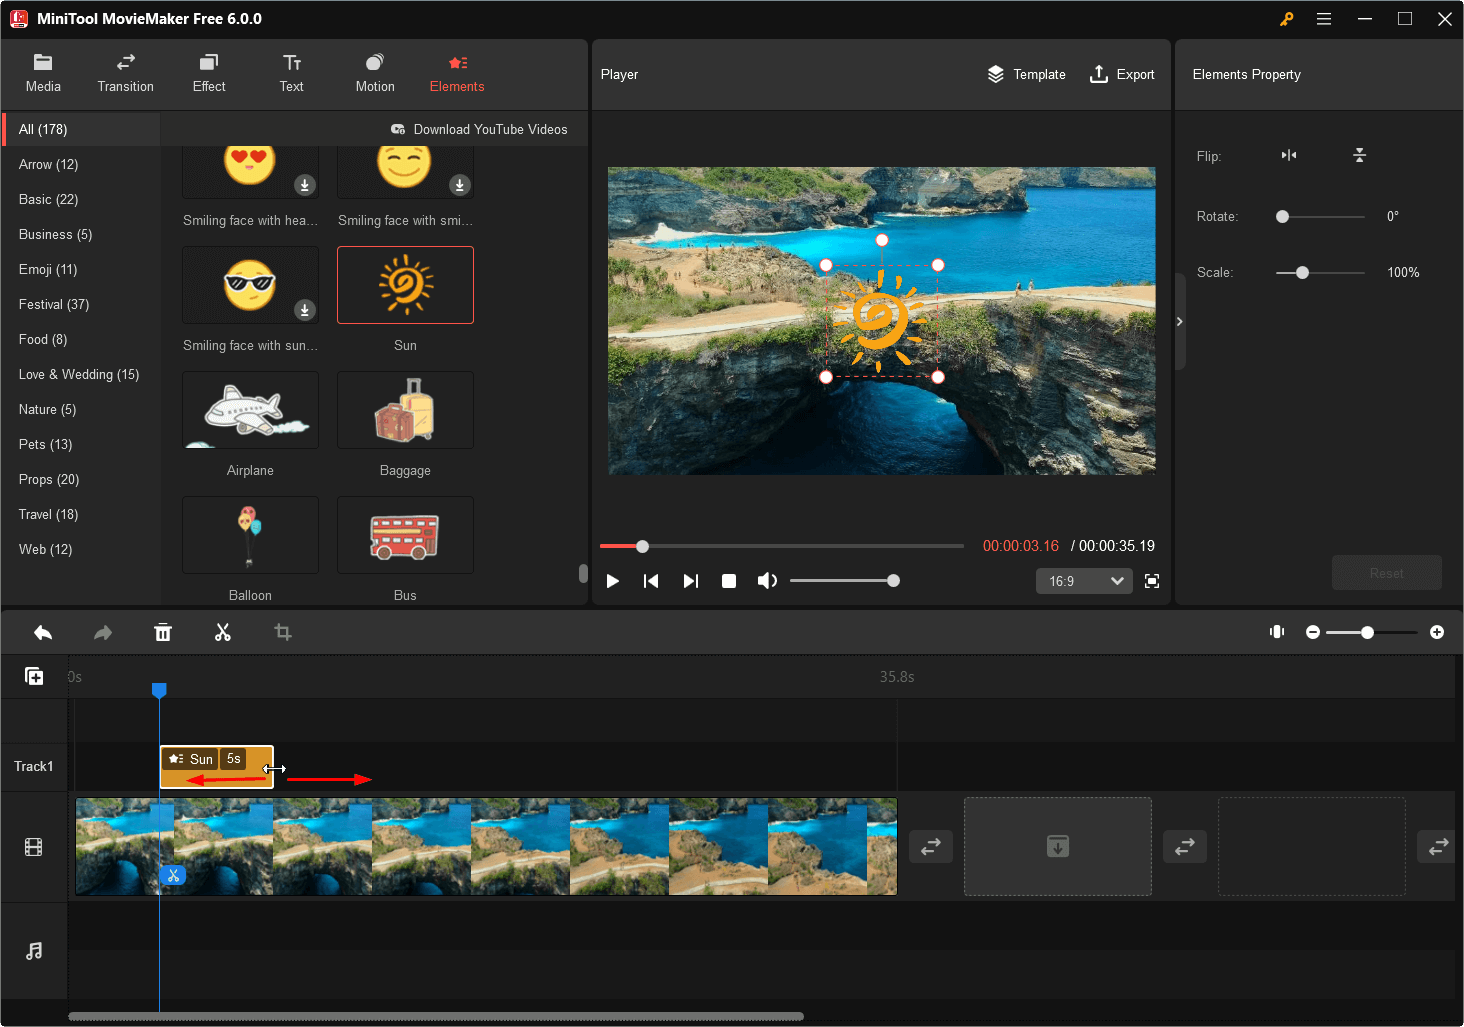
Customize the Size of the Element
Besides, you can change the size of the element to fit it within the screen.
- Locate the element on the timeline and hit it to show it in the preview window.
- Put your mouse on either point of the four directions.
- When your mouse cursor turns into a double-headed arrow, pull it inwards to shrink the element or outwards to extend the element. Or, you can directly pull the Scale slider in the Element Property section to change the element size.

Flip the Element
Moreover, you can flip the element left and right or up and down.
- Click the target element on the timeline.
- Click the icon of Flip Horizontal or Flip Vertical in the Element Property section to flip the element horizontally or vertically.
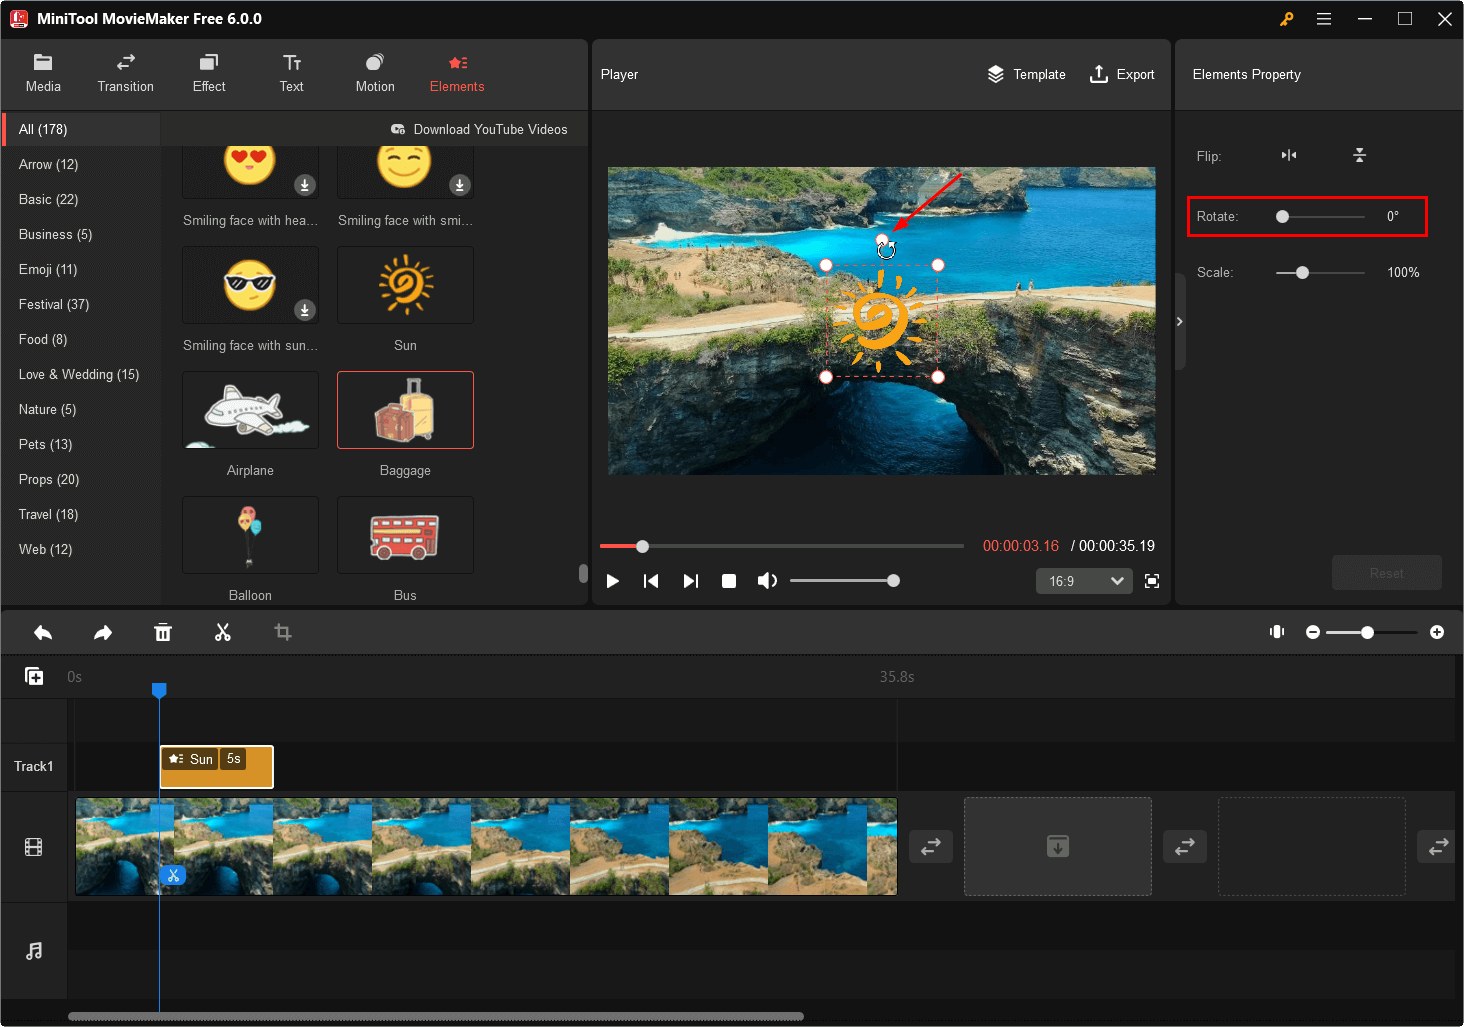
Rotate the Element
Furthermore, you are able to rotate the element to make it in an attractive direction.
- Locate the element and click it.
- Put your mouse on the top point in the preview section. When it turns into a curved arrow, drag your mouse clockwise or counterclockwise to rotate it.
- Or, just move the Rotate slider in the Element Property section to rotate the element by a certain angle (0 – 360 degrees).
Adjust Elements on the Timeline
If you have added multiple elements to the timeline, you can arrange the order of the elements that locate on the same track. Just click on the target element. When the cursor turns into a four-headed arrow, drag and drop the target element to the destination. If there is already an element on the destination, it will be replaced partially or completely. If you don’t want any element to be replaced, just move some elements to spare enough space to hold the target element.
Delete Elements
There are three methods to delete unwanted elements.
- Right-click the element on the timeline and choose Delete from the pop-up menu.
- Select the element on the timeline and click the trash icon on the timeline toolbar.
- Select the element on the timeline and press Delete on the keyboard.

Besides animated elements, you can also decorate your video with transitions, effects, texts, as well as motions with the help of MiniTool MovieMaker.
About The Author

Position: Columnist
Helen Graduated from university in 2014 and started working as a tech editor in the same year. Her articles focus on video creation, editing, and conversion. She also has a good knowledge of disk management and data backup & recovery. Through an in-depth exploration of computer technology, Helen has successfully helped thousands of users solve their annoying problems.