When editing images, I often need to remove the background to make the subject stand out or create a cleaner composition. GIMP is a powerful and free image editing tool that offers several ways to achieve this. In this guide, I will walk through how to remove background in GIMP using four practical methods.

How to Remove Background in GIMP
This section introduces four effective methods, including the Fuzzy Select Tool, Select by Color Tool, Foreground Select Tool, and Paths Tool. Each method works best in different situations, allowing me to choose the most suitable one for my image.
Method 1: Use the Fuzzy Select Tool
The Fuzzy Select Tool is a quick and efficient way to remove background from image in GIMP, particularly for images with solid colors or high contrast. It selects pixels based on color similarity from the clicked area, allowing me to isolate the subject easily.
Step 1: Open the Image
Launch GIMP and import the image I want to edit by clicking File > Open. Then, right-click the image icon on the lower right side of the editor and click add Alpha Channel.
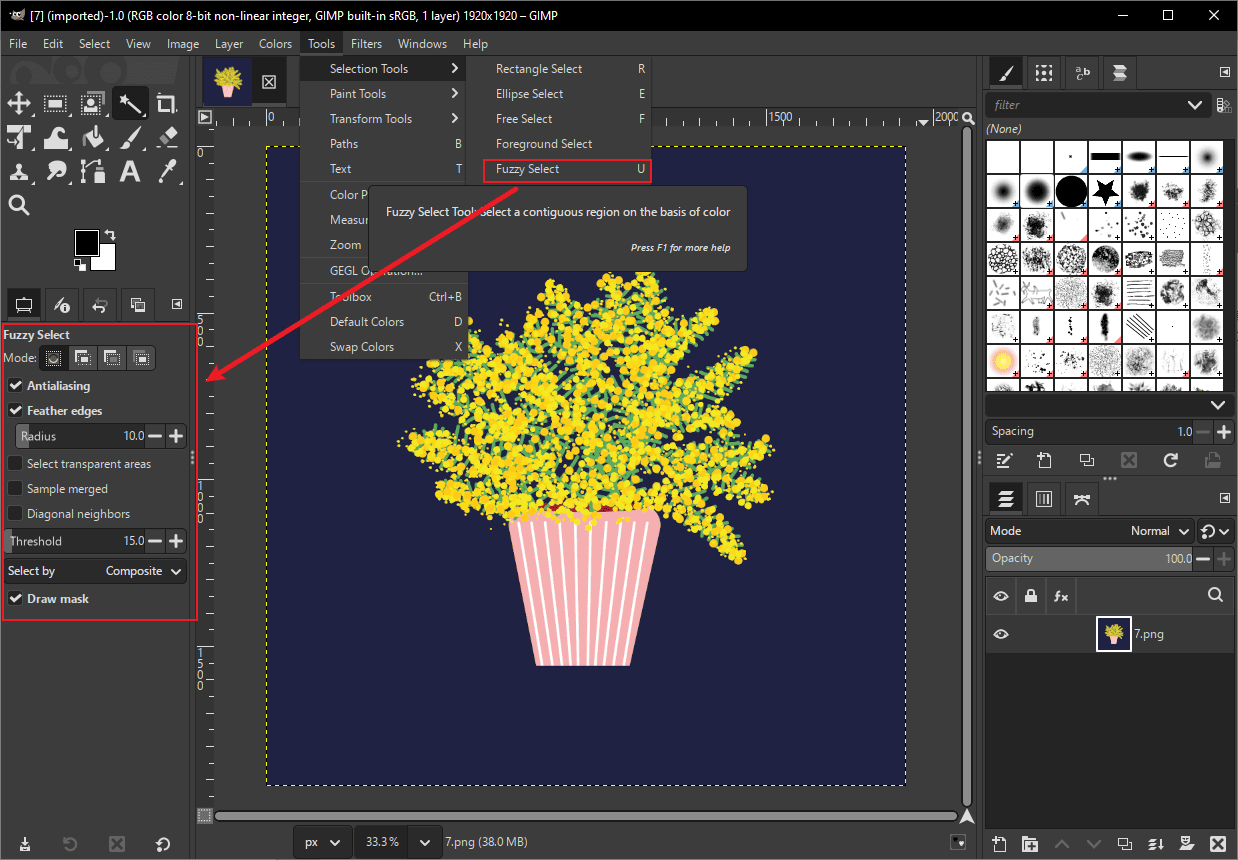
Step 2: Select the Fuzzy Select Tool
Click Tools > Selection Tools > Fuzzy Select to enable it. Then, select Antialiasing and Feather edges in the tool options for smoother edges. Click the Draw mask option.
Step 3: Delete the Background
Click on the background area I want to remove. Then, press the Delete key to remove the selected background.
This method works best for images with simple backgrounds, but it may not be ideal for complex or detailed edges.
Method 2: Use the Select by Color Tool
The Select by Color Tool is similar to the Fuzzy Select Tool, but it selects all areas of the same or similar color across the entire image. This makes it especially useful when the background consists of a consistent color that appears in multiple places.
Step 1: Choose the Select by Color Tool
Select Tools, choose Selection Tools, and click By Color Select.
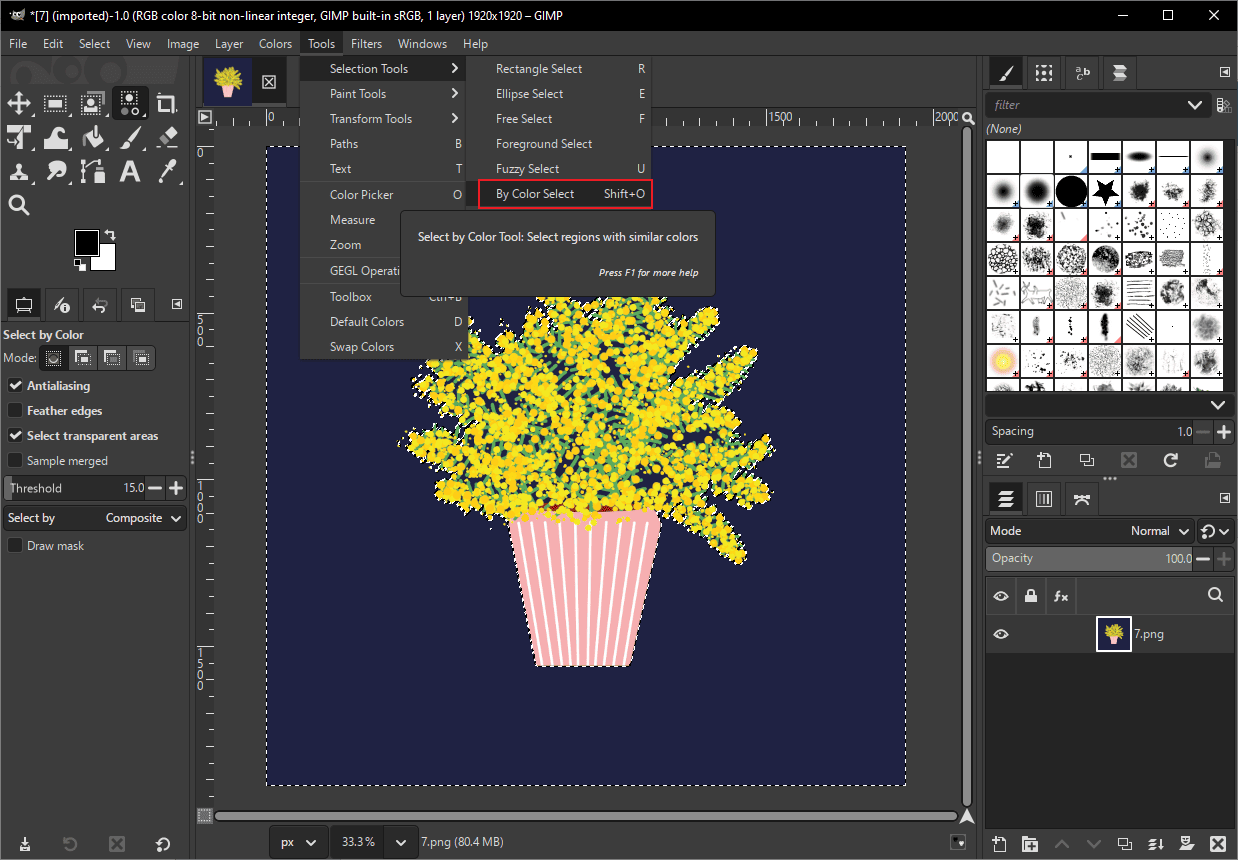
Step 2: Select the Background Color
Click on the background color I want to remove. The tool will automatically select all similar colors throughout the image. Then, press the Delete key to remove the selected areas.
This method works best for images with solid or uniform background colors, but it may accidentally select similar colors within the subject.
Method 3: Use the Foreground Select Tool
The Foreground Select Tool is a more advanced option in GIMP that helps separate the subject from the background based on rough selection and color differences. It works well for images with complex backgrounds or detailed edges.
Step 1: Select the Foreground Select Tool
Click Tools > Selection Tools > Foreground Select to activate it.
Step 2: Outline the Subject
Draw a rough outline around the subject I want to keep. There is no need to be precise, and make sure the entire subject is enclosed. Press Enter to confirm the selection.
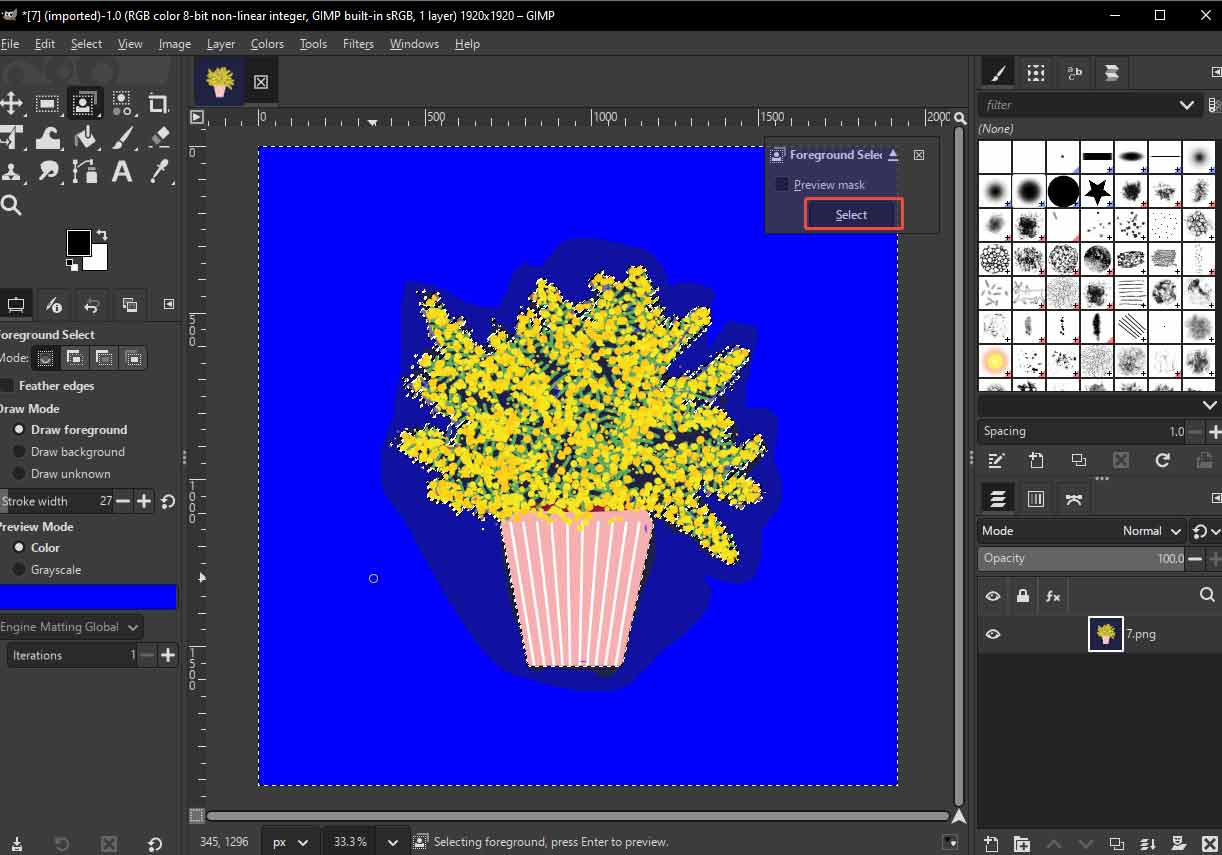
Step 3: Mark the Foreground Area
Move the Stroke width slider to adjust the size of the brush. Then, paint over the subject to help GIMP distinguish the foreground from the background more accurately.
Step 4: Generate the Selection
After marking, click Select to preview the subject.
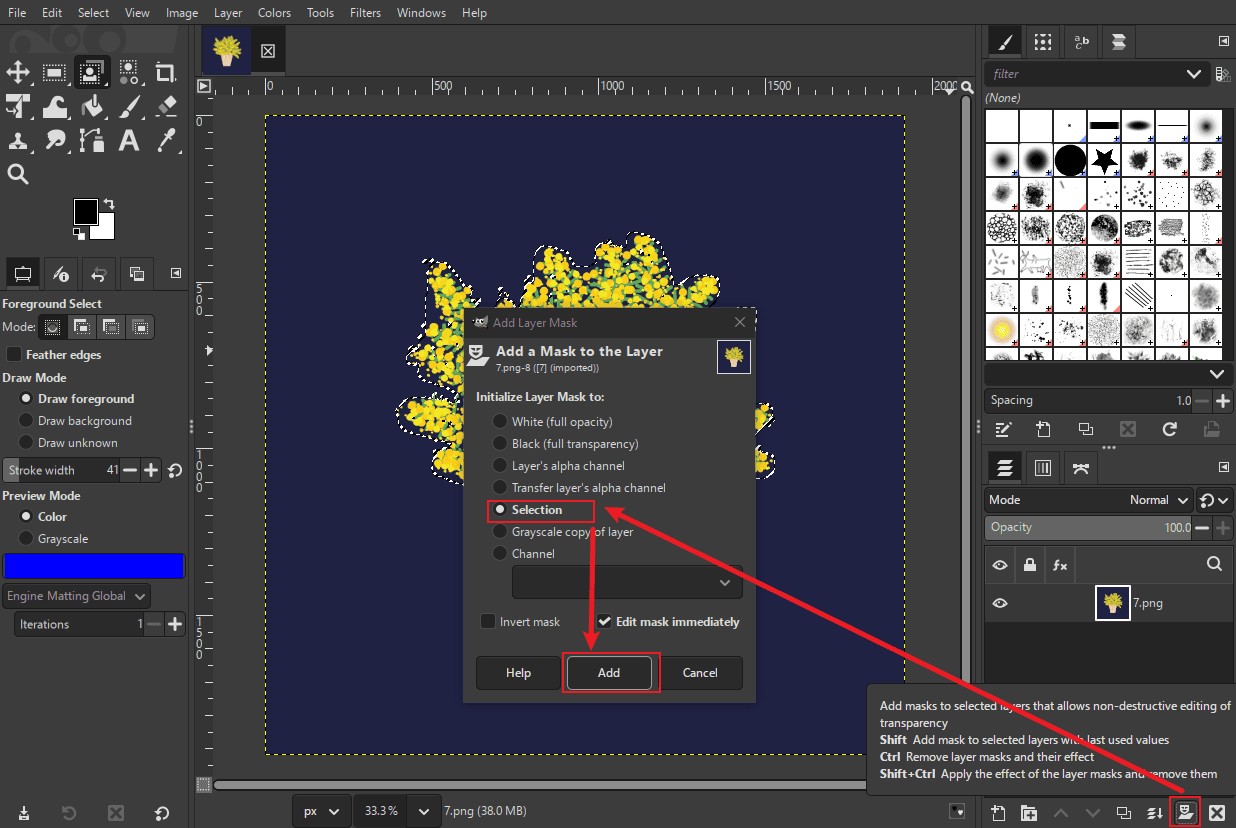
Click the Mask icon in the right corner of the interface, choose Selection, and click Add.
This method is ideal for images with complex backgrounds, but it may require more time and manual adjustment to achieve precise results.
Method 4: Use the Paths Tool
The Paths Tool is the most precise way to remove background from image in GIMP. It allows me to create accurate selections by manually placing anchor points, making it ideal for images with complex shapes or sharp edges.
Step 1: Select the Paths Tool
Click Tools and select Paths, or press B on the keyboard.
Step 2: Create a Path Around the Subject
Click around the edges of the subject to create anchor points. I can click and drag to create curves for smoother edges. Continue outlining until the path fully surrounds the subject. Connect the final point to the starting point to close the path.
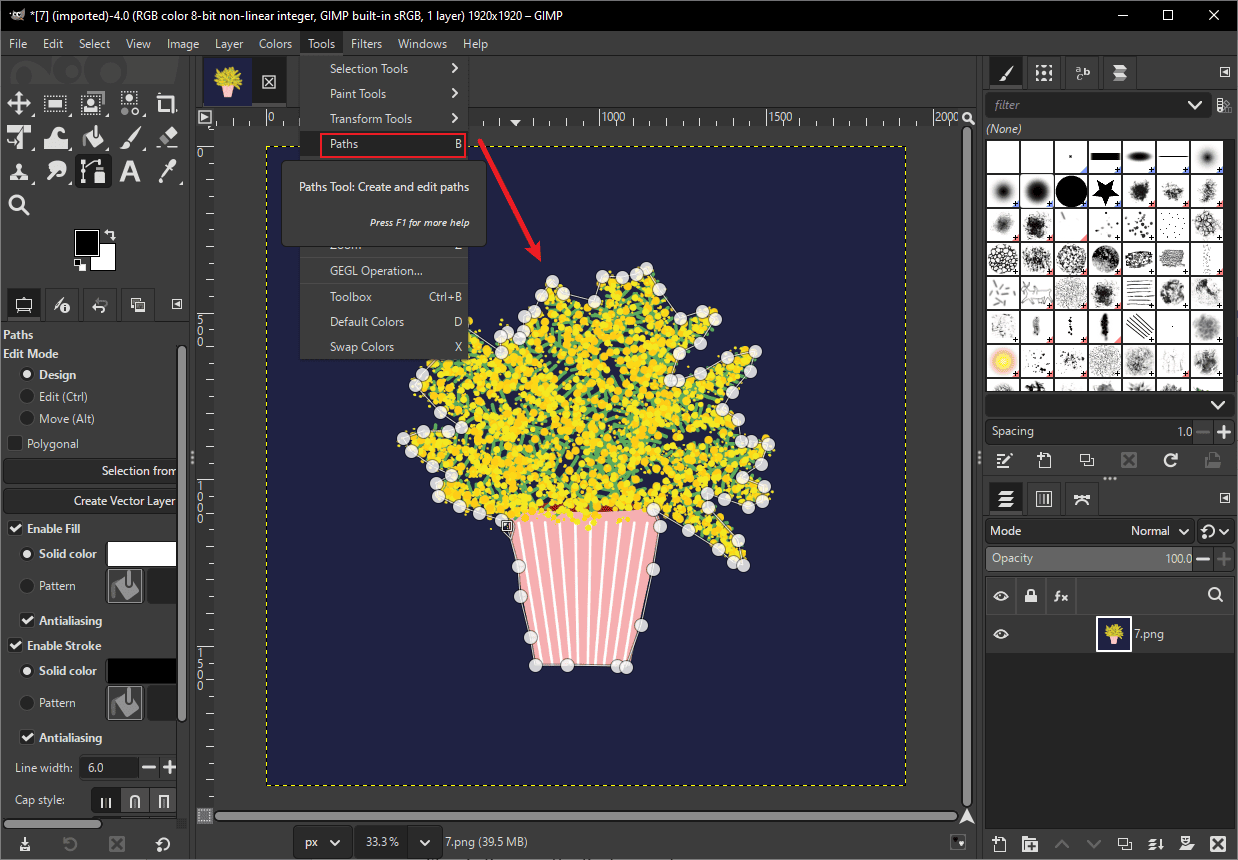
Step 3: Convert the Path to a Selection
Press Enter. Click the Mask icon in the right corner of the interface, choose Selection, and click Add.
This method provides the most accurate results, but it requires more time and patience compared to other tools.
Conclusion
This post explains how to remove background in GIMP using four powerful methods. Choose the tool that best fits your taste and follow the steps above to start creating.
About The Author

Position: Columnist
Alice is a tech writer at MiniTool, specializing in tutorials and guides on video editing and screen recording. She stays up to date with the latest tools and techniques to ensure her content is accurate and easy to follow. By combining hands-on testing with continuous learning, Alice aims to help readers solve tech problems efficiently.
User Comments :