First of all, let’s understand what video frame rate is.
What Is Video Frame Rate
Frame rate usually refers to how often a series of images is captured or displayed. A higher frame rate makes the motion look smoother, while a lower frame rate can be used to create slow-motion effects or a more cinematic appearance.
Common frame rates include 24fps, 30fps, and 60fps. 24fps is the standard for movies, giving a classic cinematic style. 30fps is more lifelike and often used in TV, whereas 60fps is popular for capturing fast-moving sports events and gaming footage.
Higher frame rates produce smoother, clearer motion, especially in fast-paced scenes. However, they also result in larger file sizes, which require more storage space and can put additional strain on your devices.

How to Check Video Frame Rate
Now, let’s see how to check video frame rate on Windows.
Method 1. Check Video Frame Rate Using File Properties
You can check video frame rate in File Properties. Here’s how:
1. Locate the Video on Your Computer
Open the File Explorer and find the video you want to check the frame rate of.
2. Open the Video’s Properties Window
Right-click the video and choose the Properties option.
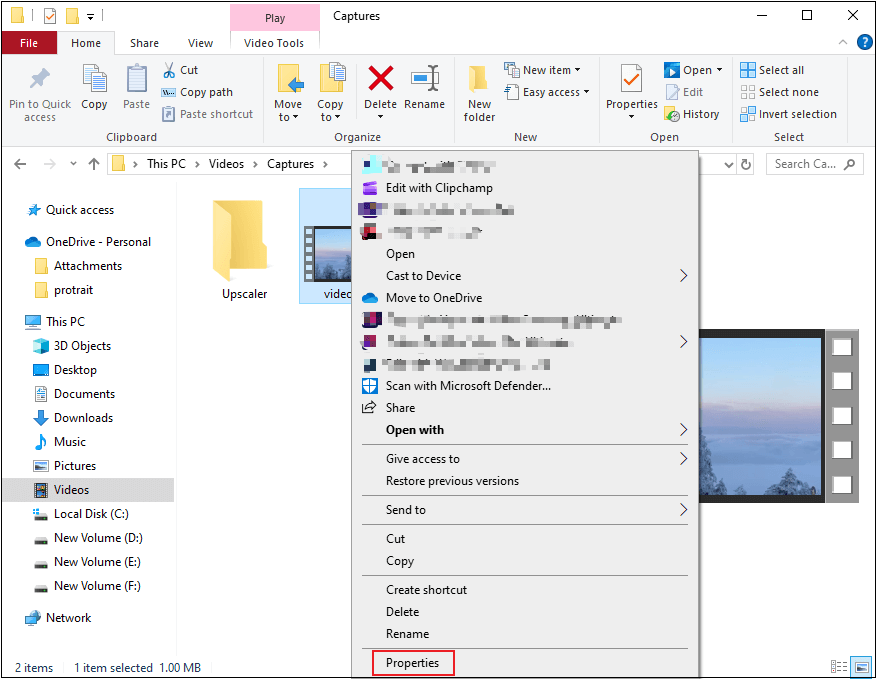
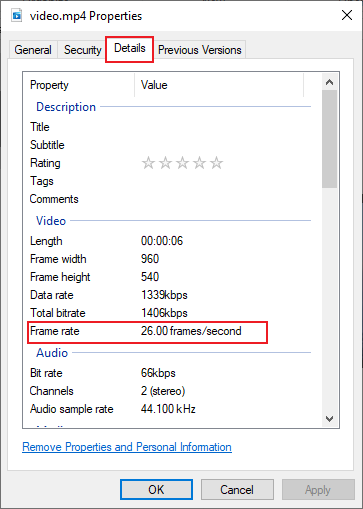
3. Check the Video Frame Rate
Select the Details tab. The frame rate information is in the Video section.
Method 2. Check Video Frame Rate Using Details Pane
Check video frame rate in the Details pane. You can follow the instructions below.
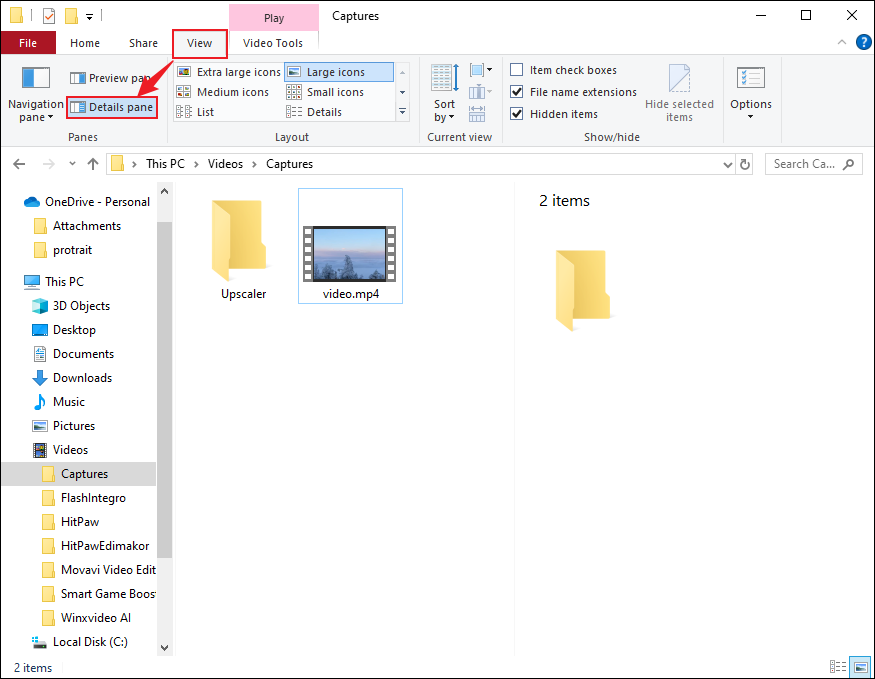
1. Locate the Video
Find the target video in File Explorer.
2. Access the Details Pane
Choose the View option on the top menu and click Details pane.
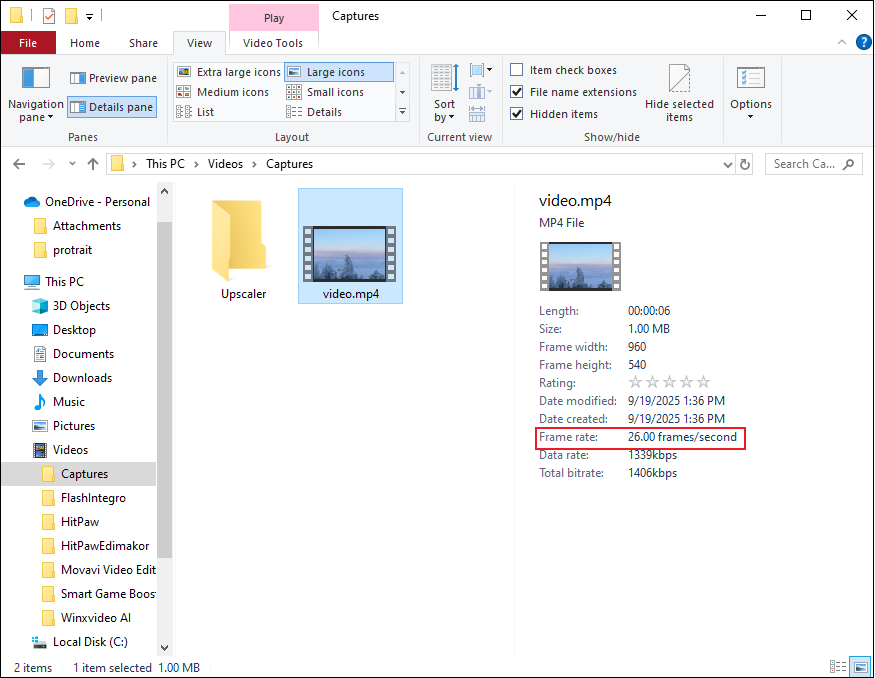
3. Check the Video Frame Rate
Click on the target video. Then, the property information will appear in the right section.
Method 3. Check Video Frame Rate Using VLC Media Player
You can also use a third-party tool to view the video frame rate. VLC Media Player is a free and open-source video player that can play videos in a wide range of formats. Also, it covers video information. To check video frame rate on Windows, you can follow the guides below.
1. Download and install VLC Media Player
Go to VLC Media Player’s official website to download and install this program.
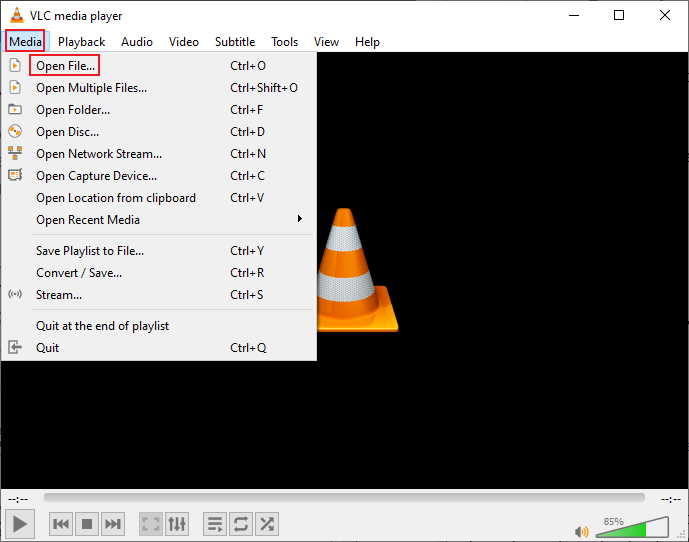
2. Open the Video
Launch VLC, click the Media option in the top menu, and click the Open File… option.
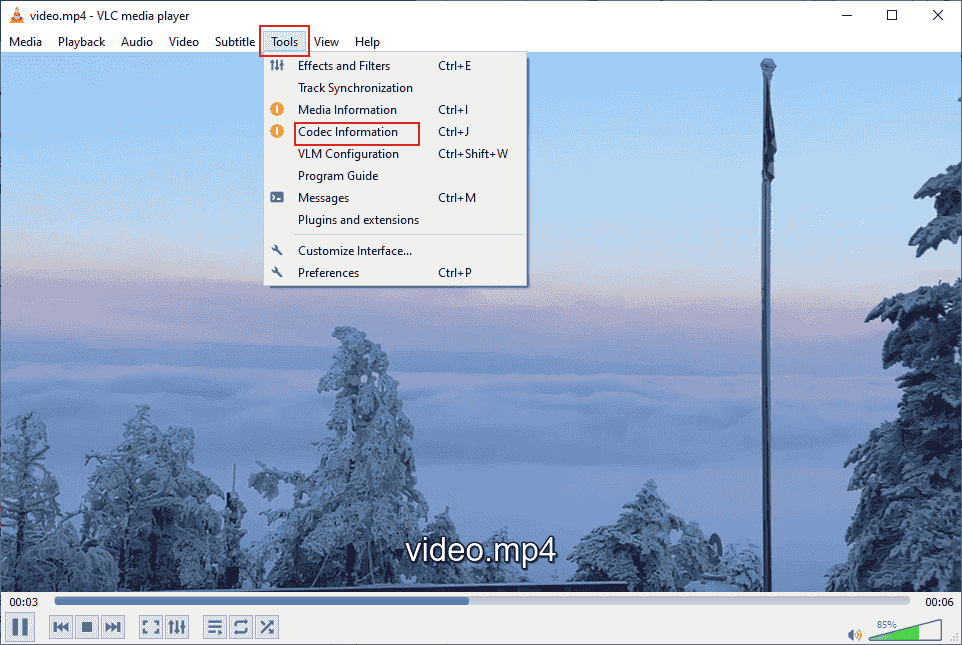
3. Check the Video Frame Rate
Click the Tools option in the top menu and click Codec Information.
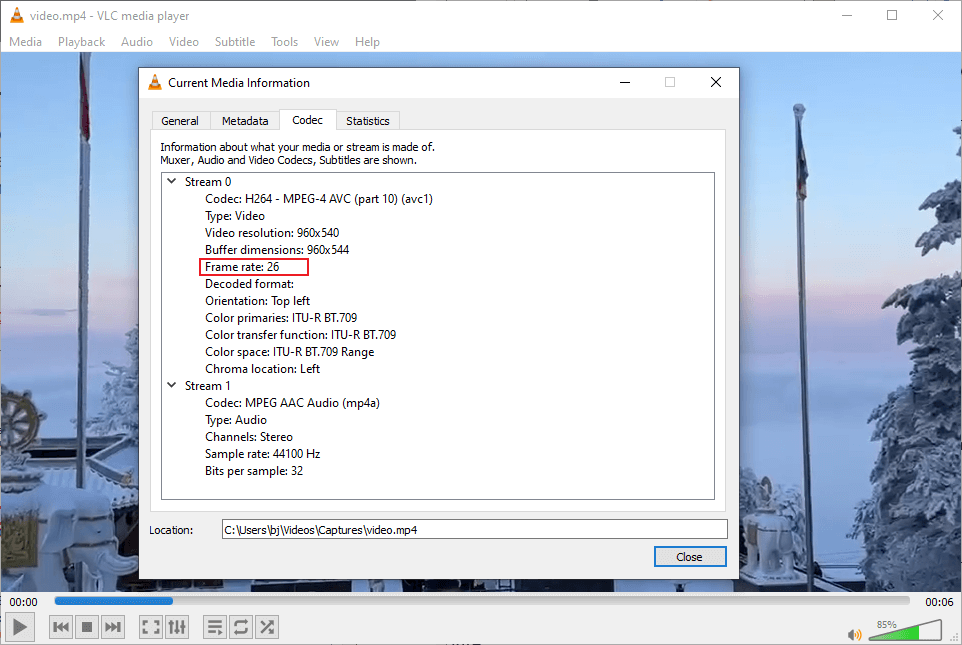
You can find the frame rate information in the Current Media Information window.
Bonus: How to Change Video Frame Rate
If you want to change the video frame rate for different uses, MiniTool MovieMaker can do you a big favor. It is a user-friendly and free video editor that supports multiple frame rates, including 24fps, 25fps, 30fps, and 60fps.
Here are detailed steps on how to change the video frame rate using MiniTool MovieMaker.
1. Download and Install the Software
Click the download button below to download and install MiniTool MovieMaker on your computer.
MiniTool MovieMakerClick to Download100%Clean & Safe
2. Import the Target Video
Launch this program and click New Project to enter the main interface. Next, click the Import Media Files option to add the video. Then, drag it to the timeline.

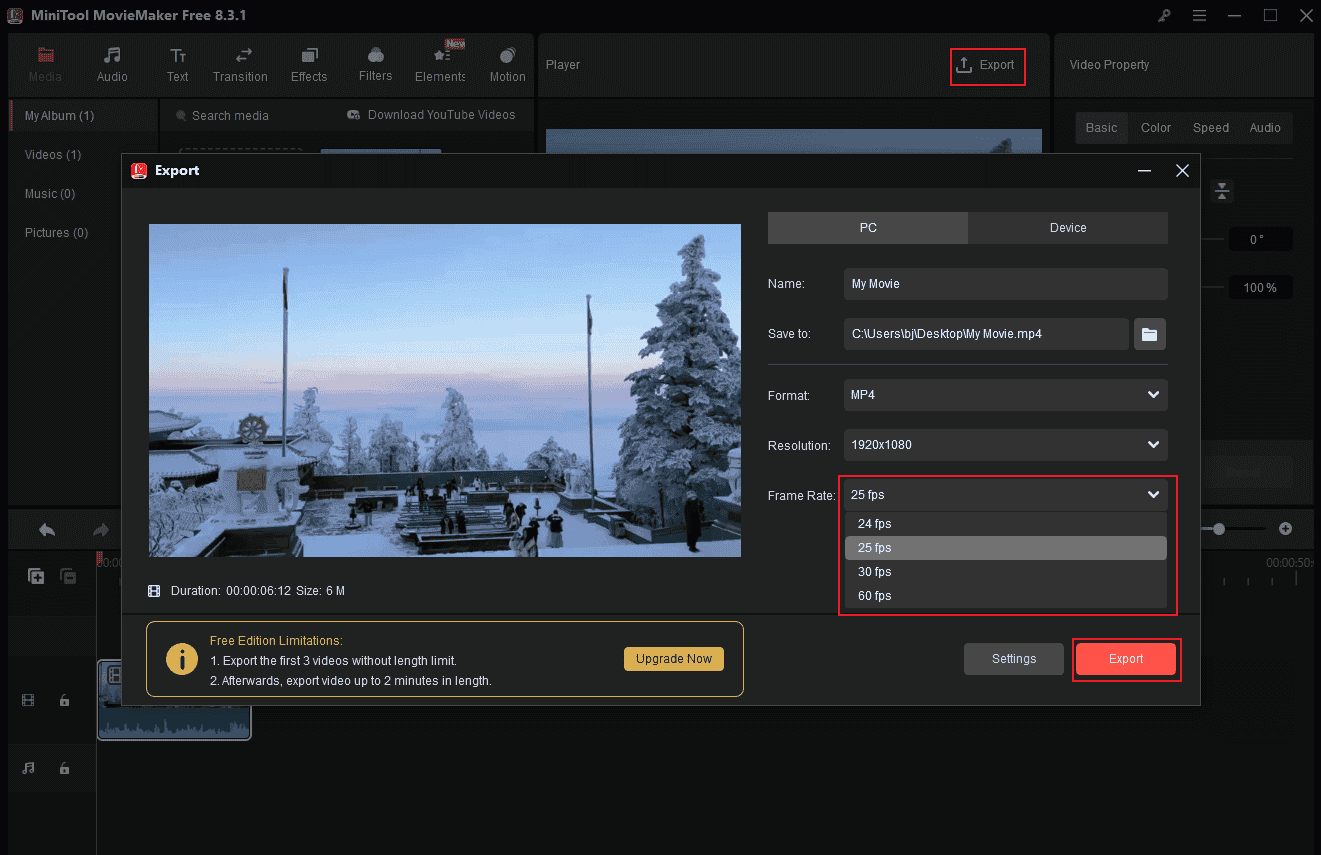
3. Change the Video Frame Rate
Click the Export button at the top right of the Player window. In the Export window, expand the Frame Rate option and choose the desired one. You can also rename the video, choose an output destination, and change format or resolution. After that, click the Export button to save the video.

In Summary
Checking the video frame rate ensures a smooth and great visual effect. How to check video frame rate on Windows PCs? This post offers three useful and easy methods and shows you how to complete the task step by step. Hope you find this article helpful!
User Comments :