Before we explore how to convert image to 300 DPI, let’s understand what DPI is.
What Is DPI
DPI, also known as dots per inch, is a metric for measuring image print resolution, indicating the number of ink dots a printer generates within each linear inch of dimension. A higher DPI contains more ink dots per inch, resulting in sharper and more detailed images, thereby producing higher-quality prints. Lower DPI results in larger ink dots and wider spacing, producing prints that are blurrier or pixelated.
Below are some common DPI parameters and their uses:
- 72 DPI: The standard for digital photographs meant for web or screen display.
- 150 DPI: A print resolution that strikes a balance between file size and clarity.
- 300 DPI: The standard for high-quality prints, for example, photos.
- 600 DPI: Used for exquisite prints that demand a high level of detail and professional printing.
What’s the Difference Between DPI and Resolution
Are DPI and image resolution the same? No, they’re not the same thing. Photo resolution is the total number of pixels in a picture, whereas DPI is a measure of pixel or dot density that is commonly used to characterize the density of pixels in printed or screen images. In addition, image resolutions mainly describe digital images on screens, while DPI is usually used for printing or digital scaling.

How to Convert Image to 300 DPI
Here are three methods to change image DPI to 300.
Method 1. Use Adobe Photoshop
Adobe Photoshop is a powerful tool designed for processing images. It is capable of adjusting image DPI efficiently. Plus, Photoshop can enhance and correct images to your requirements. It is also used to design various logos, web banners, thumbnails, and more. How to convert image to 300 DPI using Adobe Photoshop? You can follow the instructions below.
1. Download and Install Adobe Photoshop
Head to Adobe Photoshop’s official website to install this program on your computer.
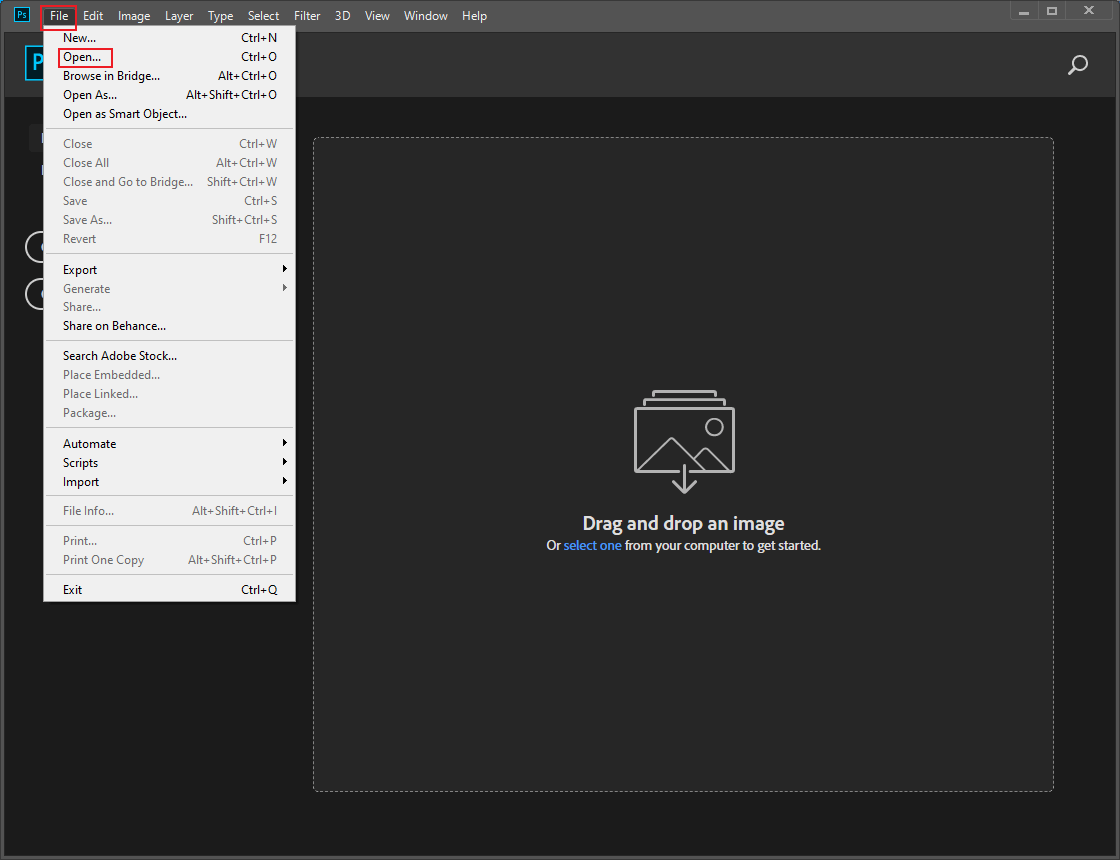
2. Import Your Image
Launch Photoshop, choose the File option on the top menu, and click Open to add the target picture.
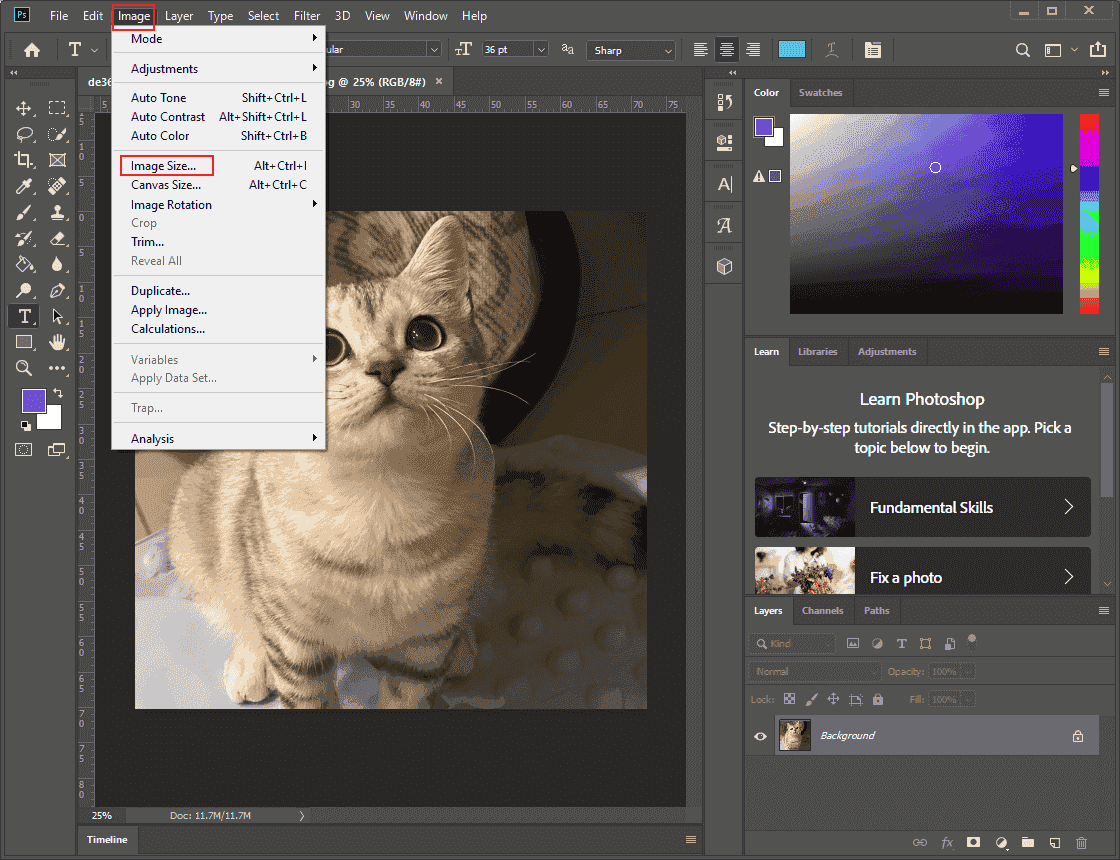
3. Enter the Image Size Section
Click the Image tab in the top menu and choose the Image Size option.
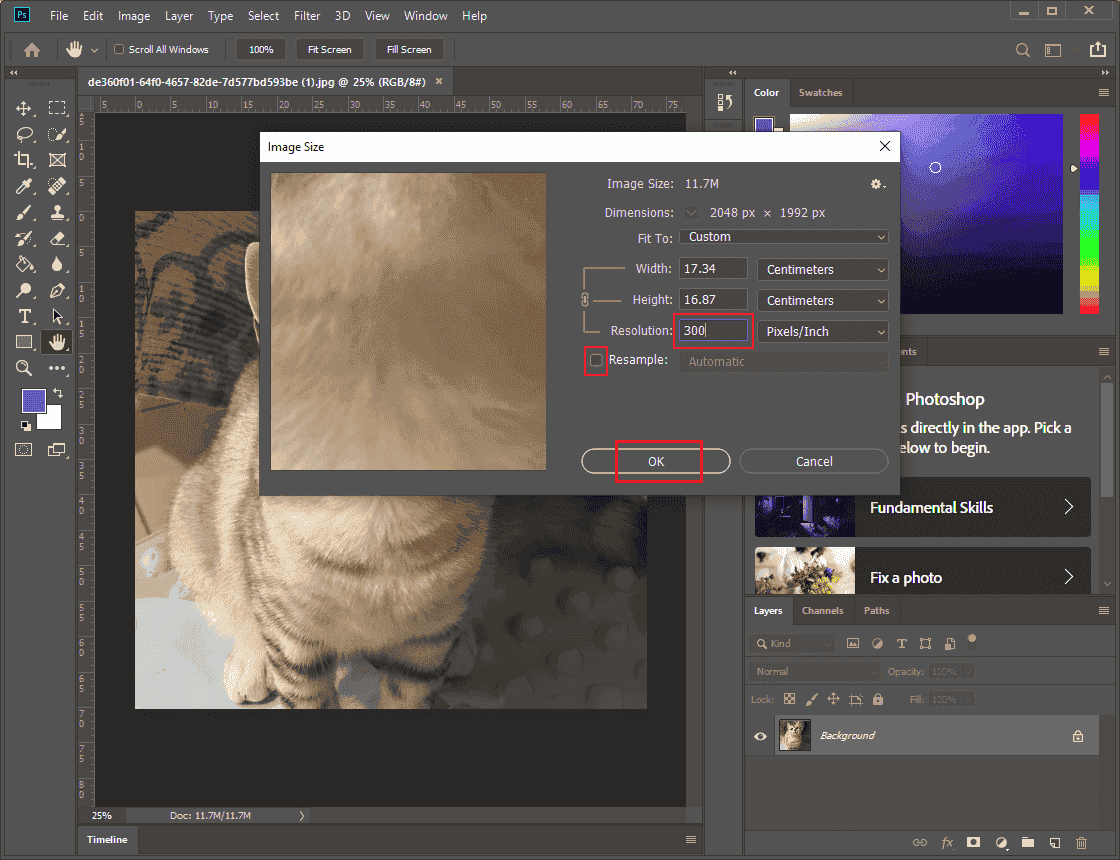
4. Change the Image DPI to 300
Make sure the Resample option is unchecked. In this way, you can change the DPI without changing the image’s dimensions or pixel count. Then, input 300 to the Resolution box. Click OK to save the changes.
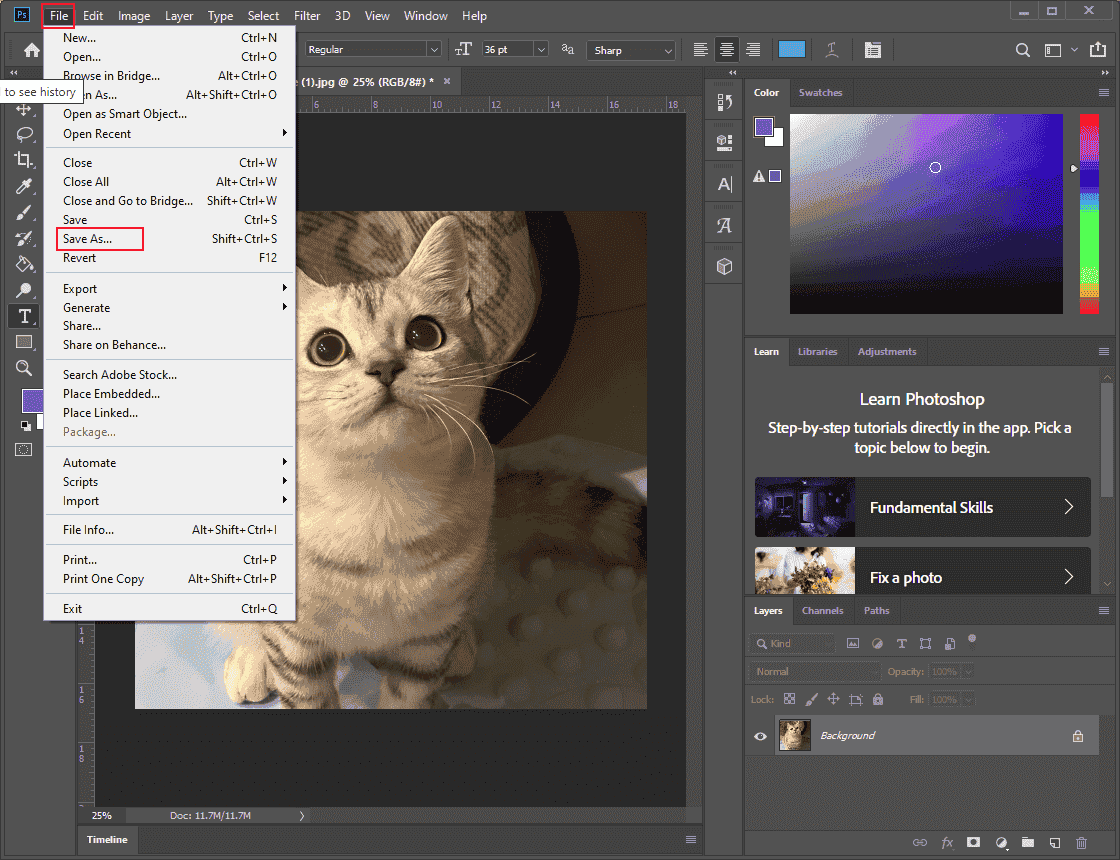
5. Save the Image
Click the File button in the top left. Then, click Save As to save the image to your local folder.
Method 2. Use Clideo
Clideo is an all-in-one online tool that can convert image to 300 DPI with just a few clicks. It supports multiple DPI parameters, including 600, 300, 200, etc. Additionally, Clideo offers one of the best file security services. Only you can access your files. Moreover, this online tool works with various image formats, such as PNG, JPEG, TIFF, and more.
Here’s how:
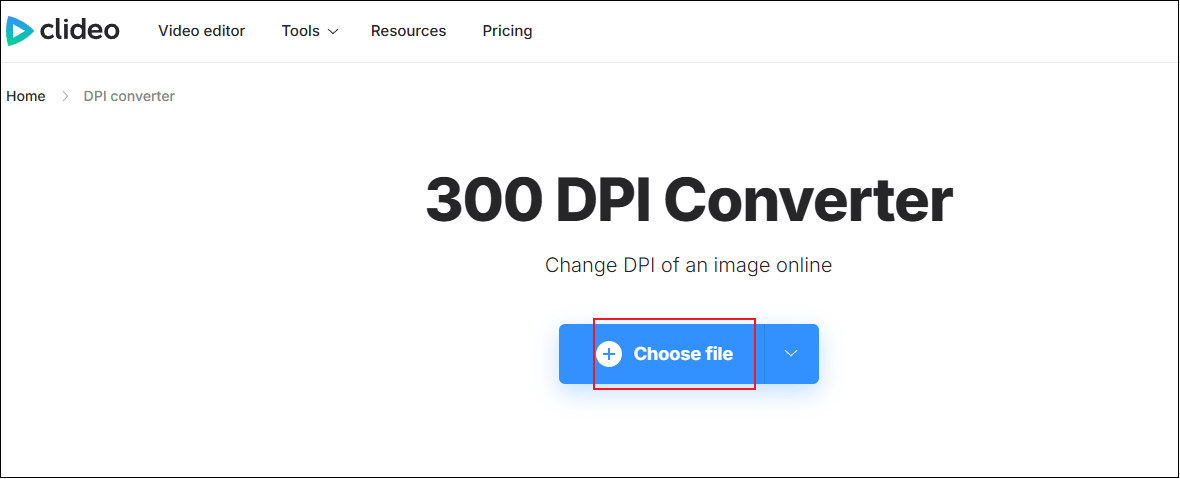
1. Access Clideo’s DPI Converter
Visit https://clideo.com/dpi-converter.
2. Upload Your Picture
Click the Choose file button to add the image you want to change the DPI to 300.
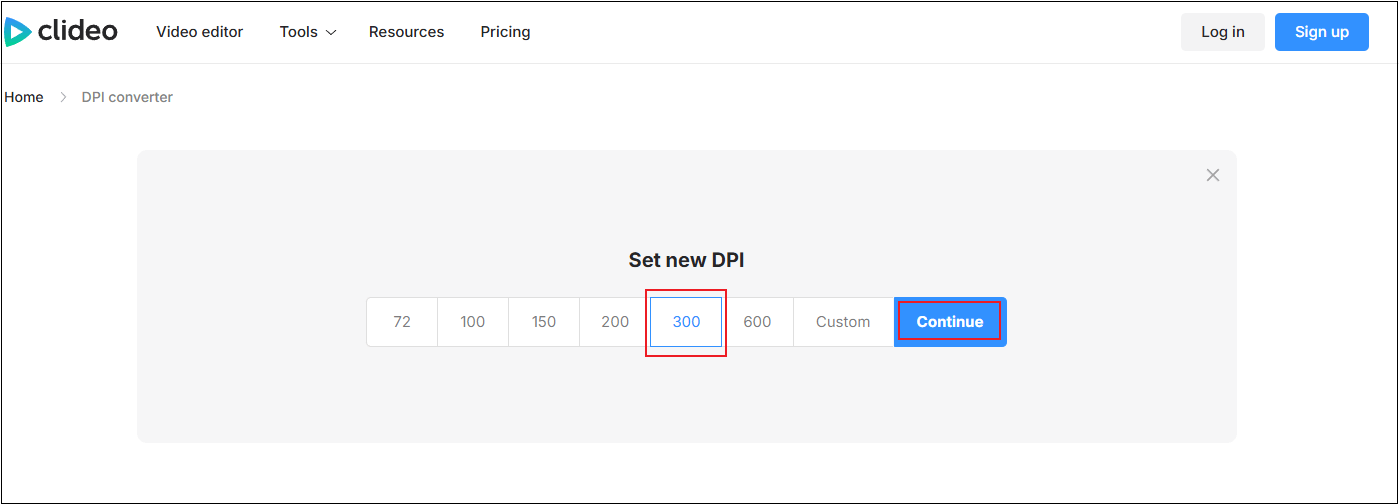
3. Set DPI to 300
Set 300 as the new image DPI and click on Continue.
4. Save the Image
When the exporting process completes, click the Download button to save the picture.
Method 3. Use Pi7 Image Tool
Pi7 Image Tool is also an online tool that can handle image DPI changing tasks. More than that, this DPI changer can also compress and resize images and convert them to other formats, like JPG, PNG, etc. Pi7 Image Tool is compatible with any modern browser. Therefore, whether you’re using Windows, Mac, Android, or iOS, you can use this tool anytime, anywhere.
Now, follow the guides below to convert image to 300 DPI.
1. Access Pi7 Image Tool’s DPI Converter
Visit https://image.pi7.org/convert-dpi.
2. Upload Your Picture
Click the Select Images button to import your image.
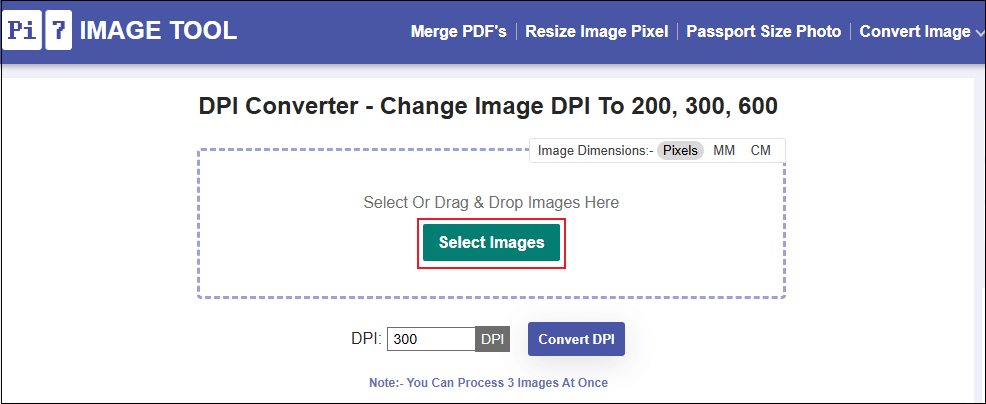
3. Set the DPI to 300
Click the Resize Image button to resize the picture, or click the Crop button to crop the image if needed. Next, set the DPI to 300. Then, click the Convert DPI button.

4. Download the Image
When the conversion process is done, click on Download to save the image to your local folder.
That’s all!
MiniTool MovieMakerClick to Download100%Clean & Safe
In Summary
This post introduces what DPI is and its difference from image resolution. To convert image to 300 DPI, I recommend three free and practical methods, guiding you through the entire conversion process. I hope this article proves helpful!
User Comments :