AVI (Audio Video Interleave) is a common multimedia container format designed to save synchronous audio and video data. The format supports various codecs and stores videos in high quality. Compared to MP4, AVI often produces larger file sizes because it uses less efficient compression.
When working with AVI or other video files, you often need to trim them to remove unnecessary parts at either end. This can effectively keep your content concise and engaging, and meanwhile, reduce the video file size. Unlike cropping, trimming shortens the video length, but does not change the composition.
It’s easy to trim AVI video files on Windows. This post offers two quick methods.
How to Trim AVI Video Files on Windows
This section introduces two excellent AVI trimmers, MiniTool MovieMaker and the Windows Photos app.
Method 1: Use MiniTool MovieMaker
MiniTool MovieMaker is a user-friendly video editor for Windows, designed to help beginners and casual users create video from images with ease. The software offers an intuitive interface and essential editing tools.
Undoubtedly, MiniTool MovieMaker provides all the basic functions for assembling and refining your video clips. Whether you need to trim, split, merge, crop, rotate video clips, change video speed, or add reverse effects, the software has you covered.
MiniTool MovieMaker can handle AVI, MP4, MOV, MKV, WebM, and other video formats encoded using various codecs. Therefore, you can use this application to trim AVI video files.
Here’s how to trim AVI files in Windows 10/11 using MiniTool MovieMaker.
Step 1: Download and Install
Click the button below to download the AVI trimmer and then install it on your computer.
MiniTool MovieMakerClick to Download100%Clean & Safe
Step 2: Import Your AVI File
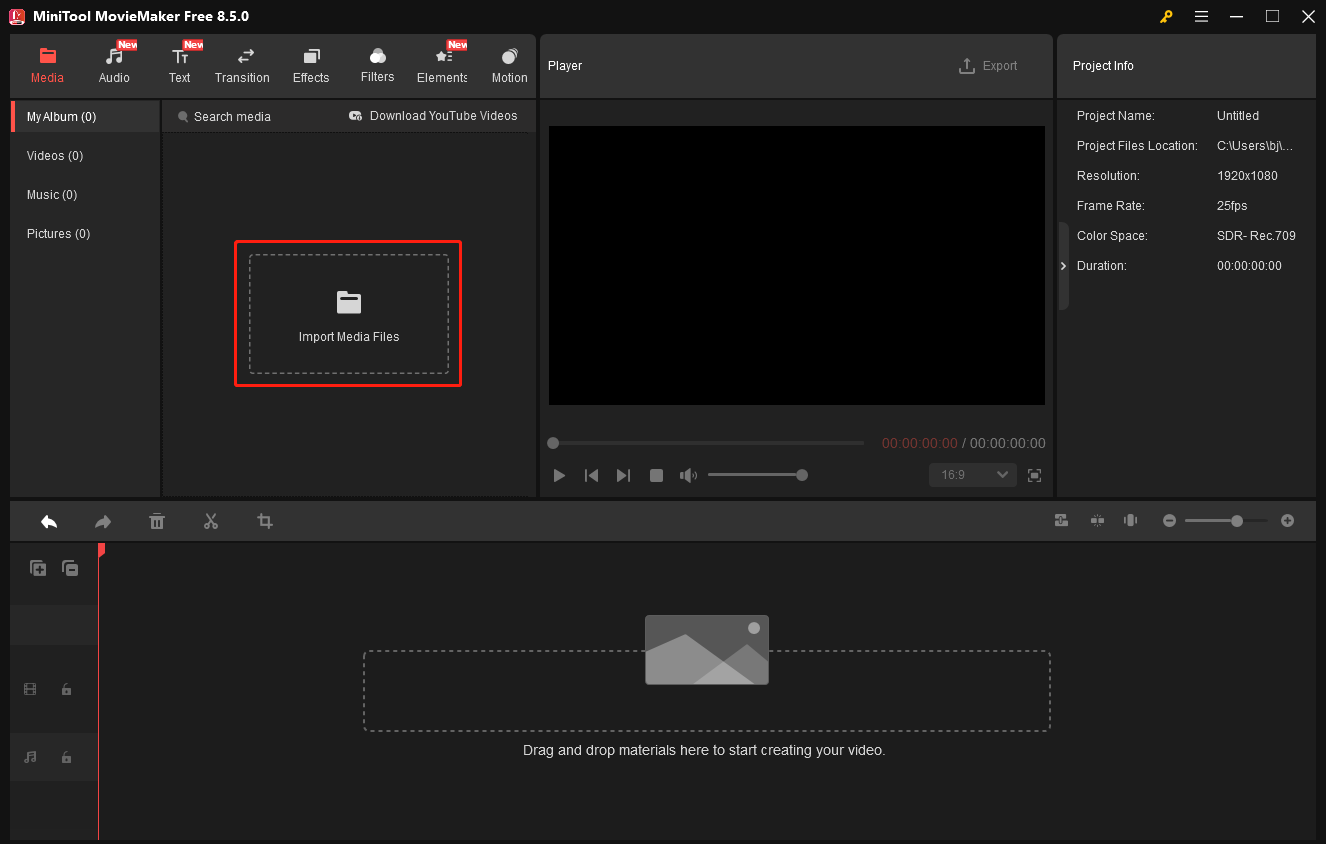
Launch the program after installation, and close the promotion window to enter the main user interface. Next, click the Import Media Files area to open the File Explorer. Navigate to your AVI file and add it to the media library of MiniTool MovieMaker.
Step 3: Trim the AVI Video
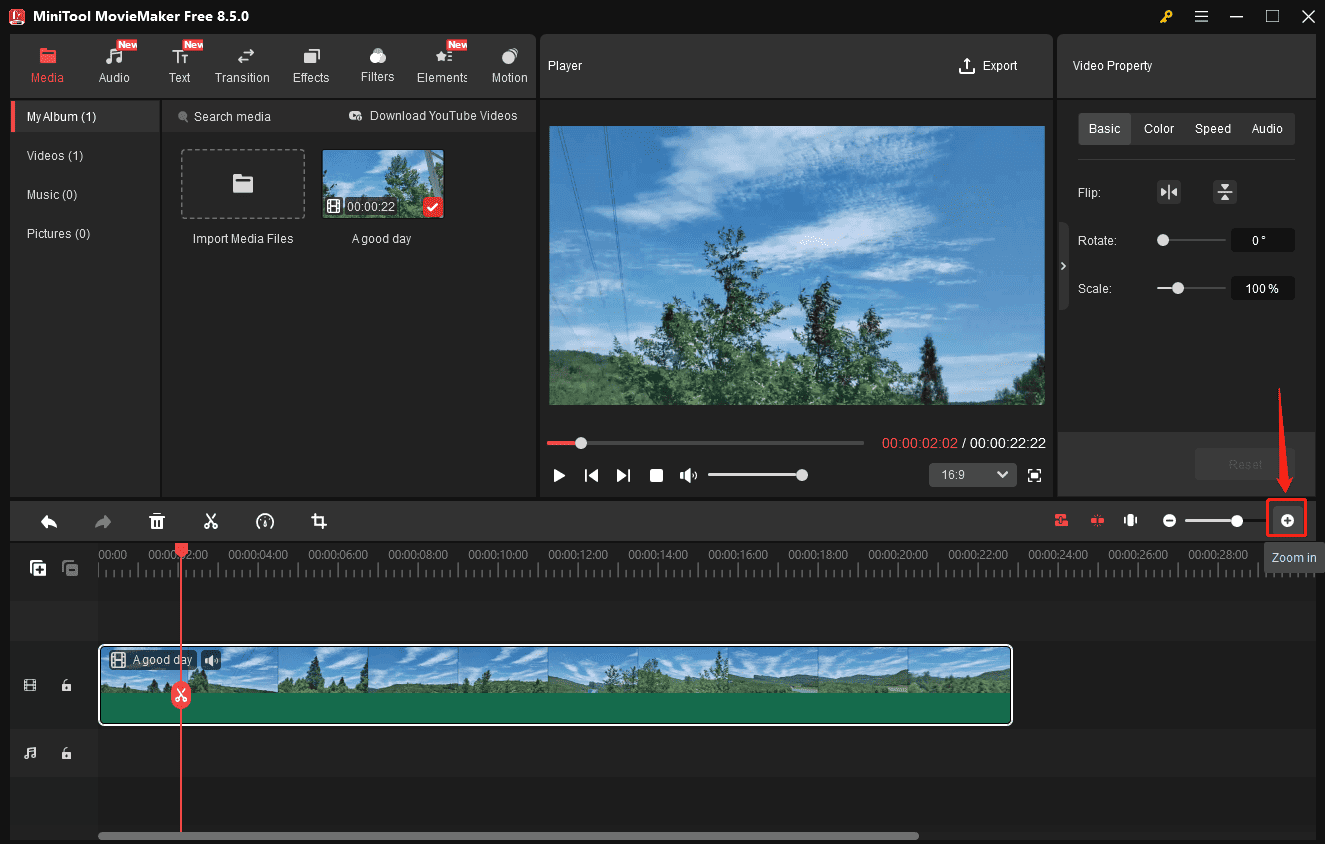
Click the + icon on the video or drag and drop it to the timeline to start editing.
To precisely trim your AVI file, zoom in on the timeline by clicking the Zoom in icon on the right side of the timeline toolbar, ensuring you can locate the target frame with maximum accuracy.
Next, hover your mouse cursor over the start or end of the video on the timeline until the Trim icon appears. Drag the Trim icon inward to the target place, release the mouse, and the beginning or end part of the video will be removed.
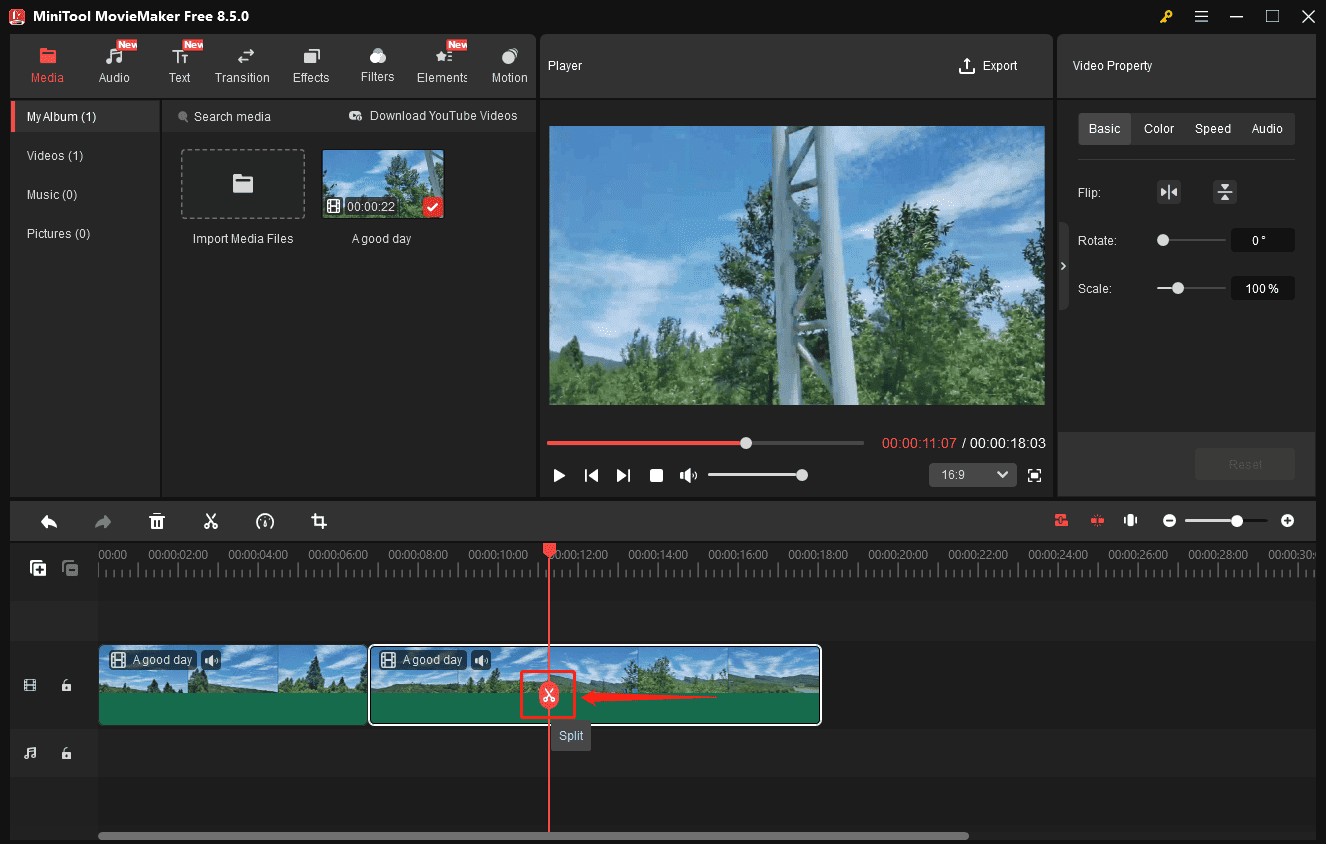
Trimming allows you to eliminate irrelevant parts from the beginning or end of a video. What if you want to delete the middle part from your AVI file? Then, you need to split the video to separate the target segment and delete it.
Move the playhead to the start of the unwanted clip, and click the Split icon on the playhead. Continue dragging the playhead to the end of the unnecessary clip, and click the Split icon again.
Next, right-click the middle segment and select Delete from the menu.
Step 4: Save the Trimmed AVI Video
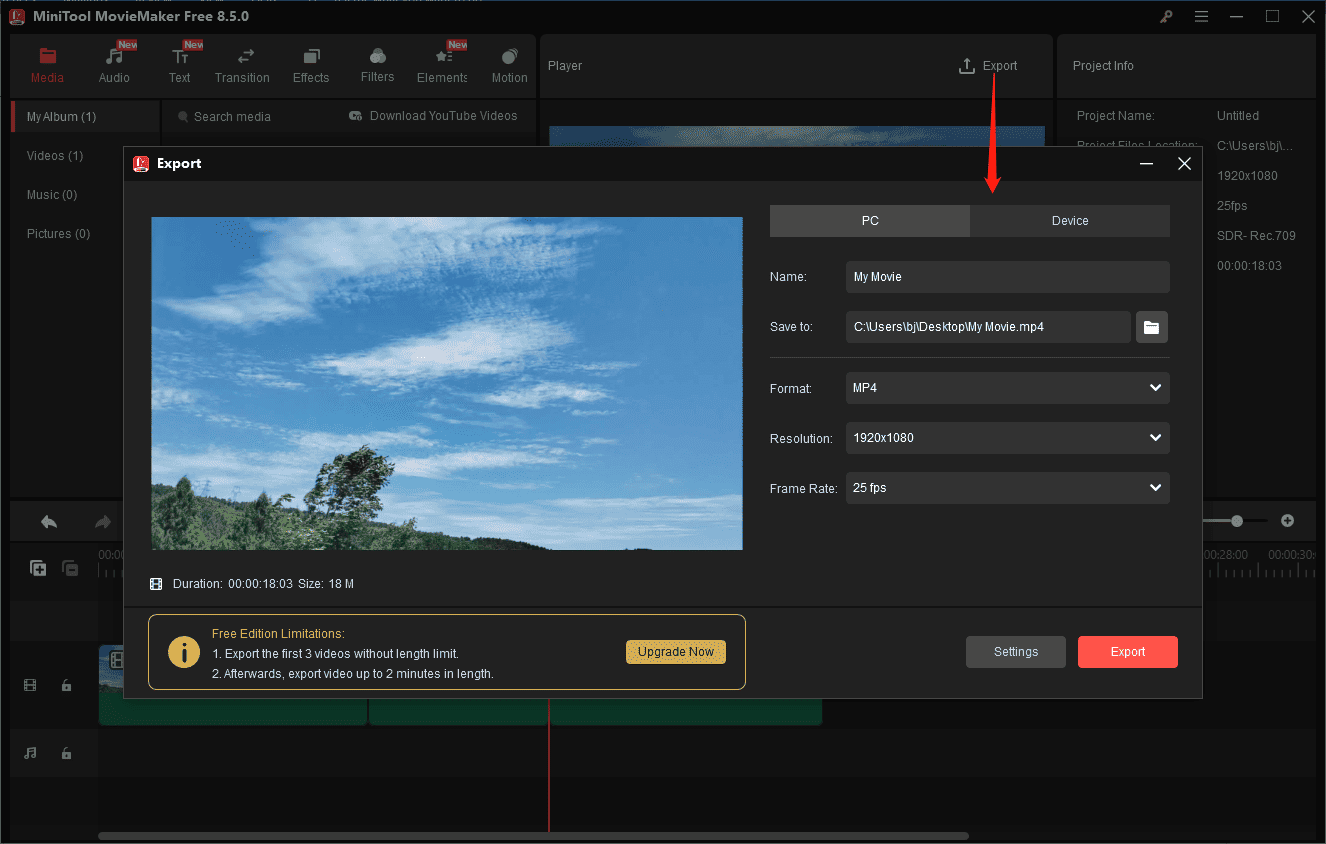
Click Export in the upper-right corner of the interface to open the Export window. You can then give the video a name and change the format, resolution, and frame rate. By default, MiniTool MovieMaker exports videos in the MP4 format. If you want to change it, expand the Format menu and choose from AVI, MOV, WMV, MKV, and WebM.
In addition to basic functions, MiniTool MovieMaker comes with more features for polishing your footage. With the multi-track timeline, you can easily work with complex projects and create picture-in-picture effects. Additionally, it offers various transitions, filters, effects, and motion elements to enhance your content, allowing you to enrich your video with sound and text.
Best of all, MiniTool MovieMaker supports exporting videos up to 4K resolution, with no watermarks on the final results.
Method 2: Use the Photos App
If you need to trim an AVI file without extra edits, then the Photos app is a great choice. It’s already built into your system, so there’s no need for a manual download.
The Photos app is designed to view, organize, and share pictures and videos on Windows 10/11. While the app comes with essential photo editing tools, such as cropping, color adjustment, and filters, it only offers the trimming feature for videos.
Follow the steps below to trim an AVI file using the Photos app on Windows.
Step 1: Open Your AVI Video with Photos
Right-click your AVI file, click Open with from the dropdown, and then select Photos.
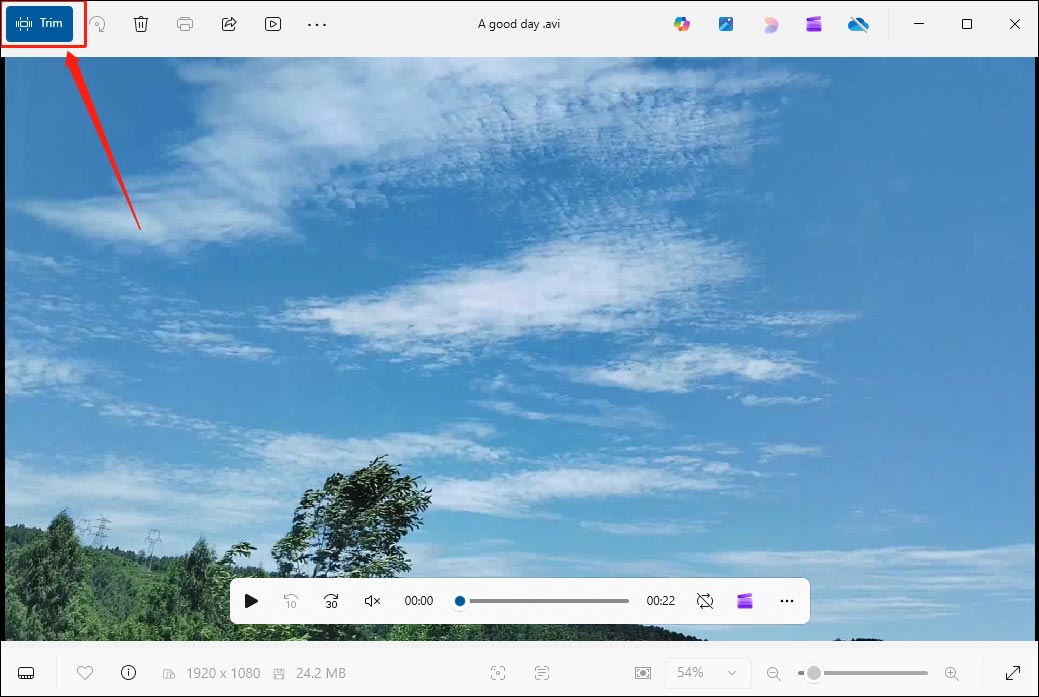
Step 2: Enable the Video Trimmer in Photos
Click the Trim option in the top left corner of the Photos app.
Step 3: Trim the AVI Video
You’ll then see a blue trimming handle below the video player window. Drag either the handle inward to select the portion of the video you want to save.
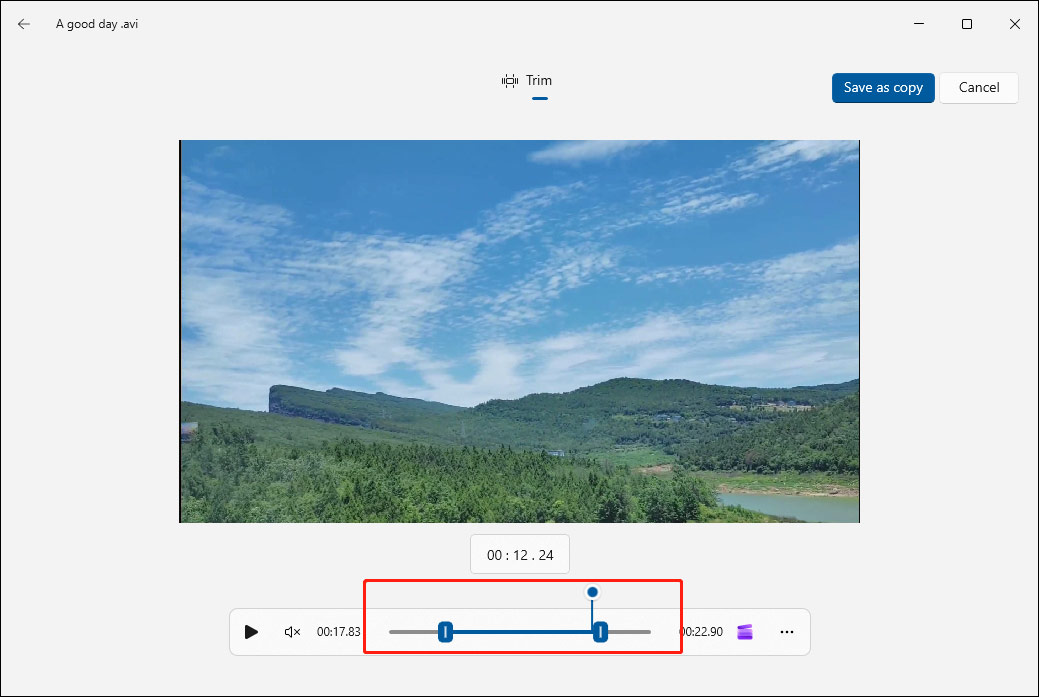
Step 4: Save Your Video
Click Save as copy in the top right corner, then select a location to save the video, and click Save. The Photos app saves your trimmed video in the MP4 format, and it doesn’t provide output settings.
Conclusion
It’s easy to trim AVI video files using MiniTool MovieMaker and the Windows Photos app. If you want other improvements besides trimming, then the former can be your ideal choice. If you only need to trim AVI files occasionally, the latter is your go-to solution.
Finally, if you encounter any difficulties while using MiniTool MovieMaker, please do not hesitate to contact our support team at [email protected].
About The Author

Position: Columnist
Cora is a tech writer specializing in digital media workflows, with over six years of hands-on experience in video post-production, media transcoding, and screen capture. Her writing is always clear and practical. Cora also produces in-depth software reviews for users across skill levels to help them find the right tool and enjoy video editing.
User Comments :