

This post is a quick overview of the new features and improvements in MiniTool MovieMaker 8.9, the latest version of MiniTool video editing software. This update launches keyframe animation controls and optimizes the application installation package and export UI for a quicker, smoother editing workflow.
MiniTool MovieMaker is an easy-to-use video editor designed for beginners. It provides essential tools and effects to turn ordinary footage into eye-catching videos. The development team is constantly updating the software to roll out new features that give users more creative freedom.
This time, MiniTool MovieMaker 8.9 unlocks keyframe animation controls to create smooth, custom motion and effects. It also enhances the installation process and the export button interface for a faster, more intuitive editing workflow.
In this post, I’ll mainly guide you through the keyframe controls in the editing software and how to add and delete keyframes.
MiniTool MovieMaker 8.9 Supports Keyframe Animation
Keyframe animation is a common technique in video editing that allows users to set the start and end points, called keyframes, for any visual property, such as position, size, rotation, color, audio volume, effect intensity, or opacity. The editing software automatically fills in the in-between frames and handles all the smooth movement.
Now, this powerful and essential editing tool is available in MiniTool MovieMaker since version 8.9. It allows me to add keyframes for position, scale, and rotation of a video/image/element at different timestamps to achieve smooth, cinematic motion effects.
How to add and delete keyframes in MiniTool MovieMaker? Follow me now.
1. Install the Video Editor
Click the button below to download the software. Next, follow the on-screen prompts to complete installation.
 MiniTool MovieMaker
-
 Split and trim videos to remove redundance.
 - Change video aspect ratio to match screen sizes.
- Add bubble texts, bgm, transitions, and more effects.
- Create PiP or split-screen videos by multitrack editing.
2. Import Your Video or Image
After running the application, click New Project to access the main interface. From the left side, click Import Media Files to add your media file, and drag and drop it to the timeline to start editing.
3. Add Keyframes
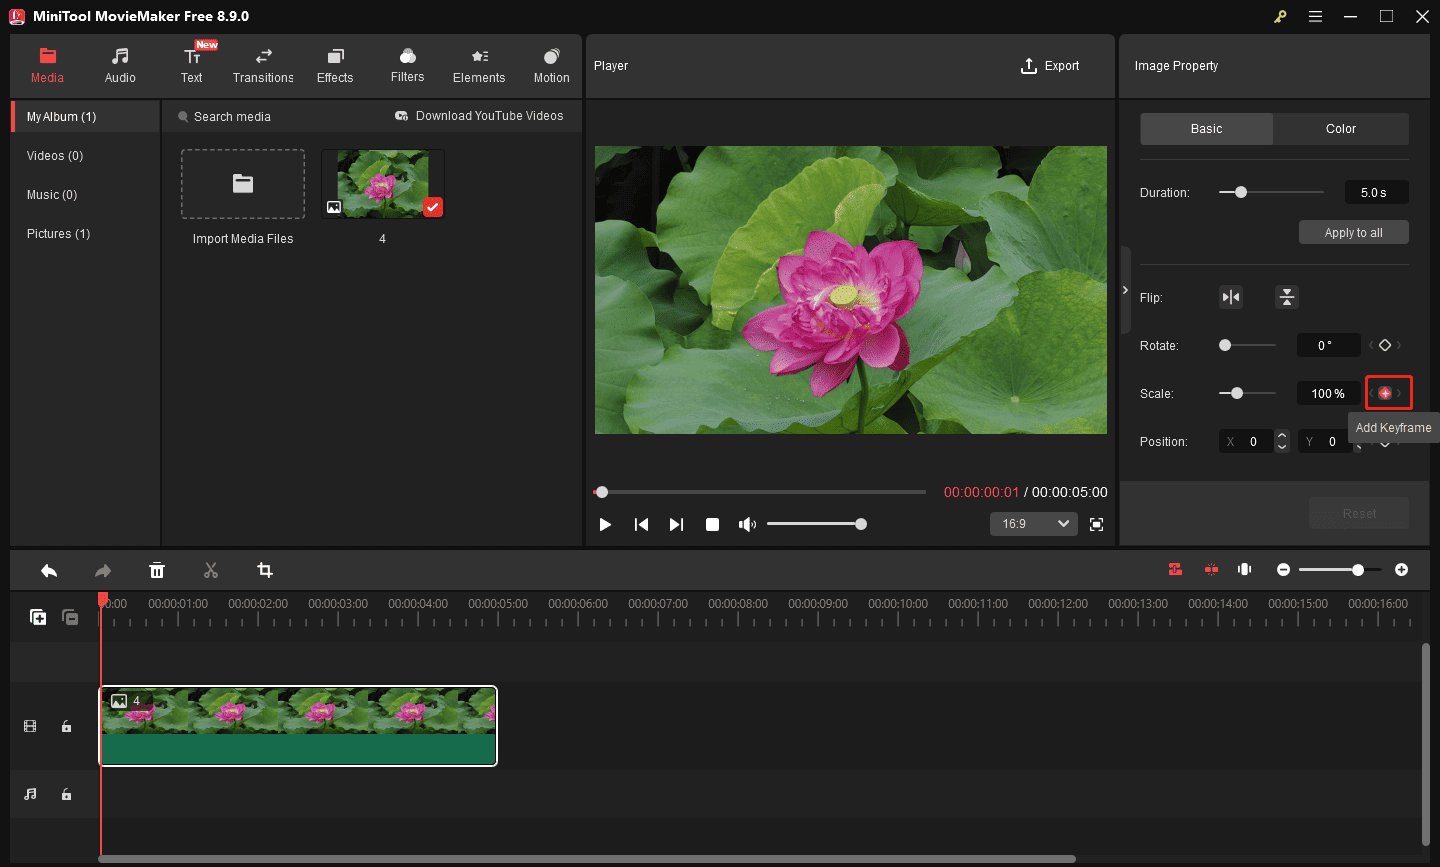
1) Select the clip on the timeline, and the Video Property or Image Property window appears on the right side. Under the Basic tab, here are three keyframe controls: Rotate, Scale, and Position.
- Rotate: change degrees to spin.
- Scale: adjust the percentage to zoom.
- Position: tweak X/Y numbers to move the image.
2) Move the playhead to where I want the animation to start, either retain the default values or modify rotation angle, scale percentage, or position by dragging the sliders, and click the Add Keyframe icon next to the target parameter to add the first keyframe.
3) Next, move the playhead where I’d like the animation to end, drag the sliders to set the degree to spin or the percentage to zoom in or out on the clip, or modify the position. Alternatively, I can drag the corner handles in the preview window to resize the clip or adjust its position. Then, the second keyframe will be added automatically.
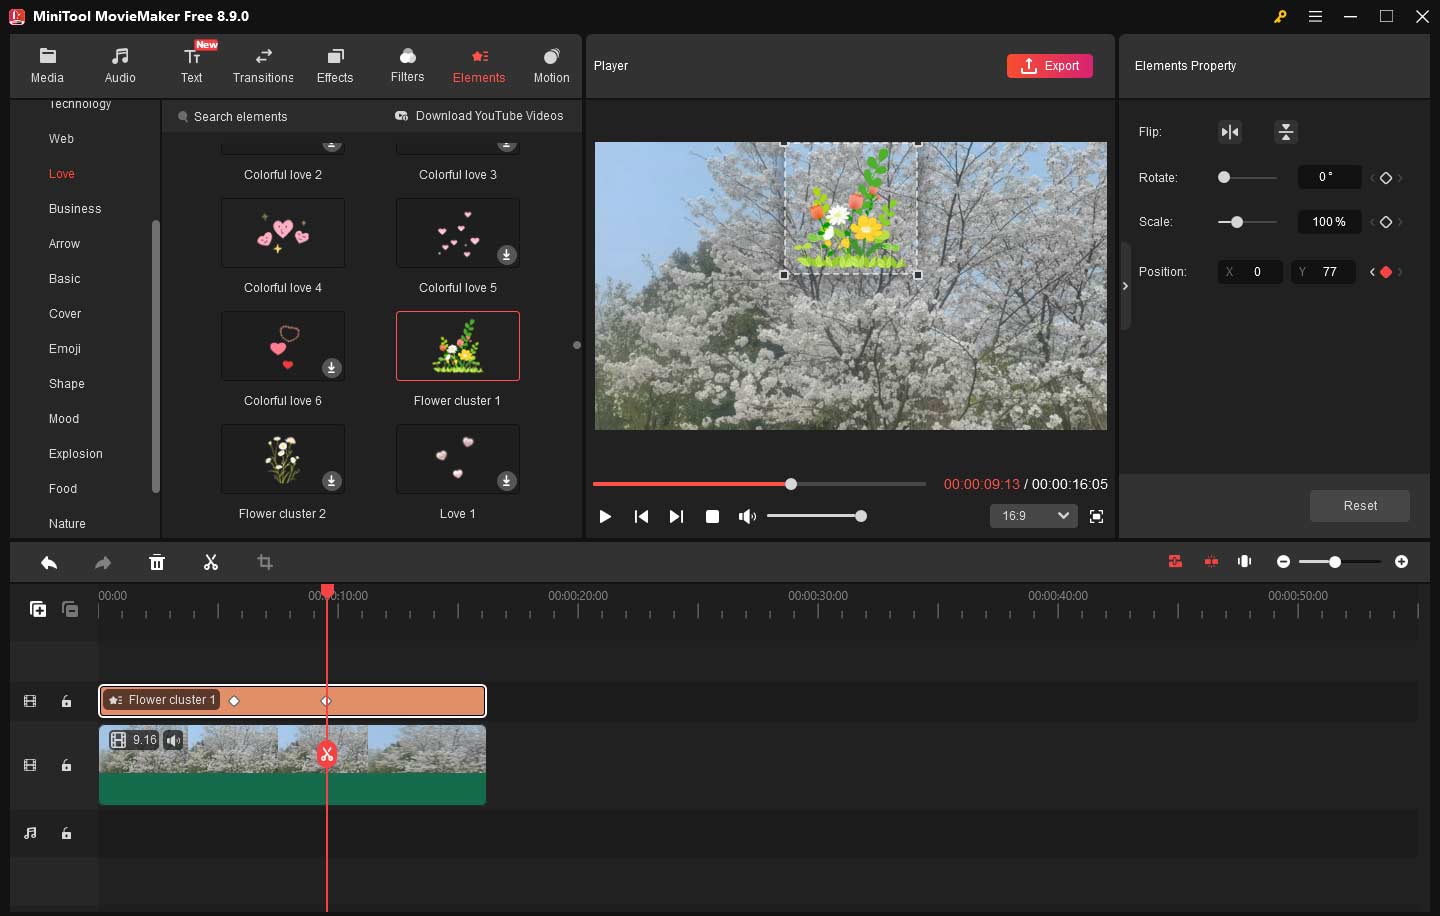
I can also add a sticker and create custom effects with keyframes. Go to Elements to select a sticker and add it to the timeline, and follow the steps above to add keyframes.
4. Delete Keyframes
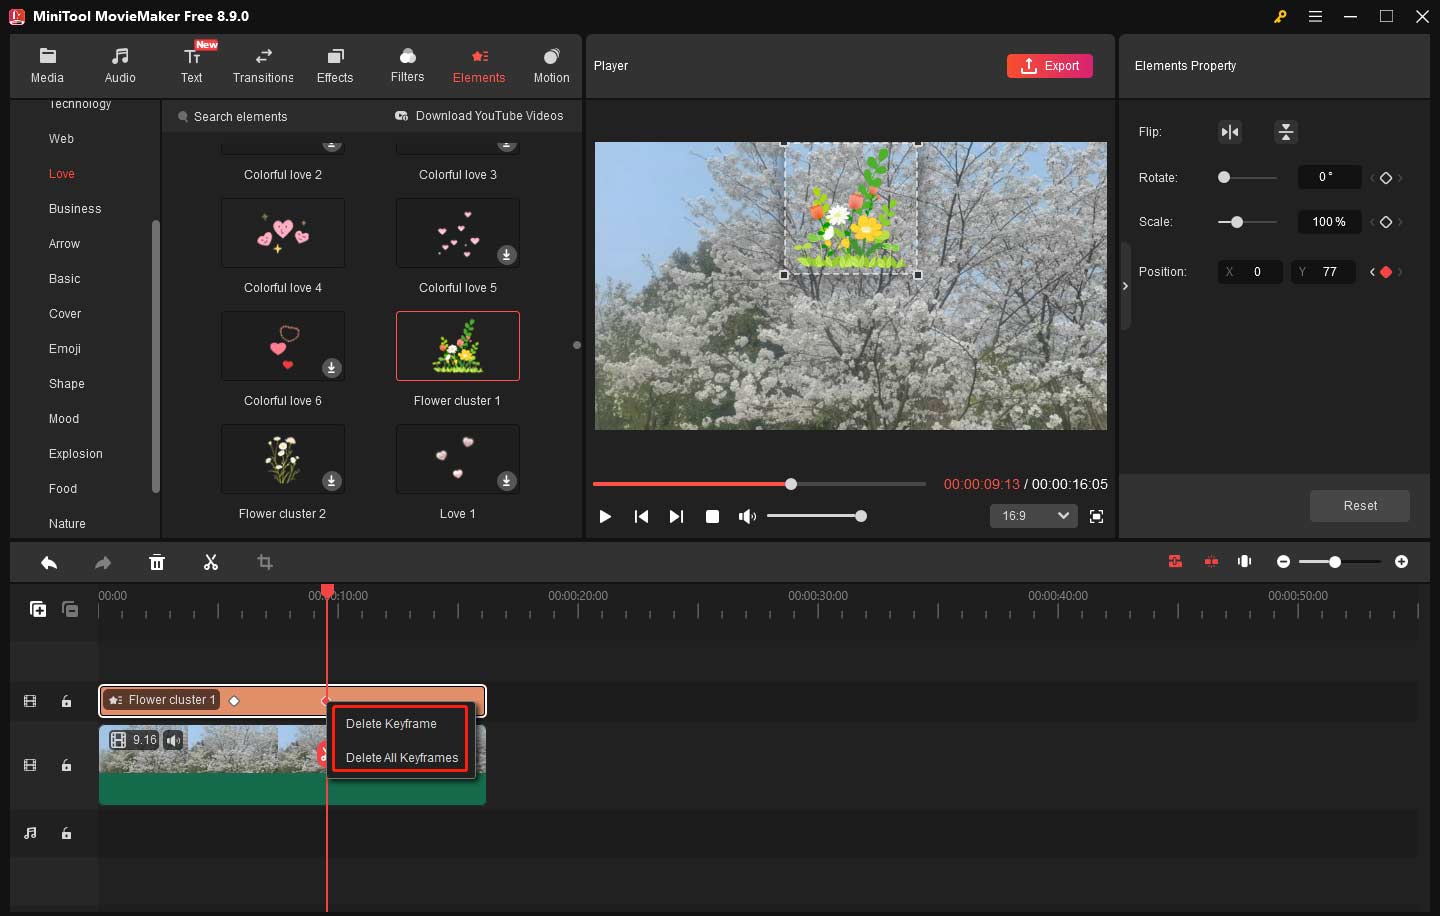
To delete a keyframe, right-click it on the corresponding track and select Delete Keyframe; to clear all keyframes at once, choose Delete All Keyframes.
5. Preview and Export the Video
Click the Play icon at the bottom of the player window to preview the animation effect. Once satisfied, click Export and configure settings like format, resolution, and frame rate to export the video.
Conclusion
Combined with a multi-track timeline, intuitive keyframe controls, and all the essential tools, MiniTool MovieMaker now gives users even more freedom to turn their ideas into compelling visual stories. Try the latest version and unlock MiniTool MovieMaker’s new features to showcase your creativity!
If you encounter any issues while using the software, contact the support team via [email protected] for help.
About The Author

Position: Columnist
Cora is a tech writer specializing in digital media workflows, with over six years of hands-on experience in video post-production, media transcoding, and screen capture. Her writing is always clear and practical. Cora also produces in-depth software reviews for users across skill levels to help them find the right tool and enjoy video editing.
User Comments :