Why need to vectorize an image? A vector image has many advantages. One of its greatest advantages is that vector image will not be distorted no matter how you zoom or rotate it.
Therefore, let’s see how to vectorize an image with Illustrator, Photoshop, and an online vector converter. (MiniTool MovieMaker is a free video maker that lets you create a video from images.)
MiniTool MovieMakerClick to Download100%Clean & Safe
How to Vectorize an Image in Illustrator
Illustrator is a vector graphics editor that can be used to make a vector image and vectorize raster images without quality loss.
Here’s how to vectorize an image in Illustrator.
Step 1. Open your image with Illustrator.
Step 2. Click Window in the top menu bar and select Image Trace from the drop-down window.
Step 3. In the Image Trace window, check the Preview box so that you can view the real-time changes displayed on the image. Then change the mode and adjust the advanced settings.
Step 4. Then right-click on the image and go to Object > Ungroup, or press “Shift + Ctrl + G”. Your color shapes will be separated into individual parts.
Step 5. Once the conversion is complete, use the Selection tool to select a color shape and choose Select > Same > Fill Color.
Step 6. In the end, save the vectorized image.
Also read: Top 6 Best Adobe Illustrator Alternatives [Free & Paid]
How to Vectorize an Image in Photoshop
Photoshop, an industry-leading raster graphics editor developed by Adobe Inc., can handle complex tasks including vectorizing image, removing objects from image, and more.
Here’s how to vectorize an image in Photoshop.
Step 1. Open the image you want to vectorize with Photoshop.
Step 2. Use the Magic Wand to select the color shapes and right-click.
Step 3. From the popup menu, choose Make Work Path and set the Tolerance to 1.0.
Step 4. Press the A key and right-click on the image. Select Create Vector Mask from the popup menu.
Step 5. Now, just save this image as a vector file. Click File > Save As, expand the Save as type list, and choose Photoshop EPS as the output format. Click Save to convert the image to vector.
How to Convert Any Image to Vector Online for Free
Are you looking for an easier way to vectorize images? An online image to vector converter is a good fit for you. Here’s an online free image to vector converter that helps you vectorize images quickly and easily.
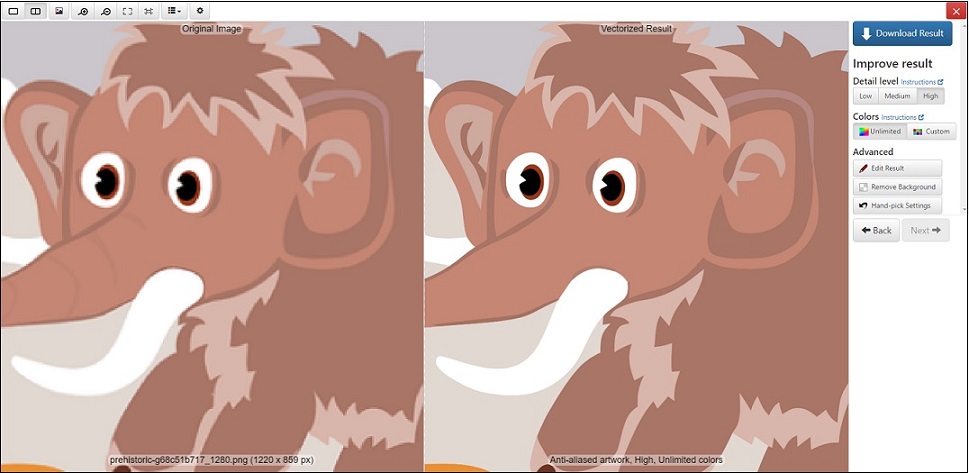
Vector Magic
Vector Magic can convert JPG, PNG, BMP, and GIF bitmap images to vector images online with just a few clicks.
Go to the website: https://vectormagic.com and upload the image you want to convert. Then it will automatically vectorize your image. When the vectorizing process is over, just click the Download Result button to save the vector image.
Conclusion
There are 3 methods of how to vectorize an image in this post. Follow the above guide to convert your image to a vector file.
User Comments :