To create a wonderful movie, the first thing is to import videos, pictures as well as background music. This post will teach you how to achieve that.
How to Import Files to MiniTool MovieMaker?
Importing videos, images, and background music is the initial step to craft an exceptional movie. MiniTool MovieMaker enables you to import various types of videos, photos, and songs from your PCs, mobile devices, etc. In this tutorial, you will learn how to import files to MiniTool MovieMaker.
MiniTool MovieMakerClick to Download100%Clean & Safe
In general, you have two options to import media files to a new project into MiniTool MovieMaker.
Way 1: Import Media Files from the Media Tab
Step 1. Launch MiniTool MovieMaker and close the project library window to enter the main interface.
Step 2. Under the default Media tab, click the Import Media Files to open File Explorer.
Step 3. Browse and select the files you want to import, then click Open.

You can also directly drag and drop the target media files from your computer to the media library.
Way 2: Import Media Files from the Top Menu
Just click on the More icon (hamburger) on the top right in the main window. Then, go to File > Import Media > Import From PC. Next, just pick up your desired media files from your computer storage.
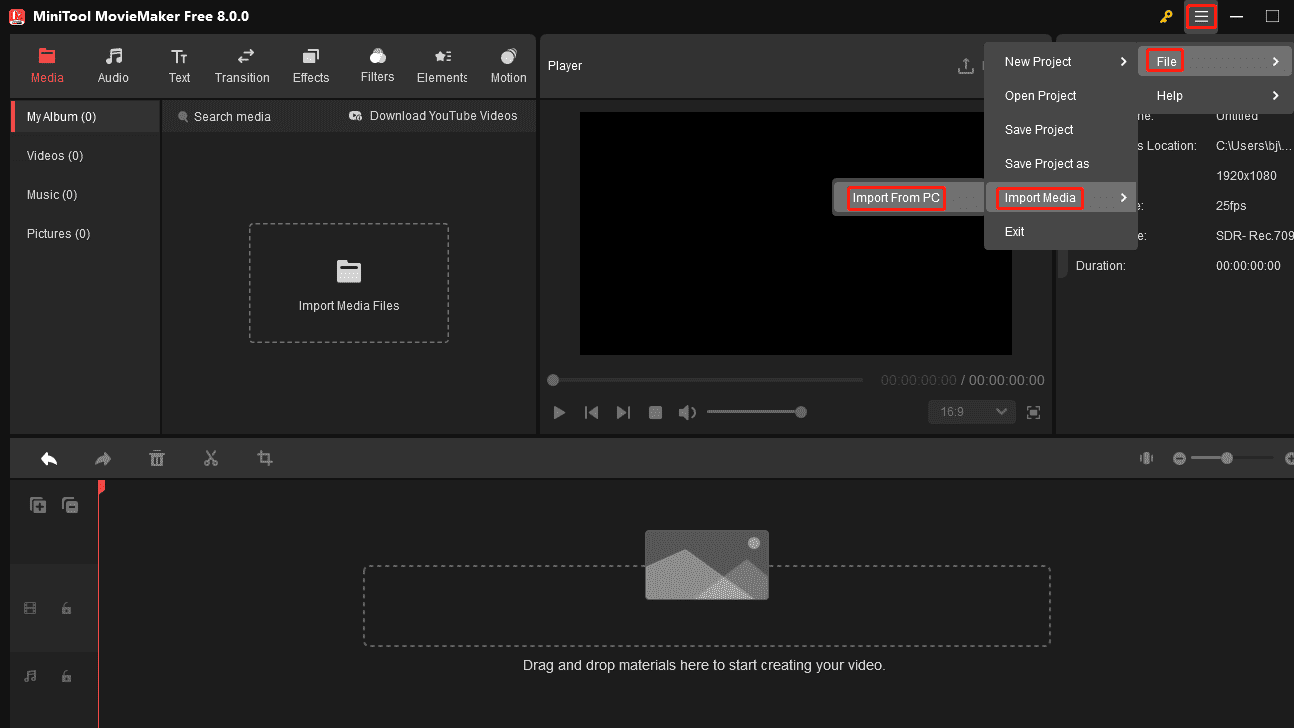
Then, MiniTool MovieMaker will load all these files in the Media library.
MiniTool MovieMaker Supported Input Video/Photo/Audio Formats
| Media Type | Media Formats |
| Video | .mp4, .3gp, .mpg, .wmv, .mov, .mkv, .flv, .avi, .vob, .rmvb, .webm |
| Photo | .png, .jpg, .jpeg, .gif, .bmp, .ico, .tif |
| Audio | .mp3, .m4a, .m4r, .wav, .flac, .aac, .amr, .ape, .mmf, .wv |
MiniTool MovieMaker Supported Input Video Codecs
| Video Format | Video Codecs | Audio Codecs |
| mp4 | H.264 (AVC) H.265 (HEVC) MPEG-4 Part 2 VP8 VP9 AV1 | AAC MP3 AC-3 Opus Vorbis PCM |
| mov | H.264 (AVC) H.265 (HEVC) Apple ProRes series M-JPEG (Motion JPEG) DV | AAC ALAC PCM MP3 |
| 3gp | H.263 MPEG-4 Part 2 H.264/MPEG-4 AVC | AMR-NB AMR-WB AAC-LC |
| avi | MPEG-4 H.264 (AVC) MJPEG DivX Xvid | PCM/WAV MP3 AC-3 AAC |
| rmvb | RealVideo (RV) series | RealAudio series |
| flv | H.264 (AVC) Sorenson Spark VP6 | AAC MP3 ADPCM PCM |
| mkv | H.264 (AVC) H.265 (HEVC) MPEG-4 Part 2 VP8 VP9 AV1 Theora Dirac MJPEG MPEG-1 MPEG-2 | AAC MP3 AC-3 DTS FLAC Opus Vorbis LPCM ALAC APE |
| mpg | MPEG-1 MPEG-2 | MP2 MP3 |
| vob | MPEG-2 | AC-3 |
| wmv | WMV7 WMV8 WMV9 VC-1 WMV HD | WMA MP3 AC3 AAC DTS |
| webm | VP8 VP9 AV1 | Vorbis Opus |
MiniTool MovieMaker Supported Input Audio Codecs
| Audio Format | Audio Codecs |
| mp3 | MP3 |
| flac | FLAC |
| m4a | AAC ALAC |
| m4r | AAC |
| mmf | MMF |
| wav | PCM (uncompressed) |
| wv | WV |
| ape | APE |
| aac | AAC |
| amr | AMR |
How to Check Media Files in the Media Library?
In the media library of MiniTool MovieMaker, it will list all uploaded media files in the My Album subtab. Video files all come with a video recorder icon, music files come with a music symbol, and pictures come with nothing. You can sort the uploaded video clips or photos in a certain order by right-clicking on any of them and selecting Sort by.
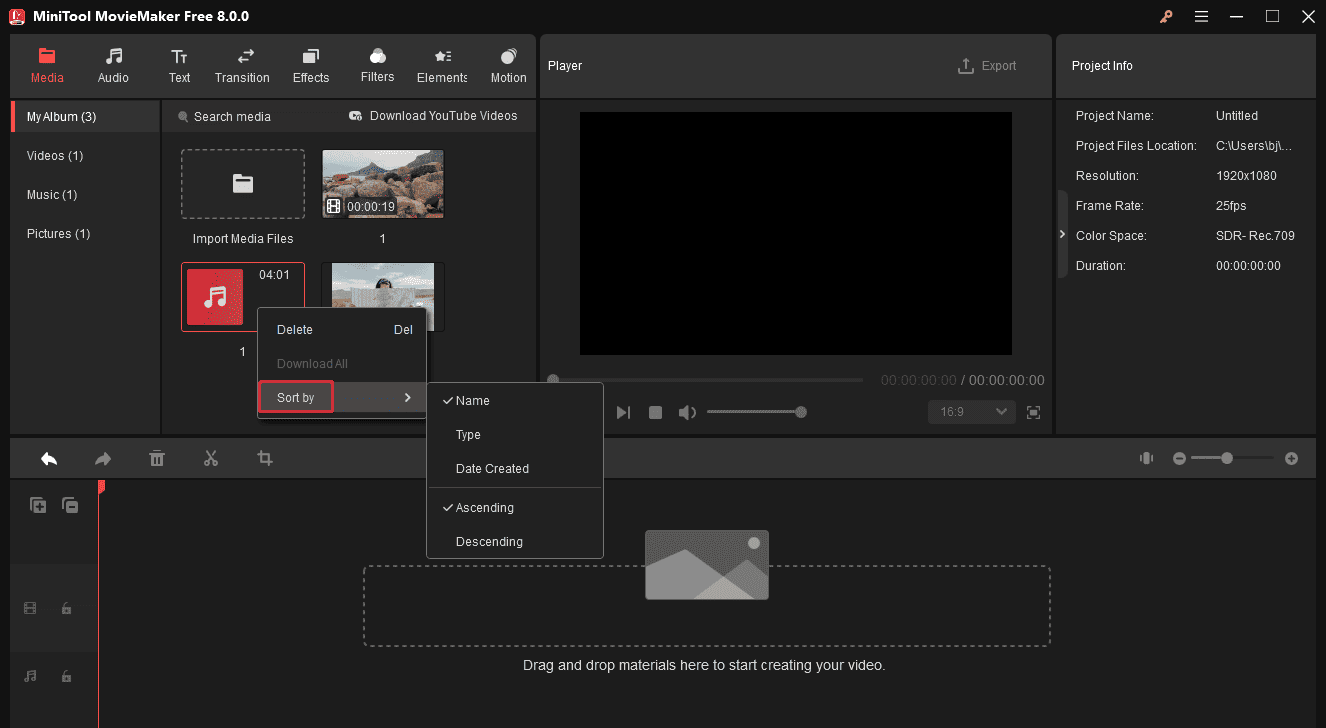
The media files you upload to the program will be automatically saved. However, when the next time you enter the program, those files will disappear. The media library can only show the media files for the current project. If you have uploaded the wrong files or you don’t need some files anymore, you can right-click on them and select Delete.
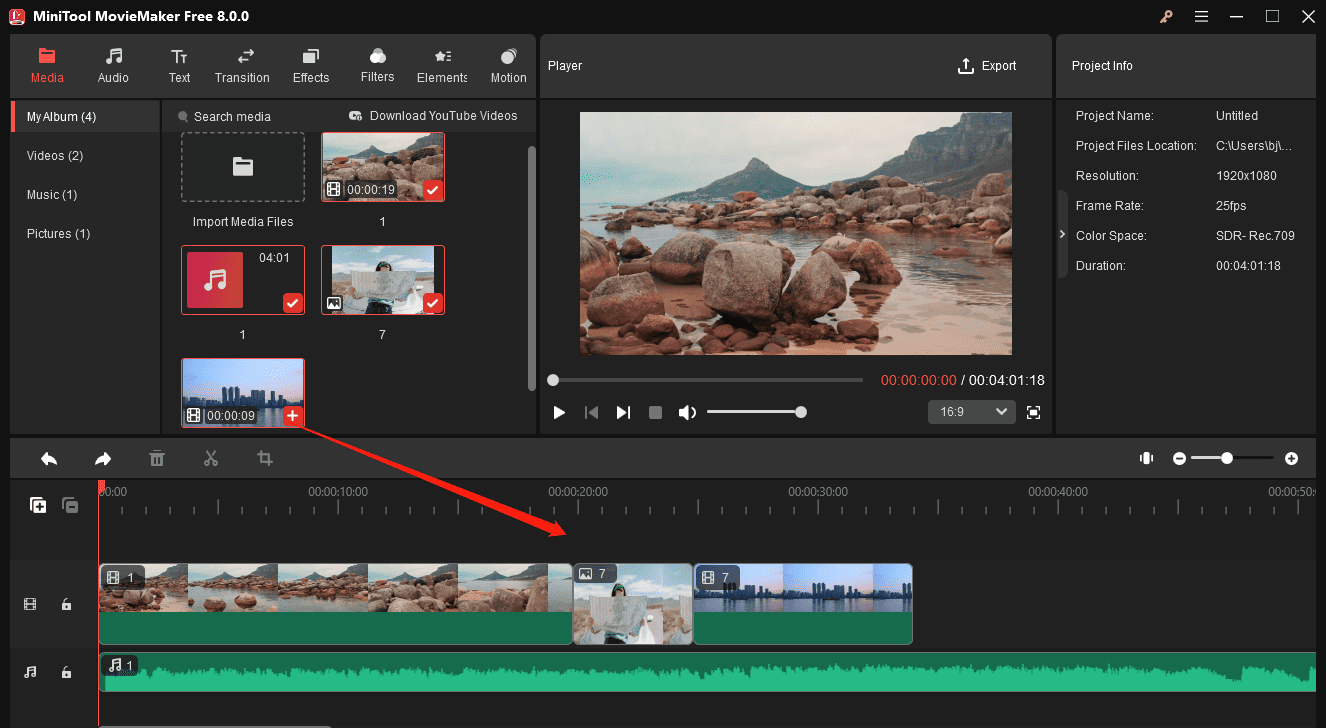
How to Add Media Files to Timeline?
Simply click the plus icon (+) on the target files to add them to the timeline in sequence. Or just drag and drop the media files to the desired location on the timeline.
You can add multiple media files at a time. Select the first clip in the media library, press the Shift key on your keyboard, and click the last clip to select all media files you want to add to the timeline. Then, click the + icon on any clip or drag and drop them to the timeline.
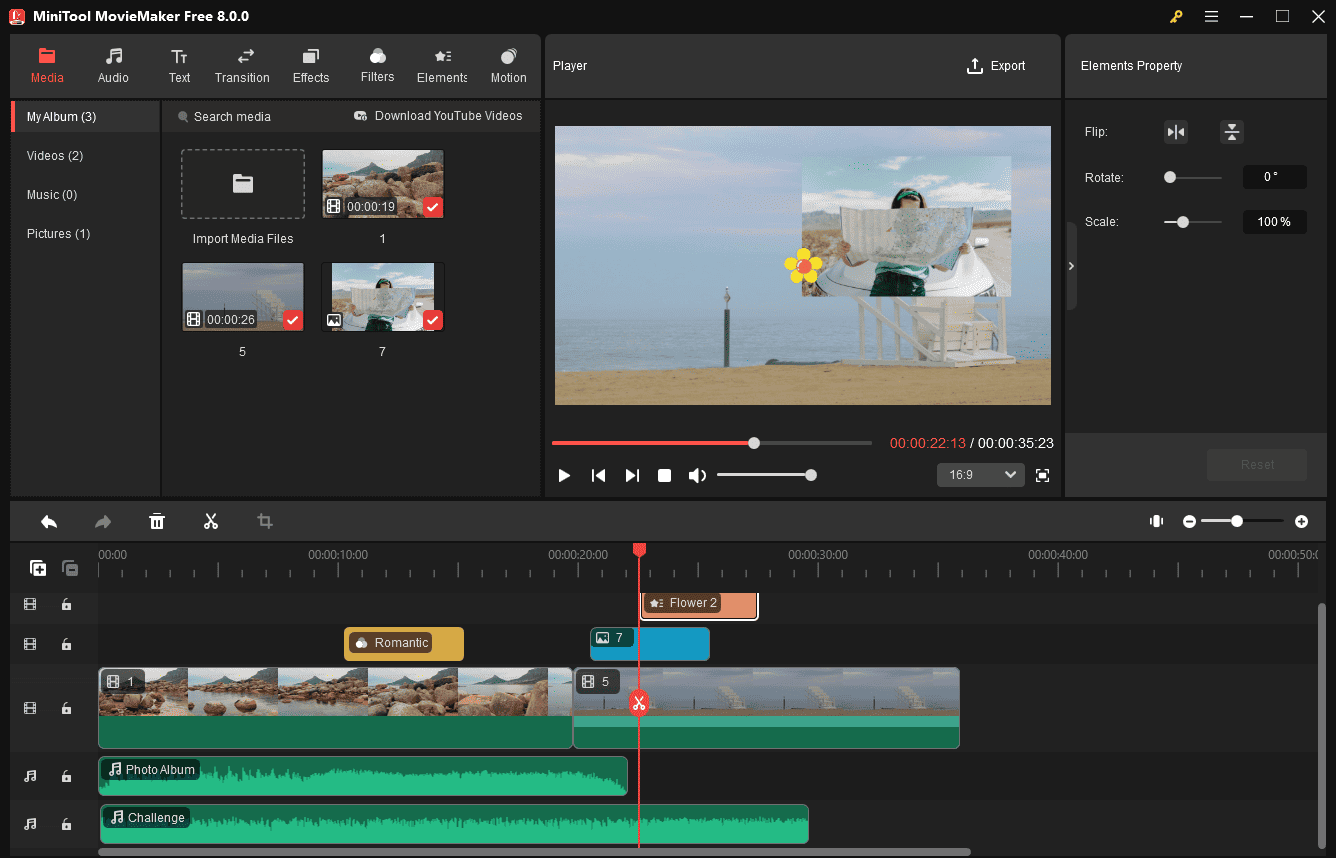
With multitrack editing support, you can seamlessly layer video, images, text, effects, animations, and audio on multiple tracks, thus easily achieving the picture-in-picture (PiP) effect to unleash your imagination, improving the flexibility and efficiency of video editing, and meeting the needs of complex video production.
In general, it’s easy to add media files into MiniTool MovieMaker. After editing, you can export your video from MiniTool MovieMaker.
About The Author

Position: Columnist
Cora is a tech writer specializing in digital media workflows, with over six years of hands-on experience in video post-production, media transcoding, and screen capture. Her writing is always clear and practical. Cora also produces in-depth software reviews for users across skill levels to help them find the right tool and enjoy video editing.
User Comments :