Sometimes you may need to hide important files on your computer. You can hide files in image and unhid hidden files without a password. How to hide files in a picture? This post gives you two ways to hide data in image on Windows.
How to Hide Files in Image on Windows
Here are two methods to hide files in image on Windows. (If you need to split a video or combine videos, MiniTool MovieMaker might be a good choice.)
- Using Command Prompt
- Using Text Document
Method 1. Using Command Prompt
Take the following steps to hide files in an image using Command Prompt.
Step 1. Create a new folder on your desktop and move the files that you want to hide to this folder.
Step 2. Right-click on the folder and choose Add to archive or use a compressor to add files to your zip archive.
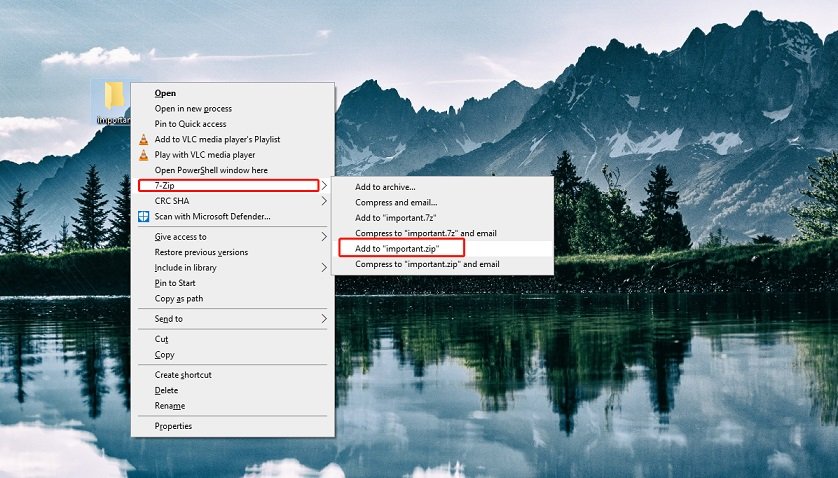
Step 3. Put an image on our desktop and rename it.
Step 4. Press Windows + R to open the Run command window. Input “cmd” and hit the Enter key.
Step 5. After launching Command Prompt, type the following command and hit the Enter key:
cd desktop
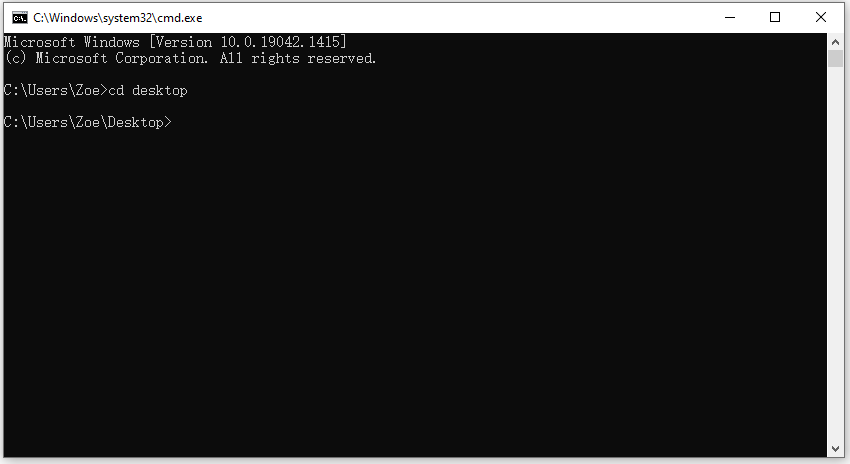
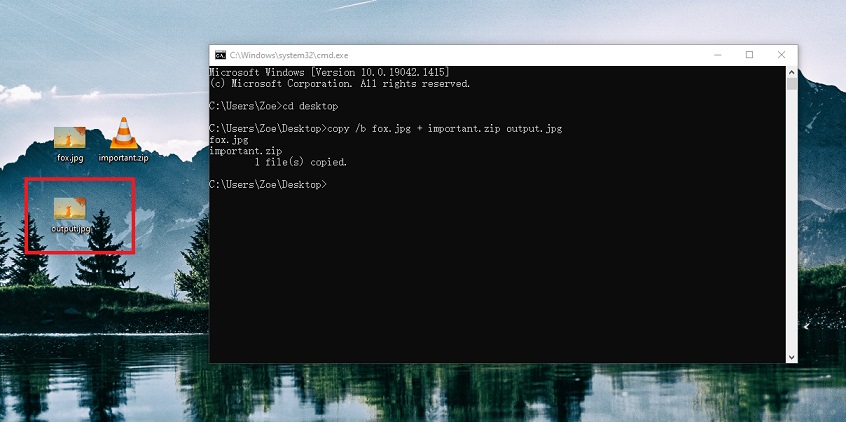
Step 6. Then type the following command and press the Enter key:
copy /b imagename.jpg + archivefilename.zip outputimagename.jpg
If your image file is in PNG format, just change the “.jpg” to “.png”.
If your archive file format is RAR, you need to change the file extension “.zip” to “.rar”.
Step 7. Now, you successfully hid your files in a picture.
Method 2. Using Text Document
Another method to hide images in image is using Text Document.
Here’s a step-by-step guide on how to hide files in a picture.
Step 1. First, create a new folder and move the needed files to this folder.
Step 2. Select these files and right-click on them. From the popup window, choose Add to “xxx.rar”. Or select the compressor and choose Add to “xxx.zip”.
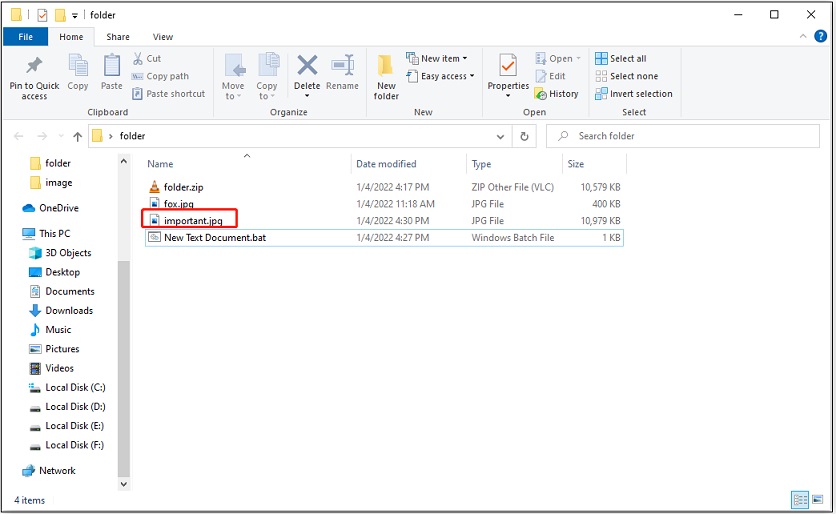
Step 3. Create a new folder. Then drag and drop the zip file and a picture into this folder.
Step 4. Right-click on the blank area and select New > Text Document.
Step 5. Open the text document and enter:
copy imagename.jpg/b+archivefilename.zip=outputfilename.jpg
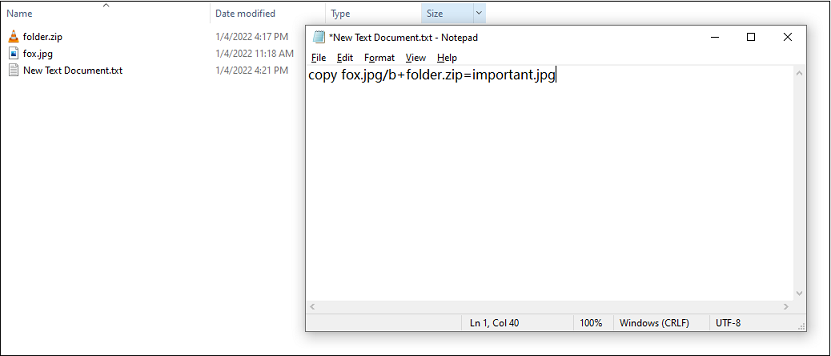
Step 6. Close the window and save the document. Then change the text document file extension to “.bat”.
Related article: How to Show File Extensions in Windows 10?
Step 7. Double-click the .bat file and you will get an image file that contains your files.
How to Extract Hidden Files from PNG or JPG
After embedding files in a picture, you may want to know how to extract hidden files from PNG or JPG.
Here’s how:
Step 1. Find the output image file and right-click on it. Choose rename and change its file extension to “.zip”. Click Yes to confirm the operation.
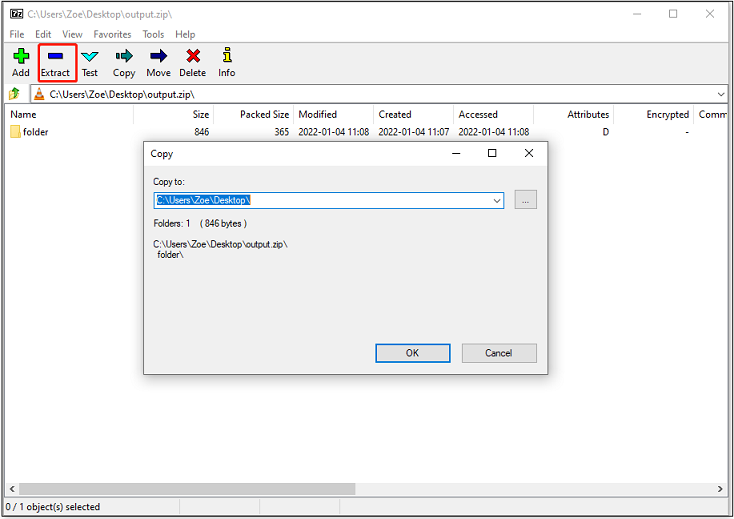
Step 2. To unhide the files, open the archive file with your compressor or WinRAR.
Step 3. Click Extract and click the three dots to choose a new save path. Then click OK to extract hidden files from a picture.
Conclusion
Choose the method you like to hide your files in an image to protect your privacy!


User Comments :